How to Make Perfect Blackberry Jam (Homemade) – A Foolproof Guide
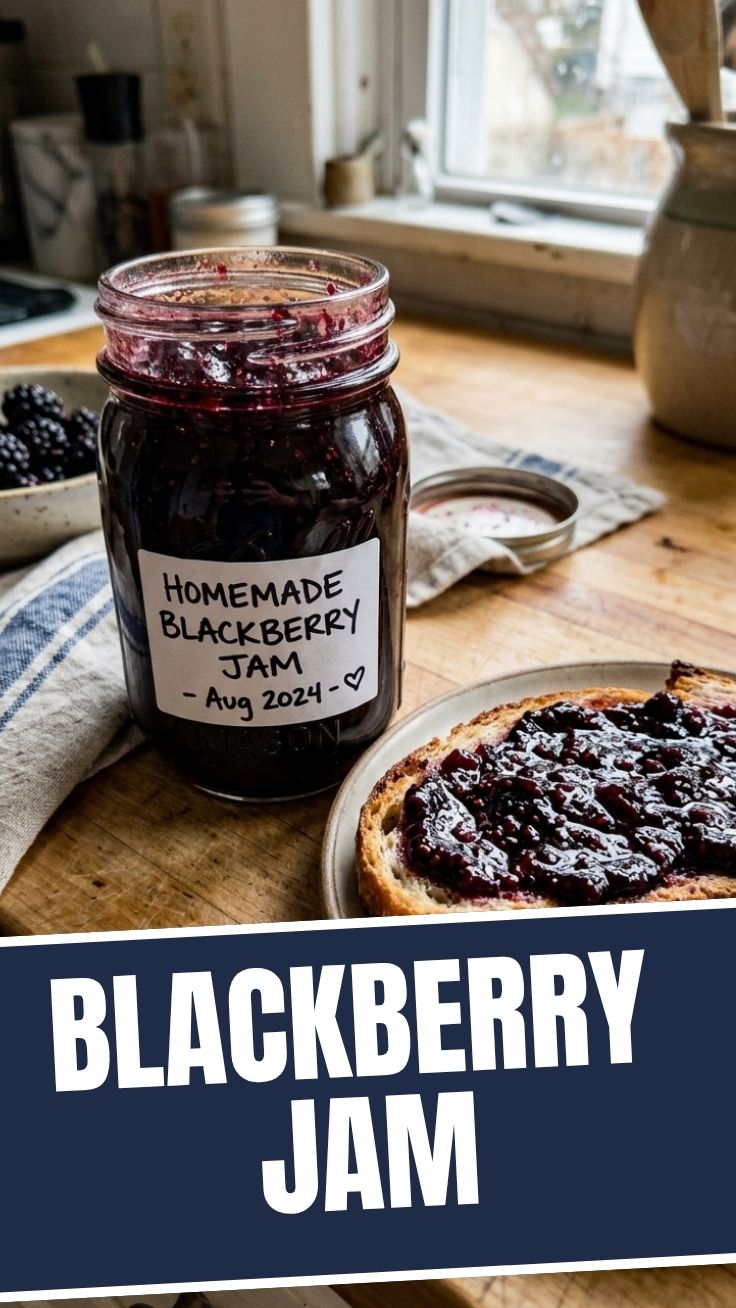
Have you ever tasted a spoonful of summer so vibrant that it instantly transports you to sun-warmed berry patches on a lazy July morning? That’s exactly what happens when you crack open a jar of your own Blackberry Jam (Homemade). While store-bought versions often rely on excessive sugar and pectin, making your own batch allows you to control sweetness, texture, and purity of flavor.
When you create a Blackberry preserves recipe at home, you’re not just preserving fruit—you’re preserving a sensory memory. The deep purple color, the balance of tart and sweet, and the absence of artificial additives make this effort truly worthwhile. Below, I’ll walk you through every detail so you can replicate that magic consistently.
Ingredients & Kitchen Tools
Ingredients
- 4 cups fresh blackberries (or frozen, thawed) – Choose ripe, aromatic berries for deepest flavor.
- 2 cups granulated sugar – Balances acidity; you can reduce to 1½ cups if berries are naturally sweet.
- 2 tablespoons fresh lemon juice – Adds brightness and helps pectin set. Bottled works, but fresh is better.
- 1 package (1.75 oz) powdered pectin – Optional if berries are naturally high in pectin (underripe berries have more).
- ¼ teaspoon unsalted butter – Reduces foaming during cooking (optional but helpful).
Kitchen Tools
- Large heavy-bottomed pot or Dutch oven – Prevents scorching.
- Wooden spoon or silicone spatula – Ideal for stirring without scratching.
- Canning jars with lids (4 half-pints) – Sterilized and kept hot.
- Canning funnel and jar lifter – For safe, mess-free filling.
- Instant-read thermometer or candy thermometer – Ensures precise setting point (220°F at sea level).
- Small plate in the freezer – For the wrinkle test to check gel stage.
Prep Time & Cooking Schedule
- Prep time: 15–20 minutes (washing, crushing berries, sterilizing jars)
- Cook time: 20–30 minutes active cooking
- Resting/setting time: 12–24 hours (jars should sit undisturbed after sealing)
Total active time: About 40–50 minutes.
Planning note: Start in the morning so your jam can set completely by the next day. The berries need to be washed, sorted, and macerated with sugar for 10 minutes before heating—this releases natural juices and improves flavor.
Step-by-Step Instructions
- Prepare the berries: Rinse 4 cups of blackberries under cold water and remove any stems or spoiled fruit. Place them in your pot and mash gently with a potato masher until you have a chunky purée (about 80% crushed, 20% whole).
- Macerate: Stir in 2 cups of sugar and 2 tablespoons lemon juice. Let sit for 10–15 minutes so the sugar draws out moisture. This step is vital for texture in your Blackberry Jam (Homemade).
- Heat and add pectin: Turn heat to medium-high and bring mixture to a rolling boil. If using powdered pectin, whisk it in slowly once the berries start bubbling. Add butter now to reduce foam.
- Achieve the gel stage: Cook at a steady, vigorous boil for 15–20 minutes, stirring frequently. Your target is 220°F (105°C) on a candy thermometer. To double-check, place a small dollop of jam on your frozen plate, return to the freezer for 30 seconds, then push it with your finger—if it wrinkles and doesn’t flood back, it’s ready.
- Skim and fill: Remove from heat and skim off any foam. Ladle hot jam into sterilized jars, leaving ¼-inch headspace. Wipe rims, apply lids, and process in a boiling water bath for 10 minutes (adjust for altitude).
- Cool and set: Let jars cool completely on a towel-lined counter. You’ll hear the satisfying “pop” of seals forming. Do not disturb for 12–24 hours. For a variation, you might also love this Blackberry preserves recipe that uses whole berries for a chunkier texture.
Texture cues: The jam should coat the back of a spoon heavily. If it looks too runny off the heat, cook another 2–3 minutes. Temperature tip: Cook longer for a thicker spread—but don’t exceed 225°F or the natural fruit flavor will caramelize and darken.
Nutritional Benefits & Advantages
Blackberries are nutritional powerhouses. One tablespoon of this homemade jam delivers about 25 calories (less than commercial versions because you control sugar), with no high-fructose corn syrup or preservatives. Berries are rich in:
- Vitamin C – Supports immune function and collagen production.
- Dietary fiber – Each serving contains around 1g from the seeds and pulp.
- Anthocyanins – Antioxidant compounds that give berries their dark color and help reduce inflammation.
- Manganese – Essential for bone health and metabolism.
Because you use whole fruit and minimal additives, this jam retains more of these beneficial compounds than processed alternatives.
Tips Variations & Cooking Advice
- Flavor variations: Add 1 teaspoon vanilla bean paste or a sprig of fresh rosemary in the last 5 minutes of cooking (remove before jarring).
- Sugar alternative: Use honey or maple syrup, but reduce the amount to 1½ cups and increase pectin by 50%, as liquid sweeteners require more gelling agent.
- Lower-sugar version: Substitute half the sugar with a sugar-free pectin such as Pomona’s, which requires calcium water for activation.
- Berry blend: Mix blackberries with raspberries or blueberries for a more complex flavor profile.
- No-pectin method: Cook longer (35–45 minutes) and rely on the natural pectin in underripe berries. Add a few slightly green blackberries to boost pectin content.
- Dietary adaptation: This recipe is naturally gluten-free and dairy-free if you skip the butter or use a vegan alternative (coconut oil works).
Common Mistakes to Avoid
- Skipping the maceration step: Dry sugar on berries can burn before the fruit releases juice. Always let them sit together for at least 10 minutes.
- Undercooking: Jam that doesn’t reach 220°F will remain syrupy. Use a thermometer and the cold plate test every 3 minutes after the 15-minute mark.
- Overcooking: Jam that hits 225°F+ can become stiff and sticky, and the color will turn from bright ruby to muddy brown. Remove from heat immediately at 222°F.
- Ignoring headspace: Leaving too much or too little air (less than ¼ inch) can cause seal failure. Use a headspace tool or a ruler.
- Jars not sterilized properly: Even one speck of bacteria can spoil your batch. Always boil jars for 10 minutes before filling.
Storage & Meal Prep Tips
- Refrigeration: Once opened, store jam in the fridge for up to 3 weeks. Keep the lid tightly sealed to prevent crystallization.
- Freezing: Unopened, sealed jars can be frozen for up to 12 months. Leave 1-inch headspace to allow for expansion. Thaw in the refrigerator overnight before using.
- Unopened shelf life: Properly processed jars stored in a cool, dark pantry will remain safe for 12–18 months. Check seals before use—if the lid doesn’t pop when pressed, refrigerate immediately.
- Reheating gently: If jam crystallizes or separates, gently warm it in a saucepan over low heat, stirring until smooth. Do not microwave (it can create hot spots and alter texture).
Conclusion
Mastering a true Blackberry Jam (Homemade) is one of the most rewarding kitchen skills you can develop. Not only do you control every ingredient, but you also create a jar of nostalgia that brightens toast, scones, yogurt, and even savory glazes. If you prefer chunkier fruit, experiment with our Blackberry preserves recipe for a different texture. I encourage you to try this recipe this weekend—your future self (and your breakfast) will thank you. Share your results or tag us if you discover a favorite variation!
FAQs
1. Can I use frozen blackberries instead of fresh?
Absolutely. Thaw them completely and drain excess liquid (reserve it for smoothies). Frozen berries are often picked at peak ripeness, so flavor can be excellent. Just expect slightly longer cooking time to evaporate the extra moisture.
2. Why didn’t my jam set properly?
Most common causes: insufficient cooking (didn’t reach 220°F), not enough pectin (underripe berries are needed if skipping pectin), or too much sugar which can inhibit gelling. Re-cook the failed batch with 2 tablespoons of lemon juice and an extra teaspoon of pectin.
3. Can I reduce the sugar without ruining the texture?
Yes, but you must use a low-sugar pectin (like Pomona’s) or cook longer to concentrate natural pectin. Plain sugar reduction without adjustments leads to runny, shelf-unstable jam.
4. How do I seedless blackberry jam?
After crushing and heating the berries for 5 minutes, press the mixture through a fine-mesh sieve or food mill. Discard the seeds and pulp before continuing with the recipe. Expect to lose about ¼ of the volume.
5. My jam tasted bitter—what went wrong?
Bitterness usually stems from over-cooked seeds (they release tannins) or using overripe/fermented berries. To fix a finished batch, stir in a pinch of salt and 1–2 tablespoons of honey or apple juice to mask bitterness. Next time, remove any bruised fruit and don’t crush seeds too vigorously.
Quick way to grow Blackberry Jam (Homemade)
Ingredients
Equipment
Method
- Wash and sort the blackberries, discarding any unripe or damaged ones. Transfer them to a large pot.
- Add sugar and lemon juice to the pot with the blackberries. Stir well to combine.
- Cook over medium-high heat, stirring frequently, until the mixture boils.
- Reduce heat and simmer, stirring occasionally, until the jam thickens and reaches desired consistency.
- Carefully ladle the hot jam into sterilized jars, leaving about 1/4 inch headspace.
- Seal the jars and process them in a boiling water bath for 10 minutes to ensure proper sealing.