Here is a comprehensive, SEO-optimized, and engaging blog post about homemade Hummus, designed to meet all your specifications.
—
Title: The Ultimate Guide to Creamy Homemade Hummus: A Foolproof Recipe
Introduction
Have you ever opened a store-bought tub of hummus only to find it bland, pasty, or overwhelmingly acidic? The truth is, the vibrant, silky-smooth dip you crave is not a secret held by Mediterranean restaurants; it’s a simple, rewarding art you can master in your own kitchen. Making your own Hummus from scratch is not only more economical but also allows you to control the quality of ingredients, adjust the flavor profile to your exact liking, and avoid unnecessary preservatives. Whether you are a seasoned cook or a beginner, this guide will walk you through the techniques that transform basic chickpeas into a luxurious culinary experience. Within the next few minutes, you will learn the one secret to a silky texture that most recipes overlook. Let’s dive into mastering this classic Hummus recipe that will become a staple in your weekly meal prep.
Ingredients & Kitchen Tools
Ingredients:
– 1 can (15 oz) of chickpeas (garbanzo beans): The heart of the dish. Look for “no salt added” to control sodium. Pro-tip: Save the liquid (aquafaba) for vegan baking or discard it.
– ¼ cup fresh lemon juice (about 1 large lemon): Essential for brightness. Bottled juice lacks the zesty complexity.
– ¼ cup well-stirred tahini: A sesame seed paste. Good tahini is runny, not thick and bitter. Stir vigorously before measuring.
– 1 small garlic clove (or ½ roasted garlic): Raw garlic adds a sharp bite. For a milder result, blanch the clove in boiling water for 30 seconds.
– 2-3 tablespoons ice-cold water: The secret to fluffiness.
– 3 tablespoons extra virgin olive oil (plus more for serving): Use a fruity, high-quality oil for the best flavor.
– ½ teaspoon ground cumin (optional): Adds earthy warmth.
– Salt to taste (start with ½ teaspoon).
Kitchen Tools:
– High-speed blender or food processor: A blender yields the smoothest hummus. A processor works but may require more scraping.
– Rubber spatula: For scraping down the sides.
– Fine-mesh strainer: For rinsing and, optionally, peeling the chickpeas.
– Measuring cups and spoons.
– Bowl for serving.
Optional Substitutions:
– Dairy-Free: This recipe is naturally vegan.
– Low-Fat: Reduce olive oil by 1 tablespoon.
– No Tahini: Use ¼ cup of Greek yogurt or silken tofu, though the flavor will shift dramatically.
Prep Time & Cooking Schedule
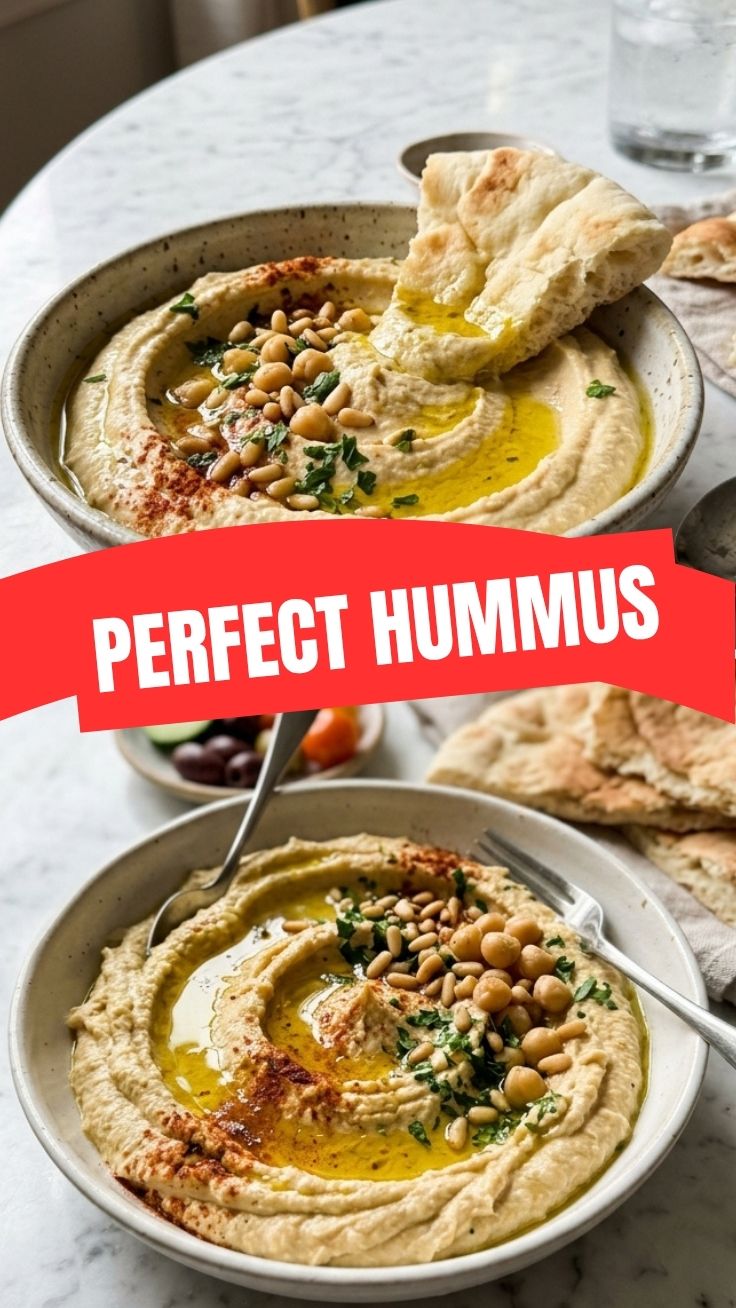
– Prep Time: 10 minutes
– Active Cooking Time: 5 minutes (for the optional garlic)
– Resting Time: 15 minutes (highly recommended to let flavors meld)
– Total Time: 30 minutes
Planning Tip: Hummus tastes significantly better after resting for at least 30 minutes at room temperature. If you have the time, make it a few hours ahead or the night before to allow the garlic and lemon to mellow and harmonize with the legumes.
Step-by-Step Instructions
1. Prepare the Chickpeas: Open the can, drain the chickpeas in a fine-mesh strainer, and rinse them thoroughly under cold water.
– The “Peel” Move: For ultra-creamy hummus, remove the skins from the chickpeas by gently squeezing them between your thumb and forefinger. This step is optional but eliminates the grainy texture caused by the hulls. Tip: This is the secret to professional-quality dips.
2. Process the Tahini & Lemon: In your food processor or blender, combine the tahini and fresh lemon juice. Process for 60 seconds until the mixture turns thick, pale, and creamy. Scrape down the sides. This “whipping” step is crucial to prevent the hummus from tasting bitter and to build a light base.
3. Add Garlic & Spice: Add the peeled garlic clove, cumin (if using), and salt. Process for another 30 seconds.
4. Blend the Chickpeas: Add the drained (and peeled) chickpeas to the processor. Turn it on and let it run for 1 minute. Stop to scrape the bowl again.
5. Emulsify with Water & Oil: With the processor running, slowly drizzle in the ice-cold water. The water aerates the mixture, making it cloud-light. Then, while running, slowly pour in the olive oil in a steady stream. Let the machine run for 2-3 full minutes. The hummus should look smooth, glossy, and taste like a creamy, balanced blend of sesame, lemon, and legumes.
6. Taste & Adjust: This is the most important step. Is it tangy enough? Add more lemon. Is it too earthy? Add a pinch more salt. Is it too thick? Add another tablespoon of ice water. The ideal consistency is “spoonable but not runny.” You have now perfectly executed a classic Hummus and a dependable Hummus recipe.
Nutritional Benefits & Advantages
Hummus is a nutritional powerhouse. As a legume-based dip, it is naturally:
– High in Plant-Based Protein: Chickpeas provide about 4-5 grams of protein per serving, helping with satiety.
– Rich in Fiber: Supports digestive health and stable blood sugar levels.
– Loaded with Healthy Fats: Tahini and olive oil offer monounsaturated fats that are heart-healthy and aid in the absorption of fat-soluble vitamins (A, D, E, K).
– Packed with Minerals: It contains iron, magnesium, and folate.
This dish is also naturally vegan, gluten-free, and dairy-free, making it a versatile, inclusive addition to any diet.
Tips Variations & Cooking Advice
– Flavor Variations:
– Roasted Red Pepper: Blend in ½ cup of roasted red peppers.
– Spicy Harissa: Add 1 tablespoon of harissa paste during Step 4.
– Herby: Fold in finely chopped fresh parsley, dill, or cilantro before serving.
– Texture Adjustments: For a thicker dip (for spreading on sandwiches), reduce the water by one tablespoon. For a soupier dip (for drizzling), increase the water.
– Cooking the Chickpeas from Scratch: Soak 1 cup of dry chickpeas overnight, boil for 1 hour until tender, and reserve the cooking liquid (which is starchier than water) for an even creamier texture.
– Dietary Adaptation: It is already gluten-free and dairy-free. For a low-FODMAP version, use a dash of garlic-infused oil instead of the raw clove.
Common Mistakes to Avoid
– Mistake: Bland Paste (Not Cream).
– Fix: You are not processing it long enough. Hummus requires 2-3 minutes after the liquids are added to emulsify properly.
– Mistake: Bitter Taste.
– Fix: This is usually from low-quality, un-stirred tahini. Always stir your tahini well before measuring—the solids sink to the bottom.
– Mistake: Lumpy or Gritty Texture.
– Fix: You skipped the chickpea skin removal and the initial tahini-lemon whipping step. Use a high-speed blender for the smoothest result.
– Mistake: Too Much Garlic.
– Fix: Raw garlic’s strength increases with time. Start with a small clove and add more after tasting. Roasted garlic provides sweetness without harshness.
Storage & Meal Prep Tips
– Refrigeration: Store hummus in an airtight container with a thin layer of olive oil poured on top to create a seal (this prevents it from drying out and turning brown). It will stay fresh for 5-7 days.
– Freezing: Hummus freezes surprisingly well. Place it in a freezer-safe bag or container, removing as much air as possible. It can be frozen for up to 3 months. Thaw overnight in the fridge. It may need a vigorous stir or a quick re-blend with a tablespoon of water to restore its creamy texture.
– Reheating: Hummus is best served at room temperature or slightly warm. If serving cold, spoon it into a bowl and let it sit out for 15 minutes. Do not microwave it directly as it can become thin and grainy.
Conclusion
Mastering this fundamental dish is a game-changer for your cooking repertoire. By focusing on the temperature of the water, the quality of the tahini, and the duration of blending, you can create a dip that rivals anything you can buy. We encourage you to taste, adjust, and make this recipe your own. This is not just another recipe; it is a vessel for creativity. Once you experience the difference of homemade Hummus and have perfected this specific Hummus recipe, you’ll never go back to the store-bought tubs. Try it tonight and share your beautiful bowls with us in the comments below!
FAQs
1. Can I use canned chickpeas without peeling them?
Yes. While peeling yields the absolute smoothest hummus, you can achieve a very creamy result simply by processing the beans for 3-4 minutes. The texture will be slightly thicker but still delicious.
2. My hummus is too thick. How do I fix it?
With the blender or processor running, add one tablespoon of ice-cold water at a time. The cold water helps re-emulsify the mixture and creates a lighter texture. A splash of extra lemon juice also works.
3. How can I make it less acidic?
The acidity usually comes from the lemon or the tahini. Balance the flavor by adding a pinch of baking soda (which chemically counteracts acidity) or a tiny amount of honey or maple syrup. You can also use less lemon juice next time.
4. Why is my homemade hummus bitter?
This is almost certainly a tahini issue. Old, stale, or un-stirred tahini (where the solids had settled) will taste bitter. Always use fresh tahini and stir it thoroughly before measuring.
5. Can I make this without a food processor?
Yes, but it requires effort. Use a mortar and pestle or a sturdy whisk. You will need to mash the chickpeas thoroughly first, then vigorously whisk in the other ingredients. The texture will be chunkier but still excellent.
How to Grow Hummus with 3 Tips
Ingredients
Equipment
Method
- Prepare your hummus patch by filling a bowl with hummus-friendly soil or, for a more immediate result, a bowl of store-bought hummus.
- Gently plant your imaginary hummus seeds in the prepared medium, then water sparingly with filtered water to encourage growth.
- For optimal hummus "growth," provide plenty of sunshine and positive affirmations; harvest when your hummus reaches peak imaginary deliciousness.