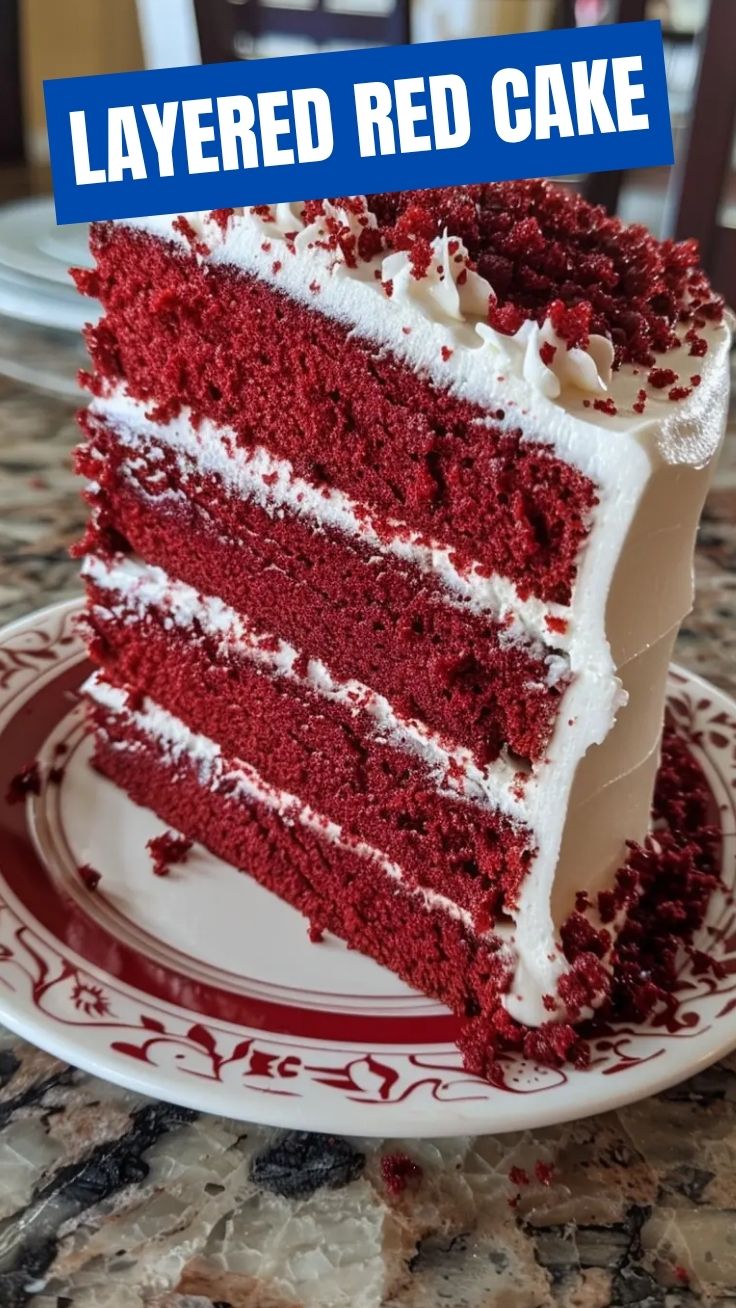
Celebrate Freedom with a Slice of Deliciousness: Your Ultimate Guide to Juneteenth Red Velvet Cake
Ever wondered how to bring a truly special dessert to your next gathering, one that’s steeped in history and explodes with flavor? Look no further! This blog post is your definitive guide to crafting a show-stopping Juneteenth Red Velvet Cake, a perfect centerpiece for honoring freedom and community. Creating this iconic dessert from scratch isn’t just about baking; it’s about connecting with a rich heritage and presenting a dish that truly reflects joy and celebration. With its vibrant color and decadent taste, it’s an ideal way to elevate your Juneteenth celebration desserts and make lasting memories.
Ingredients & Kitchen Tools
Crafting the perfect Red Velvet Cake requires a few essential items. Here’s what you’ll need:
- All-Purpose Flour (2 ½ cups): The structural backbone of the cake. Sifting it ensures a lighter, fluffier texture.
- Granulated Sugar (1 ½ cups): Provides sweetness and contributes to the cake’s moist crumb.
- Unsweetened Cocoa Powder (2 tablespoons): Don’t skimp! This gives Red Velvet its characteristic subtle chocolate flavor and deepens the red hue.
- Baking Soda (1 teaspoon): The leavening agent that reacts with the buttermilk and vinegar for a beautiful rise.
- Salt (1 teaspoon): Balances the sweetness and enhances all the flavors.
- Vegetable Oil (1 cup): Keeps the cake incredibly moist. Can substitute with canola or grapeseed oil.
- Buttermilk (1 cup): Crucial for the cake’s tenderness and to activate the baking soda. If you don’t have buttermilk, add 1 tablespoon of white vinegar or lemon juice to regular milk and let it sit for 5 minutes.
- Large Eggs (2): Bind the ingredients together and add richness.
- Red Food Coloring (2 tablespoons liquid or 1-2 teaspoons gel): The signature vibrant color! Gel coloring provides a more intense hue with less liquid.
- White Vinegar (1 teaspoon): Reacts with the baking soda and buttermilk to achieve the perfect texture and color.
- Vanilla Extract (1 teaspoon): A classic flavor enhancer that complements the chocolate and boosts overall aroma.
- Cream Cheese (8 oz, softened): For the iconic tangy frosting. Ensure it’s at room temperature for a smooth consistency.
- Unsalted Butter (½ cup, softened): Adds richness and stability to the frosting. Use unsalted to control the salt content.
- Powdered Sugar (4 cups): Sweetens and thickens the frosting. Sift it to avoid lumps.
- Mixing Bowls (various sizes): For combining wet and dry ingredients.
- Electric Mixer (stand or hand-held): Essential for creaming butter and sugar, and for whipping the frosting to perfection.
- Measuring Cups & Spoons: Accuracy is key in baking.
- Rubber Spatula: For scraping bowls and folding ingredients gently.
- Round Cake Pans (two 9-inch pans or three 8-inch pans): Greased and floured, or lined with parchment paper, to prevent sticking.
- Wire Rack: For cooling the cakes completely.
- Offset Spatula or Knife: For spreading the frosting evenly.
Prep Time & Cooking Schedule
- Prep Time: 30 minutes
- Cook Time: 30-35 minutes
- Cooling Time (Cakes): 1-2 hours
- Chilling Time (Frosted Cake): At least 30 minutes (optional, but highly recommended for setting the frosting)
This schedule allows you to bake the cakes one day and frost them the next, or complete the entire process in an afternoon. Planning ahead for the cooling and chilling times is crucial for a beautifully structured and frosted cake. Ensuring your cakes are completely cool before frosting prevents melting and sliding.
Step-by-Step Instructions
1. Preheat & Prep Pans: Preheat oven to 350°F (175°C). Grease and flour two 9-inch round cake pans (or three 8-inch pans). You can also line the bottoms with parchment paper for extra insurance against sticking.
2. Combine Dry Ingredients: In a large bowl, whisk together the all-purpose flour, granulated sugar, unsweetened cocoa powder, baking soda, and salt. Make sure there are no lumps.
3. Mix Wet Ingredients: In a separate medium bowl, whisk together the vegetable oil, buttermilk, eggs, red food coloring, white vinegar, and vanilla extract until well combined and the color is even.
4. Combine Wet & Dry: Gradually add the wet ingredients to the dry ingredients, mixing on low speed with an electric mixer until just combined. Be careful not to overmix, as this can lead to a tough cake. Scrape down the sides of the bowl as needed. The batter should be vibrant and smooth.
5. Bake: Divide the batter evenly between the prepared cake pans. Bake for 30-35 minutes, or until a wooden skewer inserted into the center comes out clean.
6. Cool: Let the cakes cool in the pans for 10-15 minutes before inverting them onto a wire rack to cool completely. This step is critical; frosting a warm cake will result in a sticky, messy situation.
7. Make Cream Cheese Frosting: In a large bowl, using an electric mixer, beat the softened cream cheese and unsalted butter until smooth and creamy, about 2-3 minutes.
8. Add Powdered Sugar & Vanilla: Gradually add the powdered sugar, one cup at a time, beating on low speed until incorporated, then increase speed to medium and beat until light and fluffy. Add the vanilla extract and mix until just combined.
9. Assemble & Frost: Once the cakes are completely cool, level them with a serrated knife if needed. Place one cake layer on your serving plate or cake stand. Spread a generous layer of cream cheese frosting over the top. Repeat with the second layer. Frost the top and sides of the entire cake evenly. Don’t forget to admire your stunning Juneteenth Red Velvet Cake, a true work of art among Juneteenth celebration desserts!
10. Chill (Optional): For best results and clean slicing, chill the cake for at least 30 minutes in the refrigerator to allow the frosting to set.
Nutritional Benefits & Advantages
While a truly celebratory dessert, Red Velvet Cake does offer some interesting elements. The cocoa powder, even in small amounts, provides antioxidants. Buttermilk adds beneficial probiotics for gut health, and eggs contribute protein and essential vitamins. This isn’t a health food, but enjoying a homemade treat allows you to control ingredient quality, such as using real butter and natural food coloring options, avoiding many artificial additives found in store-bought versions.
Tips, Variations & Cooking Advice
- Natural Color: For natural red, try beetroot powder (start with 1-2 tablespoons) or pureed cooked beets (about ¼ cup). Note that natural colors may result in a more subdued, earthy red.
- Flavor Boost: Add a touch of espresso powder (½ teaspoon) to the dry ingredients to subtly enhance the chocolate flavor without making it taste like coffee.
- Dairy-Free: Substitute buttermilk with dairy-free milk (like almond or soy) mixed with vinegar. Use dairy-free butter and cream cheese alternatives for the frosting.
- Presentation: Garnish with fresh berries (raspberries or strawberries), chocolate shavings, or even a sprinkle of toasted coconut for extra flair.
- Cupcakes: This recipe can easily be adapted for cupcakes. Bake for 18-22 minutes.
Common Mistakes to Avoid
- Overmixing the Batter: This develops gluten excessively, leading to a tough, dense cake. Mix until just combined.
- Not Greasing/Flouring Pans Properly: Leads to stuck cakes. Be thorough, or use parchment paper.
- Frosting a Warm Cake: The frosting will melt and slide off, making a mess. Patience is key!
- Using Cold Cream Cheese/Butter for Frosting: Results in lumpy frosting. Ensure both are at room temperature.
- Under-baking: A raw center is disappointing. Always test with a skewer.
Storage & Meal Prep Tips
Store leftover Juneteenth Red Velvet Cake in an airtight container in the refrigerator for up to 3-4 days. The cream cheese frosting requires refrigeration. You can also freeze individual unfrosted cake layers wrapped tightly in plastic wrap and then foil for up to 2 months. Thaw in the refrigerator overnight before frosting. Frosted slices can also be frozen for shorter periods, but the frosting texture may change slightly upon thawing.
Conclusion
This homemade Juneteenth Red Velvet Cake isn’t merely a dessert; it’s a vibrant celebration, a labor of love, and a delicious way to honor history. Its rich, moist crumb and tangy cream cheese frosting make it an unforgettable treat, perfectly suited for your Juneteenth celebration desserts. We encourage you to try this recipe, embrace the joy of baking, and share your masterpiece with loved ones. What an incredibly delicious way to make lasting memories!
FAQs
1. Can I make the cake ahead of time?
Yes, you can bake the cake layers up to 2 days in advance, wrap them tightly, and store them at room temperature or in the refrigerator. Frost the day you plan to serve.
2. Why did my cake turn brown instead of red?
This often happens if you don’t use enough red food coloring, or if your cocoa powder is too dark or too much is used. Gel food coloring provides a more intense red.
3. My cream cheese frosting is too runny. What went wrong?
This is usually because the butter or cream cheese was too soft (melted) or you added too much liquid. You can try adding more sifted powdered sugar, or chilling the frosting in the refrigerator for 15-30 minutes to firm it up.
4. Are there any non-traditional frosting options?
While cream cheese frosting is classic, you could use a simple vanilla buttercream or even a marshmallow-based meringue frosting for a different texture.
5. How can I make this cake gluten-free?
Substitute the all-purpose flour with a high-quality gluten-free all-purpose flour blend (one that contains xanthan gum). Follow the rest of the recipe as directed.
Proven way to grow Juneteenth Red Velvet Cake in 5
Ingredients
Equipment
Method
- First, locate a fertile patch of imagination in your mind. This is where your Red Velvet Cake will begin its miraculous "growth" journey.
- Next, carefully plant the idea of a fully-formed Juneteenth Red Velvet Cake. Ensure it's a vivid mental image, complete with frosting and celebratory decorations.
- Now, sprinkle generously with baking magic and a pinch of minimal effort. Remember, this is about "growing," not traditional baking.
- Stand back and observe. In exactly 5 minutes, your imaginary Juneteenth Red Velvet Cake will have "grown" to perfection, ready to be enjoyed in your mind's eye.