Why This Homemade Orange Chicken Will Change Your Takeout Game Forever
Have you ever wondered why restaurant-style Orange Chicken tastes so addictive, yet feels impossible to replicate at home? The secret isn’t a special wok or a secret ingredient—it’s a matter of technique, timing, and understanding how flavor layers build. Preparing this citrusy, crispy classic in your own kitchen isn’t just about saving money; it’s about gaining control over sodium levels, oil quality, and achieving that perfect glossy glaze without the mystery additives. Whether you’re a fan of sweet-tangy profiles or you prefer the bolder heat of General Tso Chicken, mastering this recipe gives you a versatile foundation for Chinese-American favorites. Preparing Orange Chicken at home transforms a takeout indulgence into a weekly meal prep win.
Ingredients & Kitchen Tools
For the Chicken & Coating:
– Boneless skinless chicken thighs (1.5 lbs) – juicier than breasts; stay tender after frying
– Cornstarch (1 cup) – creates the signature shatteringly crisp crust
– All-purpose flour (¼ cup) – adds structure to the coating
– Eggs (2 large) – binding agent for the dry mix
– Salt and white pepper (1 tsp each) – white pepper adds authentic flavor without black specks
– Vegetable oil (for frying) – use peanut or avocado oil for high smoke point
For the Orange Sauce:
– Fresh orange juice (½ cup) – bottled won’t give the same bright acidity
– Orange zest (2 tbsp) – this is where the essential oils live
– Soy sauce (3 tbsp) – low-sodium preferred for salt control
– Rice vinegar (2 tbsp) – milder than distilled; balances sweetness
– Brown sugar (⅓ cup) – deep caramel notes that white sugar lacks
– Garlic (3 cloves, minced) and fresh ginger (1 tbsp, grated) – aromatics are non-negotiable
– Chicken broth (¼ cup) – thins sauce without dulling flavor
– Cornstarch slurry (2 tbsp cornstarch + 2 tbsp water) – thickens to glossy perfection
Kitchen Tools:
– Heavy-bottomed wok or Dutch oven – retains heat for consistent frying
– Candy or deep-fry thermometer – prevents soggy or burnt coating
– Microplane or fine grater – for zest without bitter pith
– Wire rack over baking sheet – keeps fried chicken crispy while sauce finishes
– Whisk and rubber spatula – for lump-free sauce and gentle tossing
Optional Substitutions:
– Gluten-free: Replace soy sauce with tamari and flour with rice flour
– Lower sugar: Use monk fruit sweetener or reduce brown sugar to ¼ cup
– Extra heat: Add 1 tsp chili flakes or sriracha to the sauce
Prep Time & Cooking Schedule
– Prep Time: 20 minutes (zest, juice, chop, mix)
– Marinating Time: 15 minutes (optional but recommended for deeper flavor)
– Cooking Time: 25 minutes (fry in batches + sauce assembly)
– Total Time: 1 hour (including resting and cooling)
Planning Tip: The sauce can be made up to 3 days ahead and stored in the fridge. If you’re short on time, skip the marinade—just pat the chicken dry before coating. The key is to fry the chicken while the sauce is still hot so the coating stays crisp. Prepare all ingredients before you start cooking; this dish moves fast once the oil is hot.
Step-by-Step Instructions
1. Prepare the Chicken: Cut thighs into 1-inch bite-sized pieces. In a bowl, whisk eggs with 1 tbsp water. In a separate shallow dish, combine cornstarch, flour, salt, and white pepper. Dip each piece first in egg mixture, then coat thoroughly in the dry mix. Shake off excess—a thick, even coating is essential for that signature crunch.
2. Heat the Oil: Pour oil to a depth of 2 inches in your wok or Dutch oven. Heat to 350°F (175°C). Use a thermometer—guessing leads to greasy or burnt results. Line a wire rack over a baking sheet nearby.
3. Fry in Batches: Add chicken pieces in a single layer, never crowding the pan. Fry for 4–5 minutes until golden brown and cooked through (internal temp 165°F). Transfer to the wire rack. Let the oil return to 350°F between batches. This ensures each piece stays crispy, not soggy.
4. Make the Sauce: While the last batch fries, combine orange juice, zest, soy sauce, vinegar, brown sugar, garlic, ginger, and broth in a separate saucepan. Bring to a simmer over medium heat, whisking until sugar dissolves. Taste and adjust—add more vinegar for tang, more sugar for sweetness. Slowly whisk in the cornstarch slurry and cook for 1 minute until thickened and glossy. Remove from heat.
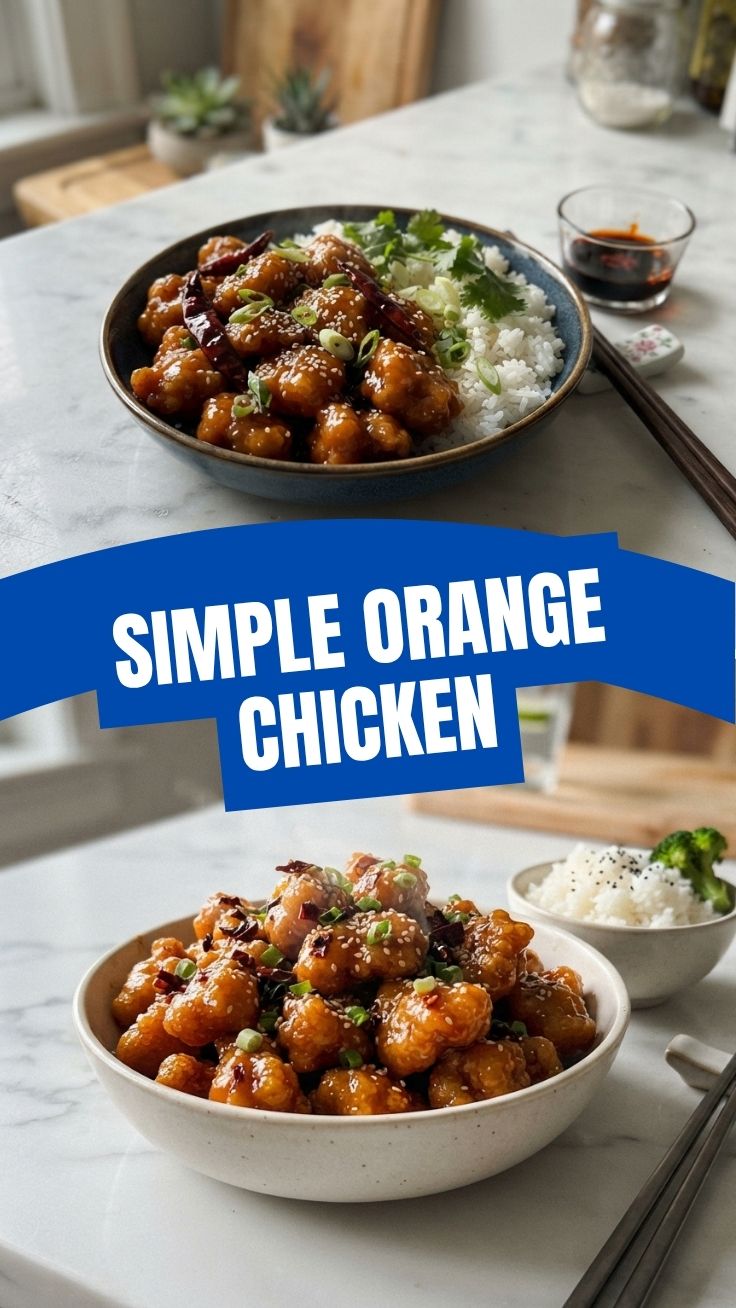
5. Toss and Serve: Place the fried chicken in a large bowl. Pour the hot sauce over the top and toss gently with a spatula until each piece is evenly coated. Serve immediately over steamed jasmine rice. Garnish with extra orange zest, sliced green onions, and sesame seeds.
Temperature Control Tip: If the sauce thickens too much before tossing, whisk in a splash of hot water. The sauce should coat the back of a spoon but still drip slowly. If you prefer a spicier profile, this is where you’d swap in General Tso Chicken techniques—add dried red chilies when sautéing the aromatics for that signature heat.
Nutritional Benefits & Advantages
This homemade version reduces sodium by up to 40% compared to restaurant servings, thanks to controlled soy sauce usage. Chicken thighs provide 25g of protein per serving, plus iron and B vitamins. Fresh orange juice and zest deliver vitamin C (35% DV) and immune-supporting flavonoids. The use of cornstarch instead of heavy batters lowers overall fat absorption during frying. When paired with brown rice and steamed broccoli, this becomes a balanced meal with fiber, protein, and antioxidants—far superior to the typical takeout box.
Tips, Variations & Cooking Advice
Flavor Twists:
– Spicy Orange: Add 2 tsp chili garlic sauce or 1 finely chopped Thai bird chili to the sauce
– Honey Orange: Replace brown sugar with ¼ cup honey for a floral sweetness
– Sesame Orange: Stir in 1 tbsp toasted sesame oil and sprinkle with black sesame seeds
Dietary Adaptations:
– Gluten-Free: Use tamari, rice vinegar, and arrowroot powder instead of cornstarch
– Dairy-Free: The recipe is naturally dairy-free; just check your soy sauce
– Air Fryer Version: Spray coated chicken with oil and air fry at 400°F for 10–12 minutes, flipping halfway. Toss with sauce immediately after cooking.
Cooking Method Swap: For a stir-fry adaptation, skip the deep-fry and pan-sear the coated chicken in 2 tbsp oil over medium-high heat until golden. The texture won’t be as crispy, but the flavor remains excellent.
Common Mistakes to Avoid
Mistake 1: Soggy Coating – This happens when chicken sits after frying. Solution: Keep the sauce separate until serving, and toss only the amount you’ll eat immediately. Store sauce and chicken separately for leftovers.
Mistake 2: Bitter Sauce – Overcooked garlic or burnt orange zest ruins the flavor. Solution: Add garlic and ginger only after the liquid is simmering, and zest the orange before juicing—avoid the white pith.
Mistake 3: Clumpy Sauce – A lumpy slurry leads to uneven thickening. Solution: Whisk the cornstarch and water together until completely smooth before adding to the hot liquid. Pour slowly while whisking continuously.
Mistake 4: Overcrowded Pan – Dropping too many pieces at once lowers oil temperature, creating greasy, breading-shedding chicken. Solution: Fry in small batches and allow oil to return to temperature between each.
Storage & Meal Prep Tips
Refrigeration: Store leftover chicken and sauce separately in airtight containers. Chicken stays crispy for 1 day; sauce keeps for up to 5 days. Combine only when reheating.
Freezing: Cooked chicken (without sauce) freezes well for up to 2 months. Place on a baking sheet in a single layer, freeze until solid, then transfer to a freezer bag. Sauce freezes separately for 3 months.
Reheating: For crispy texture, reheat chicken in an air fryer at 375°F for 5–6 minutes or in a 400°F oven on a wire rack for 8 minutes. Warm sauce on the stovetop, then toss together. Avoid microwaving—it will turn the coating rubbery.
Meal Prep Tip: Double the sauce batch and use half for stir-fried vegetables or as a glaze for salmon later in the week. Pre-cut and coat the chicken raw, then freeze the coated pieces on a tray. Fry directly from frozen, adding 2 extra minutes per batch.
Conclusion
Mastering Orange Chicken at home unlocks a world of flavorful, customizable meals that rival your favorite takeout spot. From the bright citrus notes to the satisfying crunch, this recipe proves that restaurant-quality Chinese-American food is absolutely achievable in your own kitchen. Whether you stick with the classic sweet-tangy profile or experiment with spicy variations inspired by General Tso Chicken, you now have the tools and techniques to create consistently delicious results. I encourage you to try this recipe this week—share your results in the comments below, and let me know which variation you’re most excited to explore. Your next homemade takeout night starts now.
Frequently Asked Questions
Can I use chicken breast instead of thighs?
Yes, but breast meat is leaner and can dry out faster. Cook for 3–4 minutes instead of 4–5, and check internal temperature at 165°F. Brining the breast in salted water for 20 minutes beforehand helps retain moisture.
Why did my orange sauce turn out too thin or too thick?
If too thin, you didn’t cook the slurry long enough or added too much liquid. Simmer for 1–2 more minutes. If too thick, whisk in hot water or broth 1 tablespoon at a time until it reaches a glossy, pourable consistency.
Can I make this without deep frying?
Absolutely. Use the air fryer method (400°F for 10–12 minutes) or pan-sear in 2 tbsp oil. The texture will be less crispy but still delicious. For a healthier version, bake at 425°F for 15 minutes, flipping halfway.
How do I prevent the coating from falling off during frying?
Ensure the chicken is thoroughly dried before coating, and press the cornstarch mixture firmly onto each piece. Let the coated chicken rest on a wire rack for 5 minutes before frying—this allows the coating to adhere better.
Can I substitute the brown sugar with a healthier alternative?
Yes. Coconut sugar, honey, or maple syrup work well. Keep in mind that liquid sweeteners will slightly thin the sauce, so reduce the broth by 2 tablespoons to compensate. Monk fruit or stevia blends can be used but may alter the caramelization.
Quick way to grow your Orange Chicken
Ingredients
Equipment
Method
- Cook the white rice according to package instructions.
- Steam the broccoli florets until tender-crisp.
- In a large pan or wok, add the cooked orange chicken and heat over medium heat.
- Stir in the cooked rice and steamed broccoli.
- Add soy sauce and sesame oil, then toss everything to combine and heat through.