The Ultimate Guide to Rich, Fudgy Homemade Brownies: Your Go-To Brownies Recipe
Have you ever opened a box of store-bought brownie mix and wondered why the homemade version never turns out as fudgy? The secret isn’t in a packet—it’s in the technique. Imagine sinking your teeth into a dense, crackly top brownie with a molten center that rivals your favorite bakery. That’s the magic of crafting Brownies from scratch. Preparing this classic dessert at home not only guarantees superior texture and flavor but also gives you complete control over ingredients, from the quality of cocoa to the sweetness level. Whether you’re a novice baker or a seasoned pro, mastering this one-bowl wonder saves money and impresses every time. Today, we’ll unlock the perfect science behind a foolproof batch of Brownies, and along the way, we’ll explore some Easy Brownie Recipes that fit any schedule.
Ingredients & Kitchen Tools
Required Ingredients
– Unsalted butter (1/2 cup, melted): Adds richness and prevents burning; use salted butter minus 1/4 tsp salt.
– Granulated sugar (1 cup): Creates the signature crackly top; you can reduce to 3/4 cup for less sweetness.
– Large eggs (2, room temperature): Provide structure; substitute flax eggs for vegan version.
– Vanilla extract (1 tsp): Elevates chocolate flavor; use vanilla bean paste for intensity.
– Cocoa powder (1/2 cup, Dutch-processed): Deep, dark flavor; natural cocoa works but yields a lighter result.
– All-purpose flour (1/2 cup): Creates tender crumb; swap with gluten-free 1:1 blend.
– Salt (1/4 tsp): Balances sweetness; sea salt flakes are ideal.
– Baking powder (1/4 tsp): Optional for slight lift; omit for denser brownies.
– Optional mix-ins: 1/2 cup chocolate chips, chopped nuts, or swirls of peanut butter.
Kitchen Tools
– 8×8-inch baking pan: Square pan ensures even thickness; line with parchment paper for easy lifting.
– Mixing bowls (medium and large): Glass or stainless steel for easy melting.
– Whisk or spatula: Silicone spatula helps fold without overmixing.
– Measuring cups and spoons: Accuracy is crucial for fudgy results.
– Cooling rack: Prevents soggy bottoms by allowing airflow.
Prep Time & Cooking Schedule
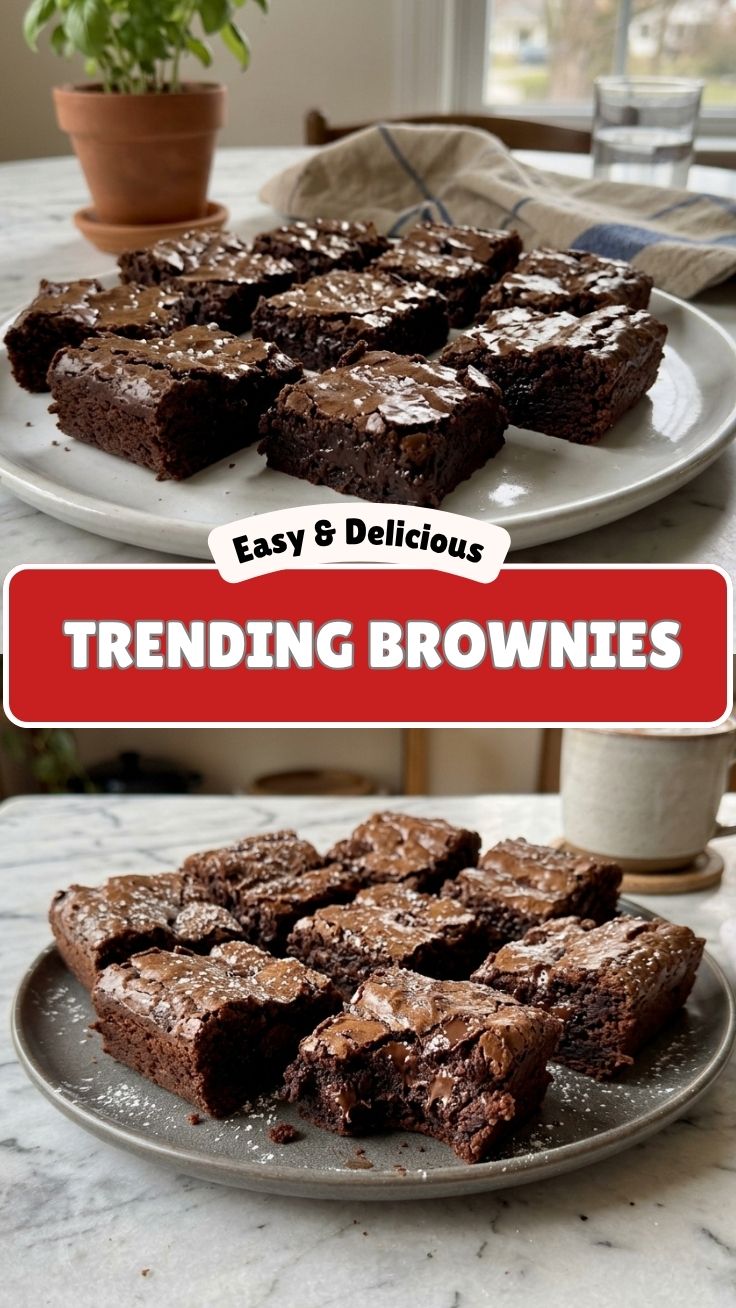
– Prep time: 10 minutes (active mixing)
– Bake time: 20–25 minutes at 350°F (175°C)
– Resting time: 30 minutes to 2 hours (essential for clean slicing)
– Total time: About 1 hour (including resting)
Context to help you plan: This recipe moves fast once you start. Preheat your oven after mixing the butter and sugar to save time. The brownies continue to cook from residual heat after removal, so pull them when a toothpick comes out with moist crumbs—not wet batter. If you’re prepping for a party, bake them a day ahead; they actually taste better after 24 hours as flavors meld. For Easy Brownie Recipes, you can skip the resting time if you’re in a rush, but refrigerating for 20 minutes helps them cut cleanly.
Step-by-Step Instructions
1. Preheat and prep: Preheat your oven to 350°F (175°C). Line your 8×8-inch pan with parchment paper, leaving overhang on two sides for easy lifting. This is a critical step—don’t skip it.
2. Melt the butter: In a medium microwave-safe bowl, melt 1/2 cup butter in 30-second bursts. If using stovetop, melt over low heat until just liquid. Temperature control: Let it cool slightly—if it’s piping hot, it can scramble the eggs later.
3. Mix sugar and butter: Add 1 cup granulated sugar to the melted butter. Whisk vigorously for 1–2 minutes until the mixture looks grainy and slightly thick. This step aerates the batter, creating that shiny top.
4. Add eggs and vanilla: Crack 2 eggs into the sugar-butter mixture one at a time, whisking after each addition until fully combined. Add 1 tsp vanilla extract. The mixture should be smooth and glossy. Texture cue: If it looks separated, your butter was too hot—let it sit for 2 minutes.
5. Sift dry ingredients: In a separate bowl, sift together 1/2 cup cocoa powder, 1/2 cup flour, 1/4 tsp salt, and 1/4 tsp baking powder. Sifting removes lumps and ensures even distribution.
6. Combine wet and dry: Gradually add dry ingredients to the wet mixture. Stir gently with a spatula until just combined—about 15 strokes. Overmixing develops gluten, resulting in cakey brownies. You want a thick, batter-like consistency.
7. Fold in mix-ins: Stir in 1/2 cup chocolate chips or nuts if desired. Fold until evenly distributed.
8. Bake: Pour batter into the prepared pan and spread evenly. Bake for 20–25 minutes. Doneness test: Insert a toothpick into the center—it should come out with moist crumbs, not wet batter. The edges will be set and slightly pulling away from the pan.
9. Cool completely: Place the pan on a cooling rack for at least 30 minutes. For best results, refrigerate for 1 hour before slicing. Use the parchment overhang to lift out the entire block.
10. Slice and serve: Use a sharp knife (wipe clean between cuts) for neat squares. Enjoy warm or at room temperature.
This careful approach ensures you master the classic Brownies technique, and it’s one of the most reliable Easy Brownie Recipes because it uses only one bowl and no electric mixer.
Nutritional Benefits & Advantages
While brownies are an indulgence, this homemade version offers several nutritional advantages over boxed mixes or bakery versions:
– Control over sugar: Boxed mixes often contain high-fructose corn syrup or extra sugars; you can reduce to 3/4 cup without compromising texture.
– High-quality cocoa: Dutch-processed cocoa is rich in flavonoids, which act as antioxidants. A 1-ounce serving provides about 10% of daily iron needs.
– Healthy fats: Butter provides vitamin A and butyrate, a short-chain fatty acid that supports gut health. You can also swap with coconut oil for medium-chain triglycerides.
– No preservatives: Homemade brownies lack emulsifiers and stabilizers found in commercial versions, making them easier to digest.
– Portion control: Baking at home means you decide serving sizes. Cut into 16 small squares for a guilt-free treat.
Tips Variations & Cooking Advice
Flavor Variations
– Espresso brownies: Add 1 tbsp instant espresso powder to the cocoa powder for a mocha boost.
– Peppermint: Fold in 1/2 tsp peppermint extract and top with crushed candy canes.
– Nutty: Replace 1/4 cup flour with almond flour for a gluten-free twist and extra moisture.
Ingredient Swaps
– Gluten-free: Use a 1:1 gluten-free flour blend (like King Arthur Measure for Measure) instead of all-purpose. Results are slightly denser but equally fudgy.
– Dairy-free: Replace butter with solid coconut oil (same amount) and use dairy-free chocolate chips.
– Low-sugar: Substitute 1/2 cup monk fruit sweetener for regular sugar; note that the texture becomes slightly cakier and the top may not crackle as much.
Alternative Cooking Methods
– Microwave mug brownie: Mix 2 tbsp butter, 2 tbsp sugar, 1 tbsp cocoa, 1 tbsp flour, and 1 egg yolk in a mug. Microwave for 45 seconds. Perfect for single servings.
– Air fryer: Use a small 5-inch pan and bake at 320°F (160°C) for 12 minutes. Watch carefully to prevent overbaking.
Portion Changes
– Muffin pan: Divide batter into a greased 12-cup muffin tin; bake for 14–16 minutes. Yields bite-sized brownies.
– Sheet pan: Double the recipe and bake in a 9×13-inch pan for 25 minutes. Perfect for a crowd.
Common Mistakes to Avoid
1. Overmixing the batter: This activates gluten, turning fudgy brownies into cake. Solution: Fold only until no flour streaks remain—about 15 gentle strokes.
2. Overbaking: The #1 cause of dry brownies. Solution: Pull them when a toothpick shows moist crumbs. They firm up as they cool.
3. Using cold eggs: Cold eggs seize the butter, making the batter lumpy. Solution: Let eggs sit at room temperature for 15 minutes before using.
4. Skipping the parchment lining: Scraping out stuck brownies ruins their shape. Solution: Line with parchment and leave overhang for easy removal.
5. Cutting while warm: The brownies crumble and stick to the knife. Solution: Cool completely, then refrigerate for 30 minutes before slicing with a sharp, wet knife.
Storage & Meal Prep Tips
Refrigeration
– Store in an airtight container at room temperature for up to 3 days. For longer shelf life, refrigerate for up to 7 days. Tip: Place a slice of bread in the container—it absorbs moisture to keep brownies soft.
Freezing
– Whole block: Wrap tightly in plastic wrap, then foil, and freeze for up to 3 months. Thawing: Leave at room temperature for 2 hours, then warm in a 300°F oven for 5 minutes to revive the crackly top.
– Individual squares: Freeze on a baking sheet for 1 hour, then transfer to a zip-top bag. Grab one as needed.
Reheating
– Microwave: 15 seconds on medium power for a gooey center.
– Oven: 300°F (150°C) for 5 minutes to restore texture. Do not overheat or they dry out.
Meal prep tip: Bake a batch on Sunday and portion into single servings. Pair with afternoon coffee or pack in lunchboxes for a special treat.
Conclusion
This foolproof recipe proves that homemade Brownies are not only superior in flavor but also simpler than you think. By mastering the right ratios and timings, you can achieve that elusive fudgy texture and crackly top every time. We’ve shown you how to adapt this base into one of the most versatile Easy Brownie Recipes in your repertoire—from gluten-free to microwave versions. The key is trusting the process: don’t overmix, don’t overbake, and always let them cool for clean slices. We encourage you to try this recipe this weekend, share your results on social media, or experiment with your own variations. Remember, the best brownie is the one you make with love—and a little butter.
FAQs
1. Can I substitute oil for butter in these brownies?
Yes! Use the same amount of neutral vegetable oil or melted coconut oil. Oil makes brownies even fudgier, though the butter flavor is slightly reduced.
2. Why did my brownies turn out cakey instead of fudgy?
This usually happens from overmixing or overbaking. Use a spatula and stir only until combined. Also, reduce flour by 2 tablespoons for a denser texture.
3. Can I add eggs if I want a more cakelike result?
Yes—add one extra egg white (not whole egg) to increase structure while maintaining moisture. This is a great trick for those who prefer a lighter texture.
4. How do I prevent the edges from burning?
Bake at 325°F (160°C) for 5 extra minutes if your oven runs hot. Also, avoid using dark metal pans that absorb more heat; glass or ceramic pans work best.
5. Can I make these ahead for a party?
Absolutely! These brownies improve after a day. Bake up to 24 hours in advance, store at room temperature (wrapped tightly), and slice just before serving. For frozen storage, prepare up to 3 months ahead.
Best Way to Grow Brownies in 10 Minutes
Ingredients
Equipment
Method
- Preheat your oven to 350°F (175°C) and lightly grease an 8x8 inch baking pan.
- In a large bowl, combine the brownie mix, eggs, vegetable oil, and water, mixing until just combined.
- Stir in the optional chocolate chips and then sprinkle in your "magic growing dust" and a lot of love for extra humor.
- Pour the batter into the prepared baking pan and place it in the preheated oven.
- Bake for 5 minutes, checking for doneness with a toothpick; if it comes out clean, your brownies have "grown" perfectly.
- Let the brownies cool in the pan before cutting and serving your magically grown treats.