Savor the Flavor: Crafting the Perfect Cheeseburger at Home
Ever wondered if you could recreate that juicy, satisfying Cheeseburger experience from your favorite diner right in your own kitchen? Absolutely! Preparing a homemade Cheeseburger isn’t just about saving money; it’s about control – control over ingredients, flavor profiles, and ensuring every bite is exactly how you like it. This comprehensive guide will walk you through mastering the art of the perfect Hamburger, highlighting how a little effort at home can yield far superior results than any fast-food joint. Elevate your culinary skills and delight your taste buds with our tailored steps for the ultimate Cheeseburger experience.
Ingredients & Kitchen Tools
To embark on this delicious journey, gather the following:
- Ground Beef (80/20 lean-to-fat ratio): 1.5 lbs (This fat content ensures a juicy, flavorful burger.)
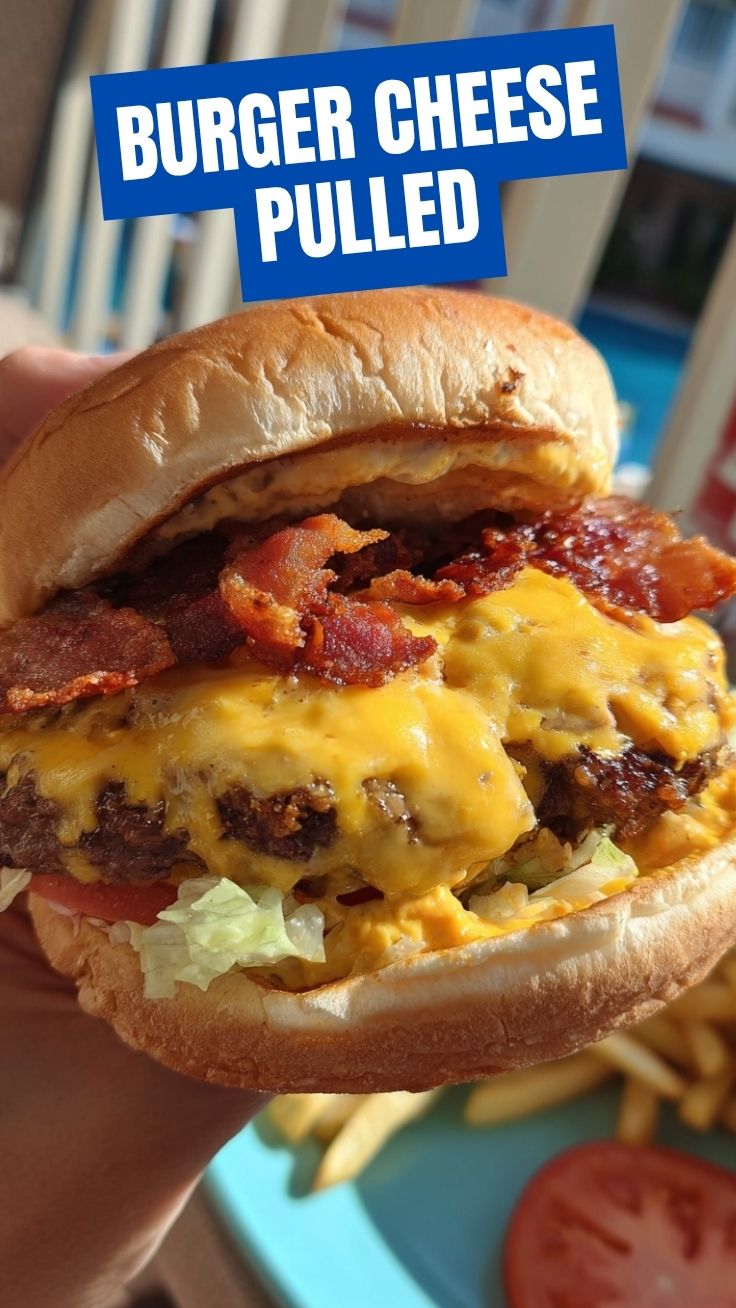
- Cheese Slices: 4-6 slices, American, cheddar, or provolone (American melts perfectly for that classic gooey finish.)
- Salt & Black Pepper: To taste (Essential for seasoning every layer.)
- Optional Toppings: Lettuce leaves, tomato slices, red onion, pickles, your favorite condiments (Customize to your heart’s content.)
- Olive Oil or Butter: 1 tbsp (For greasing the pan or grill.)
- Large Mixing Bowl: For combining ingredients.
- Spatula: For flipping and pressing.
- Heavy-Bottomed Skillet or Grill: For cooking the patties (Cast iron is excellent for a good sear.)
- Meat Thermometer (optional): For checking doneness.
Prep Time & Cooking Schedule
- Prep Time: 15 minutes (Includes forming patties and preparing toppings.)
- Cook Time: 10-15 minutes (For cooking the patties to medium-rare to medium.)
- Resting Time: 5 minutes (Crucial for the juices to redistribute, ensuring a tender burger.)
This schedule allows you to have a delicious Cheeseburger ready in under 30 minutes, making it perfect for weeknight meals or impromptu backyard BBQs. While your patties are cooking, you can toast the buns and arrange your toppings for a seamless assembly line.
Step-by-Step Instructions
1. Prepare the Patties: In a large mixing bowl, gently form the ground beef into 4-6 uniform patties, about ½ inch thick. Make a small indentation in the center of each patty with your thumb – this prevents them from bulging in the middle during cooking. Season generously with salt and black pepper on both sides.
2. Heat Your Cooking Surface: Place a heavy-bottomed skillet over medium-high heat, or preheat your grill. Add olive oil or butter to the skillet.
3. Cook the Cheeseburger: Once the skillet is hot and shimmering (or the grill is ready), carefully place the patties.
* For medium-rare: Cook 3-4 minutes per side.
* For medium: Cook 4-5 minutes per side.
* For well-done: Cook 5-6 minutes per side.
Avoid pressing down excessively on the patties with your spatula, as this squeezes out the flavorful juices.
4. Add the Cheese: During the last minute of cooking, place a slice of cheese on each patty. Cover the skillet with a lid (or tent with foil on the grill) to help the cheese melt perfectly.
5. Toast the Buns: While the cheese melts, lightly butter the cut sides of your Hamburger buns and toast them on the skillet or grill for 1-2 minutes until golden brown.
6. Assemble: Once cooked, remove the patties from the heat and let them rest for 5 minutes. This allows the juices to redistribute, resulting in a more tender and flavorful Cheeseburger. Assemble your delicious creation on the toasted buns with your favorite toppings.
Nutritional Benefits & Advantages
Crafting your own Cheeseburger offers several nutritional advantages. You control the quality of the beef, opting for grass-fed options often higher in omega-3 fatty acids. By selecting whole-wheat buns, you can increase fiber intake, and loading up on fresh vegetable toppings adds vitamins, minerals, and antioxidants. Portion control is also key; you can adjust patty size and cheese amounts to suit your dietary needs, avoiding the excessive calories and unhealthy fats often found in restaurant versions.
Tips, Variations & Cooking Advice
- Flavor Boosts: Mix finely minced onion, garlic powder, or a dash of Worcestershire sauce into the ground beef before forming patties for an extra layer of flavor.
- Cheese Alternatives: Beyond American, try blue cheese crumbles for a tangy kick, or spicy pepper jack for heat.
- Bun Swaps: For a gluten-free option, use lettuce wraps or gluten-free buns.
- Cooking Methods: If you don’t have a grill, a cast-iron skillet provides an excellent sear. For a smokier flavor on gas grills, use a smoker box with wood chips.
Common Mistakes to Avoid
- Overworking the Meat: Handling the ground beef too much makes the patties dense and tough. Be gentle when forming.
- Not Seasoning Enough: Bland burgers are a common disappointment. Season liberally with salt and pepper just before cooking.
- Flipping Too Often: Resist the urge to constantly flip the patties. Let them cook undisturbed to develop a good crust.
- Pressing Down on Patties: This squeezes out precious juices, leading to dry, less flavorful burgers.
- Forgetting to Rest: Skipping the rest period means juices escape when you cut into the burger, making it dry.
Storage & Meal Prep Tips
Leftover Cheeseburger patties can be stored in an airtight container in the refrigerator for up to 3-4 days. For longer storage, freeze cooked patties individually wrapped in plastic wrap and then placed in a freezer-safe bag for up to 2-3 months. Reheat gently in a skillet over low heat or in the oven to maintain moisture. Avoid reheating in the microwave, which can make them rubbery. You can also prepare and freeze uncooked patties; thaw them in the refrigerator overnight before cooking.
Conclusion
Mastering the homemade Cheeseburger is a rewarding culinary achievement that brings incredible flavor and satisfaction right to your table. By following these detailed steps, from selecting the right beef to perfectly melting the cheese, you’re not just cooking; you’re crafting an experience. So go ahead, gather your ingredients, fire up the grill or skillet, and prepare to indulge in the best Hamburger you’ve ever tasted. We encourage you to try this recipe tonight and share your delicious results with us!
FAQs
Q1: What’s the best type of ground beef for a juicy Cheeseburger?
A1: An 80/20 lean-to-fat ratio is ideal. The fat renders during cooking, keeping the patty moist and flavorful.
Q2: How do I prevent my burgers from shrinking?
A2: Make a small indentation in the center of each patty with your thumb before cooking. This helps the burger maintain its shape.
Q3: Can I bake these burgers instead of grilling or pan-frying?
A3: Yes, bake at 375°F (190°C) for 20-25 minutes, flipping halfway through, for a less hands-on approach. Add cheese five minutes before they’re done.
Q4: What are some good topping combinations?
A4: Classic: lettuce, tomato, onion, pickles. Gourmet: caramelized onions, bacon, avocado, blue cheese. Spicy: jalapeños, pepper jack, sriracha mayo.
Q5: How can I make a dairy-free Hamburger?
A5: Omit the cheese or use a good quality dairy-free cheese alternative. Ensure your buns are also dairy-free.
Quick way to grow a perfect Cheeseburger plant
Ingredients
Equipment
Method
- Prepare your planting area with rich soil, ensuring it's ready for your cheeseburger "seed."
- Gently place the cheeseburger "seed" into the soil and cover it lightly.
- Water the planted "seed" immediately, providing an ideal environment for growth.
- Ensure the plant receives 6-8 hours of sunlight daily, simulating optimal growing conditions.
- Mist the soil regularly to maintain moisture, creating a perfect habitat for your cheeseburger plant.
- Once fully "grown," carefully harvest your cheeseburger using a spatula to avoid damage.
- Serve your freshly "grown" cheeseburger on a plate, adding an optional cheese slice for extra flavor.