The Ultimate Guide to Baking the Perfect Homemade Apple Pie
What is the secret to a dessert that fills your home with an irresistible aroma of cinnamon and baked apples, bringing back cherished memories of family gatherings and cozy autumn evenings? The answer lies in a perfectly baked Apple Pie. While store-bought versions are convenient, preparing this classic dessert from scratch allows you to control the quality of ingredients, customize the sweetness, and create a truly heartwarming experience. The foundation of any great apple pie is a buttery, flaky Apple Pie Crust. In this comprehensive guide, we will walk you through every step, from selecting the perfect apples to achieving a golden-brown crust, ensuring your homemade pie is the highlight of any meal.
Ingredients & Kitchen Tools
For the Filling
– 6–7 large apples – A mix of Granny Smith (tart) and Honeycrisp (sweet) provides ideal balance. Avoid soft varieties like Red Delicious.
– ¾ cup granulated sugar – Adjust to taste depending on apple sweetness.
– 2 tablespoons all-purpose flour – Helps thicken the filling; cornstarch or tapioca starch work as alternatives.
– 1 teaspoon ground cinnamon – The quintessential apple pie spice.
– ¼ teaspoon ground nutmeg – Adds warmth; use fresh-grated for best flavor.
– 1 tablespoon lemon juice – Prevents browning and brightens the flavor.
– 1 teaspoon vanilla extract – Enhances overall sweetness and aroma.
– 2 tablespoons unsalted butter – Dot over filling for richness.
For the Crust
– 2½ cups all-purpose flour – Provides structure; use a gluten-free blend if needed.
– 1 teaspoon salt – Balances sweetness.
– 1 tablespoon granulated sugar – Adds a subtle sweetness.
– 1 cup (2 sticks) cold unsalted butter, cubed – Keep butter ice-cold for flakiness.
– ½ cup ice water – Adjust as needed; add one tablespoon at a time.
Kitchen Tools
– 9-inch pie dish (glass or ceramic recommended)
– Rolling pin
– Large mixing bowls (2–3)
– Pastry blender or food processor
– Sharp knife or apple peeler/corer
– Measuring cups and spoons
– Aluminum foil or pie shield
– Pastry brush
– Wire cooling rack
Optional Substitutions
– Gluten-free: Use a 1:1 gluten-free flour blend with xanthan gum.
– Dairy-free: Substitute cold coconut oil or vegan butter for the butter.
– Sugar-free: Replace sugar with coconut sugar or a monk fruit blend; note that texture may change slightly.
Prep Time & Cooking Schedule
– Prep Time: 45 minutes (includes making dough, peeling, and slicing apples)
– Chill Time: 30 minutes minimum for dough resting (can be up to 2 days)
– Cook Time: 55–65 minutes total
– Cooling Time: At least 3 hours before slicing – this is non-negotiable for a clean slice
– Total Time: Approximately 5 hours (including cooling)
Planning Tip: Make the dough the night before and refrigerate. Assemble the pie the next day, bake, and let it cool while you enjoy dinner. Your patience will be rewarded with perfectly set slices.
Step-by-Step Instructions
1. Prepare the Crust
In a large bowl, whisk together 2½ cups flour, 1 teaspoon salt, and 1 tablespoon sugar. Add the cold cubed butter and cut it in using a pastry blender or your fingertips until the mixture resembles coarse meal with pea-sized butter pieces. Gradually drizzle in ice water, one tablespoon at a time, tossing with a fork until the dough just holds together. Divide in half, flatten into disks, wrap tightly in plastic wrap, and refrigerate for at least 30 minutes. A well-made Apple Pie Crust is the foundation of a great dessert, so take your time here.
2. Prepare the Filling
Peel, core, and slice the apples into ¼-inch thick slices. In a large bowl, toss the apples with ¾ cup sugar, 2 tablespoons flour, 1 teaspoon cinnamon, ¼ teaspoon nutmeg, 1 tablespoon lemon juice, and 1 teaspoon vanilla extract. Let the mixture sit for 15–20 minutes; this allows the apples to release their juices, which will later thicken into a rich syrup.
3. Assemble the Pie
Preheat your oven to 425°F (220°C). Roll out one disk of dough on a lightly floured surface to a 12-inch circle. Gently transfer it to your 9-inch pie dish, pressing it into the bottom and sides. Leave a 1-inch overhang. Pour the apple filling into the crust, mounding it slightly in the center. Dot the filling with the 2 tablespoons of butter cut into small pieces.
4. Top and Bake
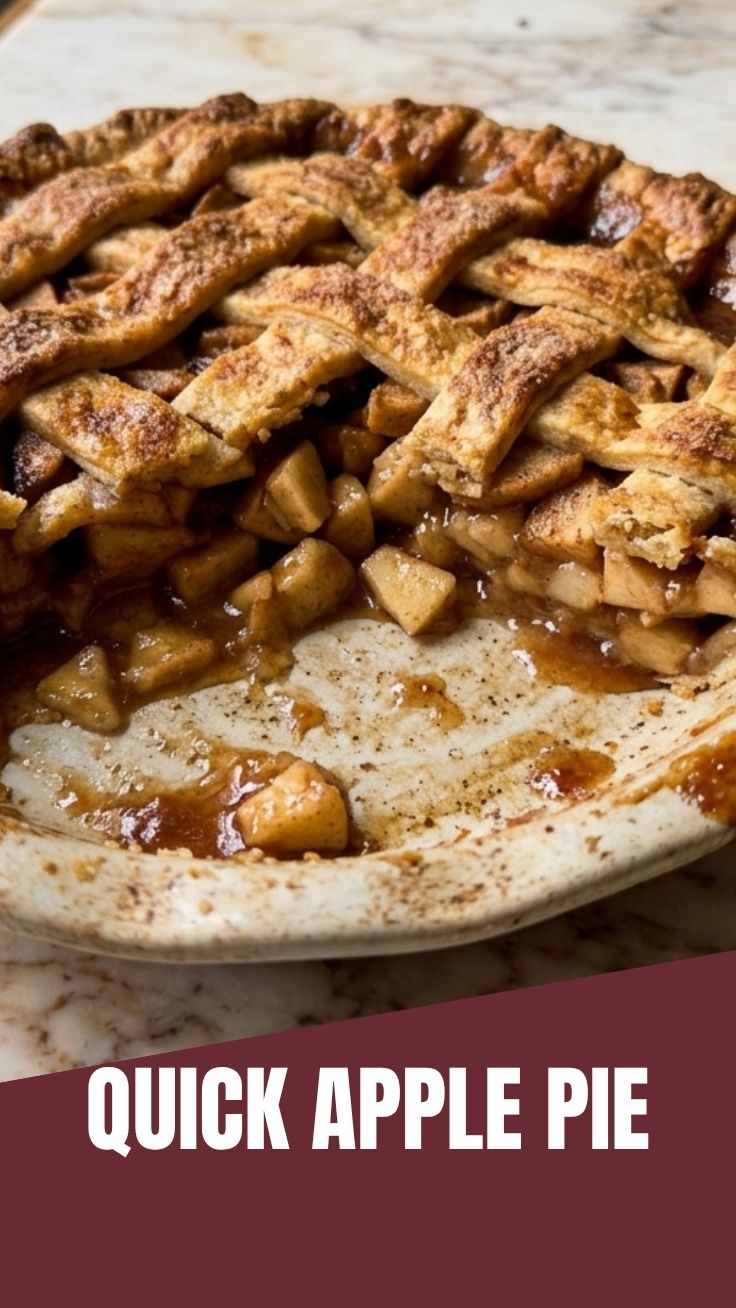
Roll out the second disk of dough to the same size. Place it over the filling, or cut it into strips for a lattice top. Crimp the edges to seal and cut 4–5 slits in the top to allow steam to escape. Brush the top with an egg wash (1 egg beaten with 1 tablespoon water) and sprinkle with coarse sugar for a bakery-style finish. Bake at 425°F for 20 minutes, then reduce the temperature to 375°F (190°C) and bake for an additional 35–45 minutes, until the crust is deep golden brown and the filling is bubbling through the slits. This classic Apple Pie recipe is a true labor of love, and the aroma alone will tell you it’s working.
5. Cool Completely
Place the pie on a wire rack and let it cool for at least 3 hours. This allows the starches to set and the filling to thicken. Cutting into a warm pie guarantees a runny mess, so practice patience.
Nutritional Benefits & Advantages
– Dietary Fiber: Apples are rich in pectin, a soluble fiber that supports digestion and heart health. One serving provides about 15% of your daily fiber needs.
– Antioxidants: Apples contain quercetin and vitamin C, which help combat oxidative stress and support immune function.
– Homemade Control: You control the sugar, fat, and additives. No high-fructose corn syrup, hydrogenated oils, or preservatives like in commercial pies.
– Satiety: A slice of homemade apple pie is more satisfying than processed desserts, thanks to whole-food ingredients and fiber.
– Portion Mindfulness: A 1/8th slice of homemade pie typically contains 350–400 calories, making it a reasonable indulgence within a balanced diet.
Tips Variations & Cooking Advice
Flavor Variations
– Spiced Apple Pie: Add ½ teaspoon ground ginger and ¼ teaspoon cardamom for a chai-inspired twist.
– Berry Apple Pie: Replace 1 cup of apples with fresh or frozen blueberries or raspberries.
– Bourbon Apple Pie: Add 2 tablespoons bourbon or dark rum to the filling for depth.
– Salted Caramel Apple Pie: Drizzle homemade caramel sauce over the filling before adding the top crust.
Dietary Adaptations
– Gluten-Free: Use a gluten-free flour blend for both crust and filling. Add ½ teaspoon xanthan gum if your blend doesn’t include it.
– Dairy-Free: Use cold coconut oil or vegan butter for the crust. Skip the butter dots in the filling or use a plant-based alternative.
– Lower Sugar: Reduce sugar to ½ cup and use a mix of sweet Fuji apples to compensate.
Cooking Method Alternatives
– Lattice Top: For a decorative look, weave strips of dough instead of a full top crust.
– Mini Hand Pies: Use a biscuit cutter to make individual pies; bake for 20–25 minutes at 375°F.
– Skillet Apple Pie: Use a 10-inch cast-iron skillet for a rustic presentation; bake for 40–50 minutes.
– Pre-Baked Bottom Crust: For extra crispness, brush the bottom crust with egg white and bake at 375°F for 10 minutes before adding the filling.
Common Mistakes to Avoid
| Mistake | Solution |
|———|———-|
| Soggy bottom crust | Brush the bottom crust with egg white or melted butter before adding filling. Bake on the lowest oven rack. |
| Tough, dense dough | Don’t overwork the dough. Stop mixing when it just holds together. Use ice-cold water and butter. |
| Runny filling | Let the pie cool for at least 3 hours. Use a mix of flour and cornstarch (1 tablespoon each) for better thickening. |
| Burnt edges | Cover the crust edges with aluminum foil or a pie shield for the first 30 minutes, then remove. |
| Mushy apples | Use firm, tart apples like Granny Smith. Avoid over-soft varieties. Don’t overbake; check at 50 minutes. |
| Filling bubbles over | Place a baking sheet on the lower rack to catch drips. Don’t overfill the pie dish. |
Storage & Meal Prep Tips
Refrigeration
– Store leftover pie covered with foil or plastic wrap in the refrigerator for up to 4 days.
– Keep at room temperature for the first day only if your kitchen is cool (below 70°F/21°C).
Freezing
– Baked Pie: Cool completely, wrap tightly in plastic wrap, then aluminum foil. Freeze for up to 4 months. Thaw overnight in the refrigerator and reheat in a 350°F oven for 15 minutes.
– Unbaked Pie: Assemble the pie without cutting slits. Wrap and freeze for up to 3 months. Bake from frozen, adding 15–20 minutes to the baking time and cutting slits just before baking.
Reheating
– Oven: Reheat slices on a baking sheet at 350°F (175°C) for 10–15 minutes. This keeps the crust crisp.
– Microwave: Use only if you’re in a rush; heat for 30–45 seconds, but expect a softer crust.
– Skillet: For a fresh-baked feel, reheat slices in a buttered skillet over medium heat for 2–3 minutes per side.
Meal Prep Tips
– Dough: Make the dough up to 2 days in advance; keep refrigerated or freeze for 1 month.
– Apples: Peel and slice apples up to 8 hours ahead; toss with lemon juice to prevent browning.
– Full Assembly: Assemble the pie (without egg wash) the night before, refrigerate, and brush with egg wash just before baking.
Conclusion
Baking a homemade Apple Pie is a rewarding experience that fills your kitchen with warmth and creates a timeless dessert everyone will love. The key to success lies in a flaky, butter-rich Apple Pie Crust and perfectly seasoned apple filling. We encourage you to try this recipe, share your beautiful results, and experiment with the variations. For more delicious desserts and baking tips, be sure to explore our other recipes and leave a comment below with your success story!
FAQs
1. Can I use pre-made pie crust to save time?
Yes, you can use a store-bought crust, but a homemade crust offers superior flavor and texture. If using pre-made, follow the package instructions for blind baking, and brush the bottom with egg white to prevent sogginess.
2. How do I prevent my pie crust from getting soggy?
Brush the bottom crust with a thin layer of egg white or melted butter before adding the filling. Also, ensure the oven is hot enough initially (425°F) to set the crust, and bake on the lowest rack for even heat distribution.
3. What is the best apple for apple pie?
A combination of tart (Granny Smith) and sweet (Honeycrisp, Fuji, or Braeburn) apples provides the best flavor and texture. Avoid soft apples like Red Delicious, which turn mushy and lack structure.
4. Why is my pie filling runny?
This can happen if the apples are not fully cooked down, if you didn’t use enough thickener (flour or cornstarch), or if you cut into the pie too early. Let the pie cool completely for at least 3 hours to allow the filling to set.
5. How do I know when my apple pie is done?
The crust should be deep golden brown, and the filling should be bubbly with thick juices visible through the slits. You can also insert a knife into the center; the apples should be tender but not mushy. Use an instant-read thermometer – the internal temperature should reach 200°F (93°C).
Best way to grow perfect Apple Pie in 3 steps
Ingredients
Equipment
Method
- Combine flour and cold butter in a food processor until crumbly, then gradually add ice water until a dough forms. Divide the dough in half, flatten each into a disc, wrap, and refrigerate for at least 30 minutes.
- Roll out one dough disc and carefully transfer it to a 9-inch pie plate, trimming any excess and crimping the edges as desired.
- In a large bowl, combine sliced apples with sugar, cinnamon, and nutmeg, ensuring the apples are evenly coated.
- Pour the apple mixture into the prepared pie crust, mounding it slightly in the center.
- Preheat oven to 425°F (220°C). Roll out the second dough disc and place it over the apple filling, either as a solid top crust with vents or as a lattice, then crimp the edges to seal.
- Bake for 15 minutes at 425°F (220°C), then reduce oven temperature to 375°F (190°C) and continue baking for another 35-45 minutes, or until the crust is golden brown and the filling is bubbly. Let cool completely before serving.