The Ultimate Guide to Making Restaurant-Quality Teriyaki Chicken at Home
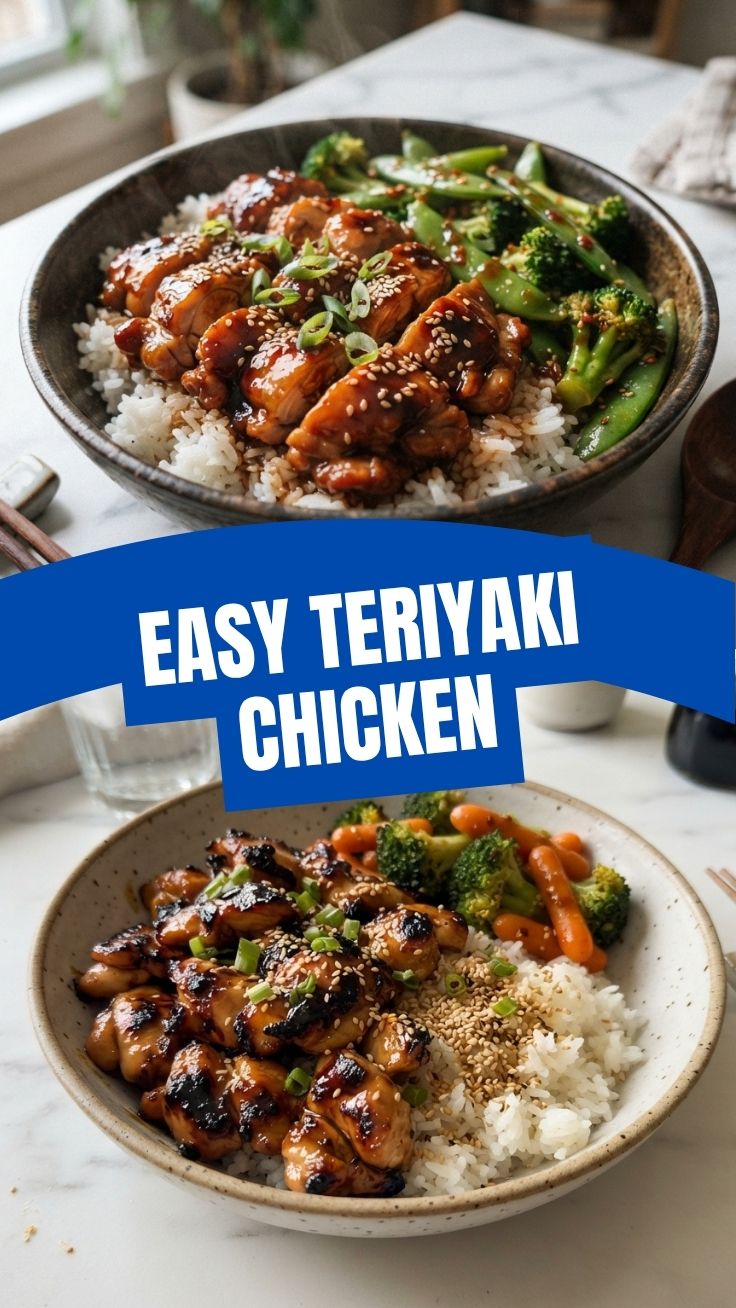
Have you ever craved that glossy, savory-sweet Teriyaki Chicken from your favorite takeout spot, only to wonder if you could recreate it in your own kitchen? The answer is a resounding yes—and it’s easier than you think. Preparing this iconic dish at home not only saves money but also allows you to control the quality of ingredients, sodium levels, and cooking techniques. Whether you’re a busy parent looking for a quick weeknight dinner or a meal-prep enthusiast seeking versatile protein, mastering Teriyaki Chicken will elevate your cooking game. This recipe delivers juicy, caramelized chicken thighs coated in a homemade sauce that rivals any delivery order—without the MSG or excess sugar. Let’s dive into the secrets of authentic Japanese recipes that make this dish so irresistible.
Ingredients & Kitchen Tools
Essential Ingredients
– Boneless, skinless chicken thighs (1.5 lbs) – Thighs stay juicier than breasts; substitute with breasts if desired.
– Soy sauce (½ cup) – Use low-sodium for better salt control; tamari for gluten-free.
– Mirin (¼ cup) – Sweet rice wine; substitute with 2 tbsp honey + 2 tbsp sake or dry sherry.
– Sake (2 tbsp) – Japanese rice wine; substitute with dry white wine or skip for alcohol-free.
– Brown sugar (3 tbsp) – Light or dark; adds depth and caramelization.
– Fresh ginger (1 tbsp, grated) – Essential for authentic warmth; use ½ tsp ground ginger in a pinch.
– Garlic (3 cloves, minced) – Fresh for best flavor; jarred minced garlic works.
– Rice vinegar (1 tsp) – Balances sweetness; substitute with apple cider vinegar.
– Cornstarch (1 tbsp + 2 tbsp water) – For slurry to thicken sauce.
– Sesame seeds & sliced green onions – Garnish; optional but highly recommended for visual appeal.
– Cooking oil (2 tbsp) – Avocado or vegetable oil for high-heat searing.
Kitchen Tools
– Large skillet or wok – Cast iron or stainless steel works best for even heat.
– Sharp chef’s knife – For trimming chicken and slicing vegetables.
– Microplane or grater – For fresh ginger.
– Small bowl – For mixing cornstarch slurry.
– Tongs – For flipping chicken without piercing.
– Measuring cups & spoons – Precision matters in sauce balance.
– Cutting board – Dedicated one for raw protein.
Prep Time & Cooking Schedule
| Stage | Time | Notes |
|——-|——|——-|
| Prep | 15 minutes | Cutting, grating, mixing sauce |
| Marinate | 15-30 minutes (optional) | Deeper flavor, but not required |
| Cook | 18-22 minutes | Searing + sauce reduction |
| Rest | 5 minutes | Tent with foil for juiciest results |
| Total | 35-55 minutes | Perfect for a weeknight dinner |
Context: This timeline assumes you’re using deboned thighs. If using bone-in or whole legs, add 10-15 minutes to cook time. For busy evenings, mix the sauce the night before and refrigerate—then dinner comes together in under 30 minutes.
Step-by-Step Instructions
1. Prep the chicken: Trim excess fat and cut thighs into 2-inch bite-sized pieces. Pat dry with paper towels—moisture is the enemy of browning. Season lightly with white pepper (optional).
2. Make the teriyaki sauce: In a bowl, whisk together soy sauce, mirin, sake, brown sugar, grated ginger, and minced garlic. Taste and adjust sweetness or saltiness. For a thicker sauce, prepare the cornstarch slurry (1 tbsp cornstarch + 2 tbsp cold water) and set aside.
3. Sear the chicken: Heat a large skillet over medium-high heat with 2 tbsp oil until shimmering. Add chicken in a single layer—don’t overcrowd (work in batches if needed). Cook without moving for 4-5 minutes until golden brown. Flip and cook another 3-4 minutes until internal temperature reaches 165°F. Transfer to a plate.
4. Simmer and glaze: Reduce heat to medium-low. Pour the teriyaki sauce into the skillet—it will sizzle. Stir in the cornstarch slurry while whisking constantly. Let it bubble for 1-2 minutes until thickened to a syrupy consistency. This step is where the magic of authentic Teriyaki Chicken comes alive, combining sweet and savory notes. For a more complex flavor profile, try Japanese recipes that use sake reduction for depth.
5. Combine and coat: Return chicken to the skillet. Toss with tongs until every piece is evenly glazed (about 2 minutes). The sauce should cling like a shiny lacquer.
6. Garnish and serve: Sprinkle sesame seeds and sliced green onions. Serve immediately over steamed jasmine rice or alongside stir-fried vegetables.
Pro tip: If the sauce becomes too thick, thin with 1 tbsp water at a time. If too thin, simmer an extra minute without the slurry.
Nutritional Benefits & Advantages
This recipe packs surprising nutritional value for a sauce-forward dish. Per serving (3.5 oz chicken with sauce): approximately 280 calories, 18g protein, 12g fat, 20g carbs, and 2g fiber.
Key benefits:
– High-quality protein: Chicken thighs provide complete amino acids for muscle repair and satiety.
– Ginger’s anti-inflammatory properties: Fresh ginger contains gingerol, which may reduce muscle soreness and nausea.
– Garlic’s immune boost: Allicin in garlic supports cardiovascular health and immunity.
– Lower sodium than takeout: Homemade versions use 30-40% less sodium than restaurant equivalents.
– No preservatives: Avoids artificial flavors and MSG common in commercial teriyaki sauces.
Dietary advantage: This dish naturally fits a gluten-free lifestyle when using tamari instead of soy sauce.
Tips Variations & Cooking Advice
Flavor variations:
– Spicy teriyaki: Add 1-2 tsp chili garlic sauce or sriracha to the sauce.
– Hawaiian twist: Substitute ¼ cup pineapple juice for sake; add ½ cup fresh pineapple chunks.
– Miso-teriyaki fusion: Whisk 1 tbsp white miso paste into the finished sauce for umami depth.
Cooking method swaps:
– Air fryer: Cook at 380°F for 12-14 minutes, then toss with sauce and cook 3 more minutes.
– Crockpot: Dump everything in on low for 4-5 hours, then thicken with slurry on the stovetop.
– Grill: Marinate 1 hour, grill over medium-high heat, then brush with sauce before serving.
Dietary adaptations:
– Gluten-free: Use tamari or coconut aminos instead of soy sauce.
– Dairy-free: Naturally dairy-free; no substitutions needed.
– Low-carb: Serve over cauliflower rice or zucchini noodles.
– Vegan option: Substitute extra-firm tofu (pressed and cubed) for chicken; cook until golden.
Portion tip: This recipe scales perfectly—double the sauce ingredients for 2x the chicken.
Common Mistakes to Avoid
| Mistake | Solution |
|———|———-|
| Burnt sugar | Don’t use high heat during sauce reduction; medium-low is your friend. |
| Rubbery chicken | Always use thighs and don’t overcook—remove at 165°F for safety but stop there. |
| Watery sauce | Pat chicken dry; don’t overcrowd the pan; fully reduce sauce before glazing. |
| Bland flavor | Balance sweet (sugar), salty (soy), acidic (rice vinegar), and umami (ginger/garlic). |
| Sauce slides off | Let the sauce thicken to a syrupy consistency before adding chicken back. |
Pro tip: If your sauce separates, whisk vigorously while simmering—cornstarch slurry may need re-dissolving.
Storage & Meal Prep Tips
Refrigeration: Cool completely (within 2 hours of cooking) and store in an airtight container for 3-4 days. Place a paper towel on top to absorb excess moisture between layers.
Freezing: Store in freezer-safe bags or containers for up to 3 months. Remove as much air as possible to prevent freezer burn. Thaw overnight in the refrigerator.
Reheating:
– Stovetop: Simmer over medium-low heat with 1 tbsp water; stir frequently (5-7 minutes).
– Microwave: Cover with a damp paper towel; heat in 30-second bursts (2-3 minutes total).
– Oven: 350°F for 10-12 minutes in a covered dish.
Meal prep tip: Cook double batch of chicken and sauce separately. Combine only when serving to maintain crispy exterior. Use for: rice bowls, salads, wraps, or noodle stir-fries throughout the week.
Texture maintenance: If sauce thickens while stored, thin with a splash of water before reheating.
Conclusion
Mastering homemade Teriyaki Chicken is one of the most rewarding skills in your kitchen arsenal. By following this guide, you’ve learned how to balance sweet and savory flavors, achieve that signature glossy glaze, and adapt the recipe to fit your dietary needs—all while saving money and avoiding hidden additives. Whether you’re serving it over fluffy rice on a busy Tuesday or impressing dinner guests with authentic Teriyaki Chicken, this recipe delivers consistent, restaurant-quality results. Don’t stop here—experiment with the variations, try different proteins, or explore other Japanese recipes to expand your culinary repertoire. I invite you to make this dish this week, snap a photo of your creation, and share your honest results in the comments below. Your feedback helps our community cook better together!
Frequently Asked Questions
Q: Can I use chicken breast instead of thighs?
A: Yes, but breasts cook faster and dry out more easily. Pound them to even thickness, cook 2-3 minutes per side, and check temperature at 160°F (carryover cooking will bring it to 165°F).
Q: What if I don’t have mirin or sake?
A: Substitute mirin with 2 tbsp honey + 2 tbsp water. For sake, use 2 tbsp dry sherry, white wine, or simply omit and add 1 tbsp water to maintain liquid balance.
Q: How do I fix a sauce that’s too salty?
A: Add ½ tsp rice vinegar or 1 tsp brown sugar to counteract saltiness. Alternatively, add 2 tbsp water and re-thicken with another cornstarch slurry (1 tsp cornstarch + 1 tbsp cold water).
Q: Can I make this recipe without sugar?
A: Yes! Use monk fruit sweetener or allulose for zero-glycemic sweetness. Keep in mind that brown sugar contributes to caramelization, so you may need to cook for slightly longer to achieve desired browning.
Q: Why is my teriyaki sauce separating?
A: This usually happens when the sauce is too hot or the fat content is high. Reduce heat, whisk vigorously, and add cornstarch slurry gradually. If it persists, strain the sauce through a fine-mesh sieve to remove any coagulated particles.
Quick way to grow Teriyaki Chicken wings
Ingredients
Equipment
Method
- In a medium bowl, whisk together the soy sauce, mirin, sake (or rice vinegar), brown sugar, minced garlic, grated ginger, and sesame oil to create the teriyaki marinade.
- Add the chicken wings to the marinade, ensuring they are fully coated, then cover the bowl and refrigerate for at least 30 minutes, or preferably for a few hours to maximize flavor.
- Preheat your oven to 400°F (200°C) and line a baking sheet with parchment paper for easy cleanup.
- Arrange the marinated chicken wings in a single layer on the prepared baking sheet, discarding any remaining marinade.
- Bake for 20-25 minutes, then flip the wings and continue baking for an additional 10-15 minutes, or until they are cooked through and have a nice golden-brown, caramelized crust.
- Optionally, if you prefer a thicker sauce, you can simmer the reserved marinade in a small saucepan over medium heat, whisking in 1 teaspoon of cornstarch mixed with a tablespoon of water, until the sauce thickens.
- Serve the teriyaki chicken wings immediately, garnished with sesame seeds and chopped green onions if desired.