How to Make Perfect Savory Stuffed Peppers at Home
Have you ever craved a hearty, comforting meal that’s both colorful and packed with flavor, but felt intimidated by the cooking process? Stuffed Bell Peppers are a timeless classic—juicy peppers filled with a savory blend of seasoned meat, rice, and melted cheese, all baked to tender perfection. Preparing this dish at home isn’t just about saving money; it gives you total control over ingredients, spice levels, and dietary needs. Whether you’re a busy parent looking for a make-ahead dinner or a home cook exploring new bell pepper recipes, mastering this recipe will expand your culinary repertoire. In this guide, you’ll learn how to create restaurant-quality Stuffed Bell Peppers from scratch, with tips that guarantee success every time.
—
Ingredients & Kitchen Tools
For the Filling
– 4 large bell peppers – any color (red, yellow, orange, green). Red are sweeter; green are slightly bitter. Choose firm peppers with flat bottoms so they stand upright.
– 1 lb ground beef (or ground turkey, chicken, or plant-based crumbles) – 85/15 lean-to-fat ratio keeps filling moist.
– 1 cup cooked white or brown rice – leftover rice works perfectly; quinoa or cauliflower rice for low-carb.
– 1 small onion, finely diced – adds sweetness and texture.
– 2 cloves garlic, minced – adjust to taste.
– 1 can (14.5 oz) diced tomatoes – fire-roasted for depth.
– 1 can (8 oz) tomato sauce – or use ½ cup marinara.
– 1 tsp dried oregano – or 1 tbsp fresh.
– ½ tsp smoked paprika – optional, adds smokiness.
– Salt and black pepper to taste.
– 1 cup shredded cheese – mozzarella, cheddar, or a mix. Use dairy-free for vegan adaptation.
– 2 tbsp olive oil – for sautéing.
For Topping (optional)
– Fresh parsley or basil – for garnish.
– Sour cream or Greek yogurt – for serving.
Kitchen Tools & Equipment
– Large skillet or sauté pan
– Cutting board and chef’s knife
– Mixing bowl
– Baking dish (9×13-inch works well)
– Aluminum foil
– Measuring cups and spoons
– Wooden spoon or spatula
– Oven mitts
Substitutions & Variations
– Gluten-free: Use certified GF rice or quinoa. Ensure tomato products are GF.
– Dairy-free: Omit cheese or use vegan shreds; add 2 tbsp nutritional yeast for cheesy flavor.
– Vegetarian: Substitute lentils or black beans for meat, adding extra diced mushrooms for umami.
—
Prep Time & Cooking Schedule
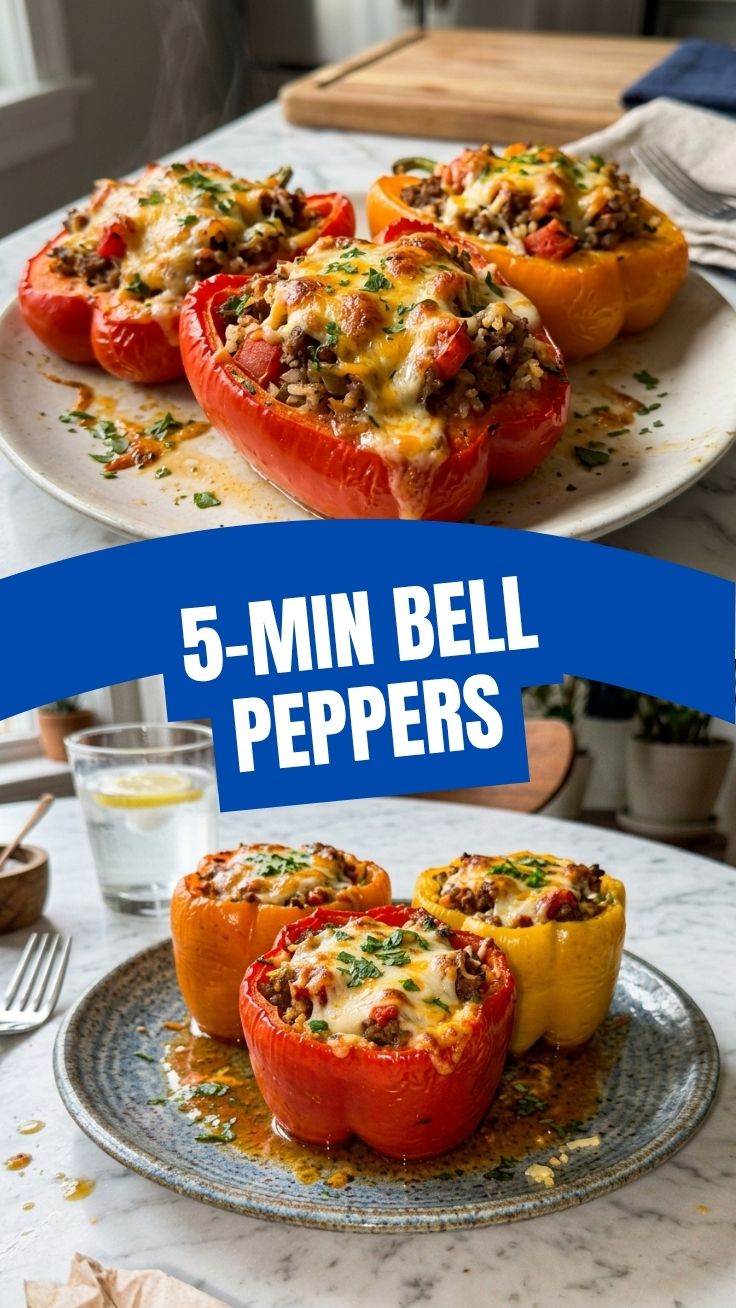
Here’s your timeline at a glance:
| Phase | Time |
|——-|——|
| Prep (washing, dicing, cooking rice) | 20 minutes |
| Sautéing filling | 10 minutes |
| Assembling peppers | 5 minutes |
| Baking (covered) | 30 minutes |
| Baking (uncovered with cheese) | 10 minutes |
| Resting before serving | 5 minutes |
| Total | 1 hour 20 minutes |
Planning Tip: Cook the rice up to 2 days ahead and store in the fridge. You can also prep the entire filling a day in advance—just reheat slightly before stuffing.
—
Step-by-Step Instructions
1. Preheat & Prep Peppers
Preheat your oven to 375°F (190°C). Cut the top off each bell pepper (about ½ inch from the stem) and remove seeds and membranes. If the peppers wobble, slice a thin sliver off the bottom to flatten them—but don’t cut through. Place them upright in a baking dish. Lightly season the insides with salt.
2. Cook the Filling
Heat 2 tbsp olive oil in a large skillet over medium heat. Add diced onion and sauté 3–4 minutes until translucent. Add garlic and cook 30 seconds. Add ground beef, breaking it apart with a spoon. Cook until browned (about 5–7 minutes). Drain excess fat if needed.
Stir in the cooked rice, diced tomatoes (with juices), tomato sauce, oregano, smoked paprika, ½ tsp salt, and ¼ tsp pepper. Simmer for 5 minutes, allowing flavors to meld. Taste and adjust seasoning. Remove from heat.
3. Stuff the Peppers
Spoon the filling evenly into each pepper, pressing gently. Don’t overpack—leave a little room for cheese. At this point, you can cover and refrigerate for up to 24 hours if meal prepping. For immediate baking, top each pepper with shredded cheese (about ¼ cup per pepper).
4. Bake to Perfection
Pour about ½ cup of water or extra tomato sauce into the bottom of the dish (this creates steam and prevents drying). Cover tightly with foil and bake for 30 minutes. Remove foil and bake another 10 minutes until cheese is melted and bubbly. For a golden crust, switch to broil for the last 2 minutes—watch carefully.
5. Rest & Serve
Let the peppers rest 5 minutes before serving. Garnish with fresh herbs. Pair with a side salad or crusty bread. These Stuffed Bell Peppers are satisfying enough for a main course, yet versatile enough to accompany other bell pepper recipes you might explore.
—
Nutritional Benefits & Advantages
Bell peppers are nutritional powerhouses. One medium pepper provides over 150% of your daily vitamin C needs and significant amounts of vitamin A, B6, and fiber. The capsaicin in peppers (especially in green ones) may boost metabolism. The lean protein from beef or turkey supports muscle repair, while rice offers sustained energy. This dish is naturally high in antioxidants from the tomatoes and herbs. For a lower-calorie version, swap rice for riced cauliflower and use lean ground chicken. Overall, this balanced meal fits into Mediterranean, low-carb (with swaps), and gluten-free diets.
—
Tips, Variations & Cooking Advice
Flavor Twists
– Mexican-style: Add 1 tsp cumin, ½ tsp chili powder, and ¼ cup corn. Top with cotija cheese.
– Italian-style: Mix in ¼ cup grated Parmesan and 2 tbsp chopped fresh basil. Use mozzarella.
– Greek-inspired: Use ground lamb, add cinnamon and allspice, and top with feta and olives.
Cooking Methods
– Slow cooker: Prep filling, stuff peppers, place in slow cooker with ½ cup broth. Cook on low 4–5 hours. Top with cheese last 30 minutes.
– Instant Pot: Add 1 cup water to pot. Place stuffed peppers on trivet. Pressure cook on high 8 minutes, then quick release. Broil cheese for 2 minutes.
Dietary Adaptations
– Keto: Skip rice; use ½ lb ground meat more, add ½ cup riced cauliflower, and extra cheese.
– Vegan: Use lentils, quinoa, and dairy-free cheese. Replace Worcestershire (if used) with soy sauce.
—
Common Mistakes to Avoid
– Soggy peppers: Filling releases water during baking. Sauté the filling until most liquid evaporates. Also, don’t overcook peppers—they should be tender but not falling apart.
– Burnt bottoms: Always add a thin layer of liquid (water or sauce) to the dish.
– Underseasoned filling: Bell peppers are mild; your filling needs bold seasoning. Taste before stuffing.
– Uneven cooking: Choose peppers of similar size so they bake uniformly.
– Hard rice: Use fully cooked, tender rice. If undercooked, it will remain crunchy after baking.
—
Storage & Meal Prep Tips
Refrigeration
Store leftover stuffed peppers in an airtight container for up to 4 days. Keep them whole or slice in half for quicker reheating.
Freezing
Wrap each pepper individually in plastic wrap, then place in a freezer bag. Freeze for up to 3 months. Thaw overnight in the fridge before reheating.
Reheating
– Oven: 350°F for 15–20 minutes (cover with foil to prevent drying).
– Microwave: 1–2 minutes per pepper (moisten with a splash of water).
– Air fryer: 350°F for 6–8 minutes, great for crispy edges.
Meal Prep
Assemble peppers without baking, store in the fridge for up to 2 days, then bake when ready. Or bake fully and reheat individual servings throughout the week.
—
Conclusion
Mastering Stuffed Bell Peppers opens the door to endless meal possibilities—this one dish is customizable, nutritious, and deeply satisfying. By following these step-by-step instructions, you’ll never have to settle for dry or bland versions again. Whether you’re cooking for a family dinner or exploring other bell pepper recipes, the skills you gain here will elevate your kitchen confidence. Give this recipe a try and let us know how it turns out in the comments! Happy cooking.
—
FAQs
1. Can I use different types of meat or make it vegetarian?
Absolutely. Ground turkey, chicken, pork, or even crumbled tofu work well. For vegetarian, use lentils, black beans, or a mix of mushrooms and quinoa.
2. How do I keep the peppers from falling over during baking?
Slice a thin piece off the bottom to create a flat base. Also, pack the filling snugly to help them stay upright.
3. Why did my peppers turn out watery?
Drain any excess fat from the meat and cook the filling until most liquid evaporates. Also, don’t add too much liquid to the baking dish—just ½ cup is enough.
4. Can I freeze stuffed peppers before baking?
Yes. Assemble completely (including cheese), freeze unbaked in a freezer-safe dish. Bake from frozen at 375°F for 50–60 minutes, covered, then uncover for last 10 minutes.
5. How do I make the filling spicier?
Add ½ tsp red pepper flakes, a diced jalapeño, or use hot Italian sausage instead of ground beef. You can also drizzle with hot sauce before serving.
How to Grow Stuffed Bell Peppers
Ingredients
Equipment
Method
- Choose a sunny spot in your garden with well-draining soil and enrich it with compost.
- Plant seeds indoors 8-10 weeks before the last frost date, or transplant seedlings outdoors after all danger of frost has passed.
- Space plants 18-24 inches apart in rows 30-36 inches apart, burying seedlings up to their first true leaves.
- Water regularly, especially during dry spells, aiming for about 1 inch of water per week.
- Fertilize every 2-4 weeks with a balanced all-purpose fertilizer once fruits begin to set.
- Provide support with stakes or cages if your bell pepper plants become top-heavy with fruit.
- Harvest bell peppers when they reach full size and desired color, typically 60-90 days after transplanting.
- Use pruning shears or a sharp knife to cut the peppers from the plant, leaving a short stem attached.