The Ultimate Guide to Making Key Lime Pie at Home: A Tangy, Creamy, and Irresistible Dessert
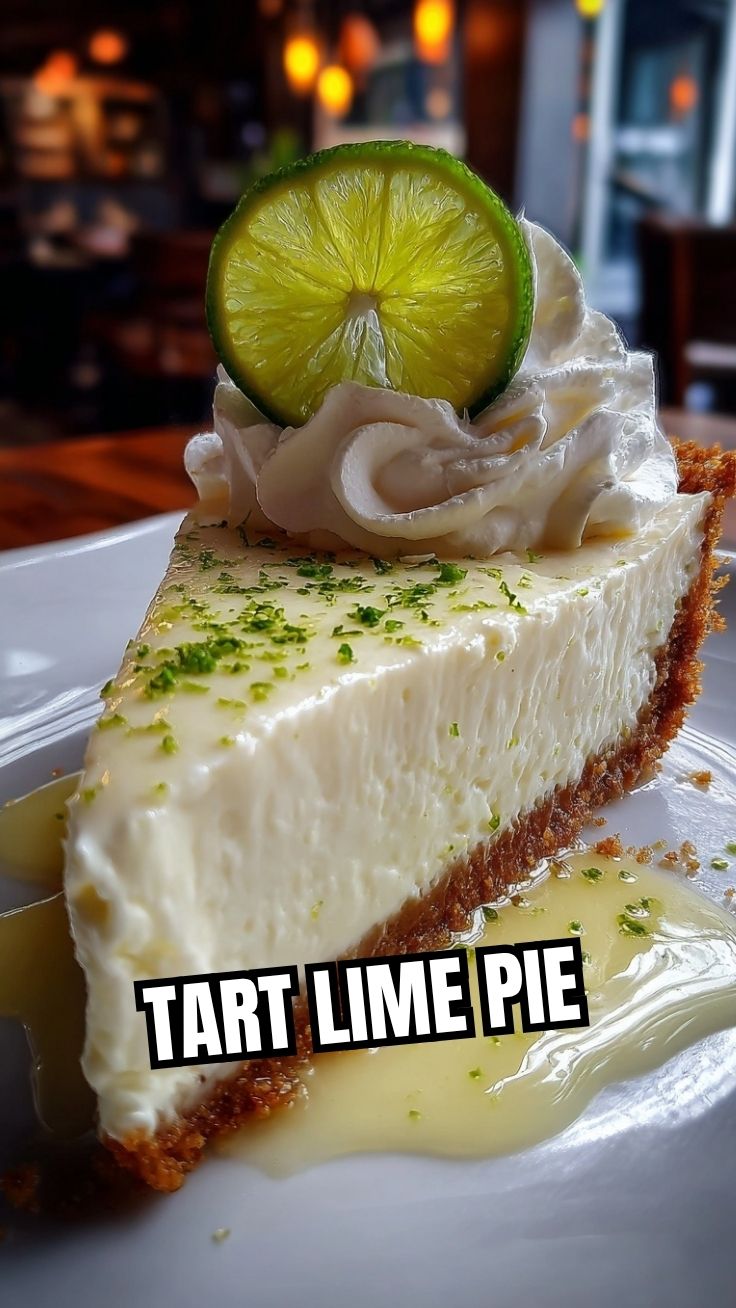
Have you ever tasted a dessert that instantly transports you to a tropical paradise with just one bite? That’s exactly what happens when you sink your fork into a perfectly chilled slice of Key Lime Pie. This iconic Florida dessert combines a buttery graham cracker crust with a luscious, tangy filling that balances sweetness and acidity in the most delightful way. While you could easily pick one up at a bakery, preparing this Key Lime Pie at home is not only surprisingly simple but also allows you to control the quality of ingredients and customize the flavor to your exact liking. Plus, the satisfaction of pulling a homemade masterpiece from your fridge is unmatched. Whether you’re a seasoned baker or a complete beginner, this guide will walk you through every step to ensure your key lime creation turns out perfectly creamy, refreshing, and utterly delicious.
Ingredients & Kitchen Tools
To create the perfect pie, gather these essentials:
For the Crust:
– 1½ cups graham cracker crumbs (about 12 full crackers) – Provides a sweet, crunchy base.
– ¼ cup granulated sugar – Adds sweetness and helps bind the crust.
– 6 tablespoons unsalted butter, melted – Holds the crumbs together and adds richness.
For the Filling:
– 1 can (14 oz) sweetened condensed milk – The key to a silky, creamy texture.
– 4 large egg yolks – Thickens the filling and adds a velvety richness.
– ½ cup fresh key lime juice (about 20 key limes or 4-5 regular limes) – The star ingredient for that iconic tartness. Substitution: Use bottled key lime juice for convenience, though fresh is brighter.
For the Topping:
– 1 cup heavy whipping cream – For a light, cloud-like topping.
– 2 tablespoons powdered sugar – Sweetens the cream without graininess.
– ½ teaspoon vanilla extract – Enhances flavor.
Kitchen Tools: 9-inch pie pan, mixing bowls, whisk or electric mixer, zester (optional), measuring cups, rubber spatula, and plastic wrap.
Prep Time & Cooking Schedule
– Prep Time: 20 minutes – Zesting and juicing limes, mixing crust, and whisking filling.
– Chill Time: Crust freezes for 15 minutes, then pie chills for at least 4 hours (overnight is best).
– Total Time: 4 hours 35 minutes (includes chilling).
Plan ahead! This pie absolutely needs time to set in the refrigerator. Make it the day before serving for the best texture and flavor development. The acidity of the key lime juice reacts with the condensed milk to thicken the filling naturally without baking (in the no-bake version) or with a short bake (as covered below).
Step-by-Step Instructions
1. Prepare the Crust: Preheat your oven to 350°F (175°C). In a bowl, combine graham cracker crumbs and sugar. Pour in melted butter and mix until all crumbs are moistened. Press firmly into the bottom and up the sides of a 9-inch pie pan. Use the bottom of a measuring cup to pack it tightly. Bake for exactly 8 minutes until lightly golden, then let cool completely.
2. Make the Filling: In a large bowl, whisk the egg yolks until thick and pale yellow (about 2 minutes). Slowly add the sweetened condensed milk while whisking constantly. Gradually pour in the fresh key lime juice and whisk until fully incorporated. The mixture will thicken almost immediately—this is the magic of the acid reacting with the milk. Temperature tip: Ensure ingredients are at room temperature for a smooth emulsion.
3. Assemble and Bake: Pour the filling into the cooled crust and spread evenly. Bake at 350°F for 12-15 minutes, just until the edges are set but the center still jiggles slightly. Overbaking leads to cracks. Texture cue: The filling should wobble like firm Jell-O when gently shaken.
4. Cool and Chill: Remove from oven and let cool on a wire rack for 30 minutes. Then cover with plastic wrap (directly touching the surface to prevent a skin) and refrigerate for at least 4 hours. The pie continues to set as it chills, allowing the Key Lime Pie to achieve its signature creamy slice. During this time, the key lime flavor also mellows and deepens.
5. Make the Whipped Topping: Just before serving, whip the heavy cream, powdered sugar, and vanilla until soft peaks form. Spread or pipe over the chilled pie.
Nutritional Benefits & Advantages
This tangy dessert offers surprising perks. Key limes are rich in vitamin C (boosting immunity and skin health) and antioxidants that fight inflammation. The sweetened condensed milk provides calcium for bone health, while egg yolks deliver choline for brain function. While moderate in sugar, this pie’s portion-controlled slices make it a satisfying treat that won’t derail your diet. Compared to store-bought versions, homemade pie contains no preservatives or artificial flavors.
Tips Variations & Cooking Advice
– Gluten-Free Version: Use gluten-free graham crackers or crushed almonds with sugar and butter.
– Dairy-Free Version: Replace butter with coconut oil, and use coconut cream-based condensed milk (available in health food stores). Use chilled coconut cream for topping instead of whipped cream.
– Flavor Variations: Add 1 tablespoon lime zest to the filling for extra punch. Swirl in 2 tablespoons of passion fruit puree for a tropical twist.
– Portion Tip: For mini pies, press crust into a muffin tin and reduce baking time to 8 minutes.
Common Mistakes to Avoid
– Watery filling: This happens when overmixing or using cold ingredients. Always whisk gently and bring eggs/limes to room temperature.
– Cracks on top: Overbaking is the culprit. Pull the pie while the center still jiggles.
– Soggy crust: Pack crumbs tightly and bake fully before adding filling. Let it cool completely first.
– Grainy texture: Using bottled juice packaged with preservatives can cause separation. Fresh juice is best.
Storage & Meal Prep Tips
Store leftover pie covered in the refrigerator for up to 3 days. Do not freeze the assembled pie with whipped topping—moisture will ruin the texture. For meal prep, make the crust and filling separately: freeze the crust (wrap tightly) for up to 1 month, and prepare filling the day of serving. Leftover slices can be frozen without topping for up to 2 months; thaw overnight in the fridge and add fresh whipped cream before serving.
Conclusion
Mastering this Key Lime Pie at home is a rewarding experience that yields a dessert far superior to anything from a box. With its buttery crust, silky filling, and cloud-like topping, this classic treat is guaranteed to impress at any gathering. Remember, the key lime is the true star here—its bright, tangy flavor transforms simple ingredients into something magical. Don’t be intimidated by the prep; the steps are straightforward, and the payoff is spectacular. Try this recipe this weekend, share your creation on social media, or explore more citrus-based desserts to continue your baking adventure!
FAQs
1. Can I use regular limes instead of key limes?
Yes! Regular Persian limes work well—just note they are less tart and floral than key limes. Use ½ cup juice as directed.
2. Why is my filling runny after 4 hours?
The pie needs at least 4 hours, but overnight chill is ideal. If still runny, the baking time was too short. Bake until edges set, then chill fully.
3. Can I make this pie no-bake?
Absolutely. Omit baking after adding filling and chill for 6-8 hours (or overnight). The acid will thicken the mixture naturally.
4. How do I prevent my whipped cream from deflating?
Use very cold cream and chill your bowl/beaters for 15 minutes. Whip on medium speed and stop at soft peaks—over-whipping turns it to butter.
5. Can I substitute lime juice with bottled lemon juice?
It will change the flavor profile completely. While citrusy, it won’t capture the unique taste of key lime. Stick with fresh or bottled key lime juice for authenticity.
Quick way to grow Key Lime Pie in 3 StepsKey Lime Pie
Ingredients
Equipment
Method
- Combine graham cracker crumbs and melted butter, then press the mixture into a 9-inch pie plate to form the crust.
- Whisk together sweetened condensed milk and Key lime juice until well combined and smooth.
- Pour the filling into the prepared crust and bake at 350°F (175°C) for 15-20 minutes, then chill for at least 2 hours before serving.