The Ultimate Guide to Making Sizzling Fajitas (Chicken or Beef) at Home
Have you ever craved the sizzle and aroma of restaurant-style fajitas but hesitated to make them at home? You’re not alone. The magic of perfectly seasoned, tender meat paired with charred peppers and onions seems like a culinary feat reserved for professional kitchens. But here’s the secret: crafting restaurant-quality Fajitas (Chicken or Beef) at home is not only achievable but also deeply rewarding. By mastering the right technique and using a bold homemade fajita seasoning, you can control the quality of ingredients, customize the spice level, and save money. This data-driven guide will walk you through every step, ensuring your fajitas are juicy, smoky, and packed with flavor. Let’s fire up the skillet!
Ingredients & Kitchen Tools
To create authentic Fajitas (Chicken or Beef), you need the right components and tools. Here’s your checklist:
Ingredients:
– Protein (1.5 lbs): Boneless, skinless chicken breasts or thighs, or flank steak (or skirt steak). Slice against the grain for tenderness.
– Bell Peppers (2-3): Mix red, yellow, and green for sweetness and color. Slice into ½-inch strips.
– Onion (1 large): Yellow or white onion, sliced into thin wedges.
– Oil (2-3 tbsp): Avocado or vegetable oil (high smoke point).
– Lime Juice (2 tbsp): Freshly squeezed for acidity.
– Tortillas (8-10): Flour or corn, warmed.
– Toppings: Sour cream, guacamole, salsa, shredded cheese, cilantro.
For the Fajita Seasoning:
– 1 tbsp chili powder
– 1 tsp smoked paprika
– 1 tsp cumin
– ½ tsp garlic powder
– ½ tsp onion powder
– ½ tsp salt
– ¼ tsp black pepper
– Pinch of cayenne (optional)
Kitchen Tools:
– Cast-iron skillet or heavy-bottomed pan (essential for high-heat searing)
– Sharp chef’s knife
– Cutting board
– Mixing bowls
– Tongs
– Measuring spoons
Optional Substitutions:
– Protein: Use shrimp, portobello mushrooms (for vegetarian), or tofu.
– Peppers: Poblano or Anaheim for milder heat.
– Tortillas: Corn tortillas for gluten-free; lettuce wraps for low-carb.
Prep Time & Cooking Schedule
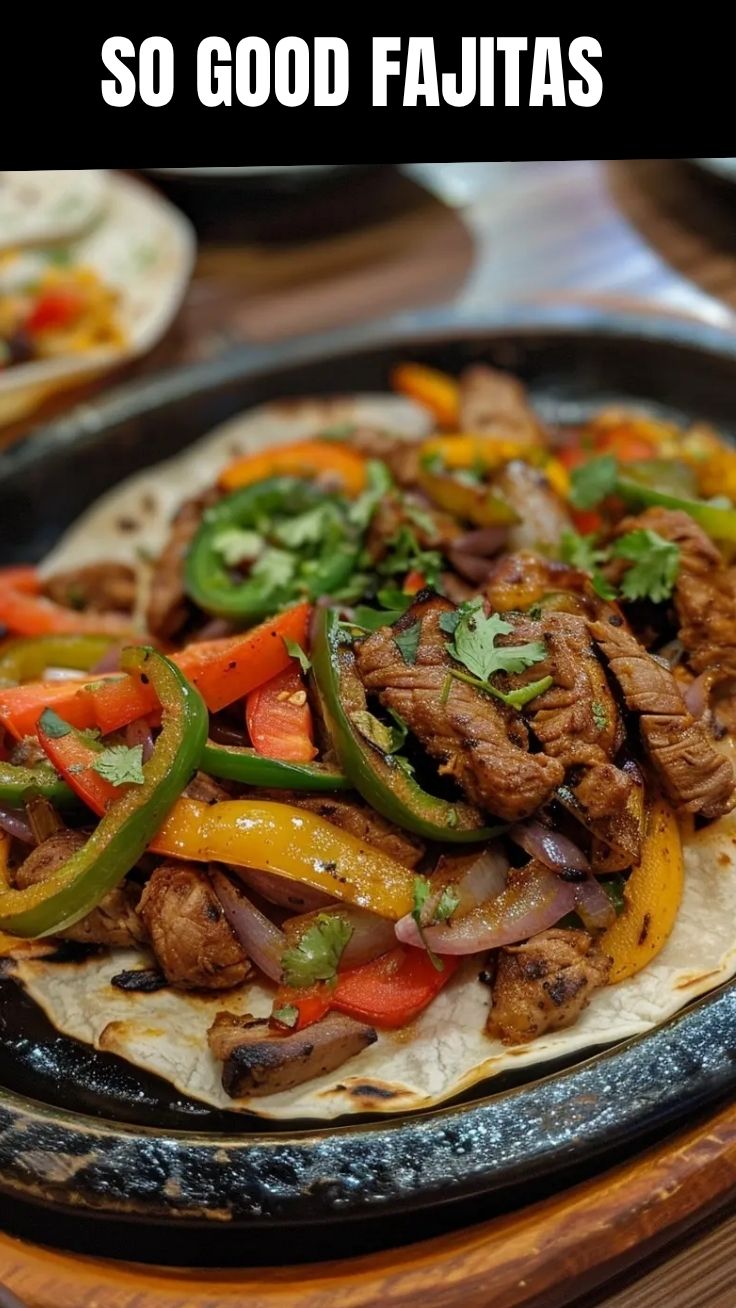
Total Estimated Time: 35–45 minutes
Active Prep: 15 minutes
Marinating Time: 15–30 minutes (optional but recommended)
Cooking Time: 15–20 minutes
Resting Time: 5 minutes (for meat)
Plan ahead: If you marinate the meat for 30 minutes, the total time extends to one hour. Use this time to prep your toppings and warm the tortillas.
Step-by-Step Instructions
Follow these precise steps for perfectly seared Fajitas (Chicken or Beef):
1. Prepare the Meat
Slice your chosen protein into thin strips (about ¼-inch thick). For chicken, pound breasts to even thickness first. For beef, slice against the grain to ensure tenderness. Pat dry with paper towels to promote browning.
2. Make the Fajita Seasoning
In a small bowl, whisk together chili powder, smoked paprika, cumin, garlic powder, onion powder, salt, black pepper, and cayenne. This homemade blend is your ticket to deep, smoky flavor without artificial additives. Use 2 tablespoons per 1.5 lbs of meat.
3. Marinate the Meat
Toss the sliced meat with 2 tbsp oil, 2 tbsp lime juice, and the fajita seasoning. Mix well to coat. Let rest for 15–30 minutes at room temperature. This short marination tenderizes and infuses flavor.
4. Heat the Skillet
Place a cast-iron skillet over high heat for 3–4 minutes until smoking hot. Add 1 tbsp oil. High heat is non-negotiable for that charred, sizzling crust.
5. Cook the Meat
Working in two batches (to avoid overcrowding), add the meat in a single layer. Cook without moving for 2–3 minutes until deeply browned. Flip and cook another 1–2 minutes. Remove and tent with foil to rest.
6. Sauté Vegetables
Reduce heat to medium-high. Add 1 tbsp oil, then the sliced peppers and onions. Cook for 4–5 minutes, stirring occasionally, until softened with charred edges. Season lightly with salt and a pinch of the fajita seasoning.
7. Reheat and Serve
Return the meat to the skillet with the vegetables. Toss to combine and heat through for 1 minute. Serve immediately on warm tortillas with your favorite toppings.
Cooking tip: If your meat releases too much liquid, drain it off before returning to the skillet to prevent steaming.
Nutritional Benefits & Advantages
This recipe is not just delicious—it’s nutrient-dense. A serving (3 oz meat + ½ cup veggies, no tortilla/toppings) contains approximately:
– Calories: 220–280
– Protein: 25–30g (high-quality for muscle repair)
– Fiber: 3–4g from peppers and onions
– Vitamin C: 150% DV from bell peppers (immune support)
– Iron: 15% DV from beef (or 8% from chicken)
The homemade fajita seasoning avoids excess sodium and preservatives found in store-bought packets. Smoked paprika and cumin provide antioxidants, while lime juice boosts iron absorption. This dish fits gluten-free, low-carb (with lettuce wraps), and dairy-free diets effortlessly.
Tips Variations & Cooking Advice
– Flavor Variations: Add sliced jalapeños for heat, or pineapple chunks for a sweet-tangy twist (Hawaiian-style).
– Ingredient Swaps: Use chicken thighs for juicier texture; beef sirloin is leaner but less tender.
– Alternative Methods: Grill the meat and veggies in a grill basket over high heat for smoky char. Or use an air fryer at 400°F for 8–10 minutes, shaking halfway.
– Dietary Adaptations: For dairy-free, skip cheese and sour cream; use cashew cream. For low-carb, serve over cauliflower rice or in romaine lettuce boats.
– Batch Cooking: Double the recipe and freeze cooked meat-veggie mix in portions for quick weeknight meals.
Common Mistakes to Avoid
1. Overcrowding the Pan → Causes steaming instead of searing. Cook in batches.
2. Slicing Meat Too Thick → Results in chewy, unevenly cooked strips. Aim for ¼-inch.
3. Underseasoning → Fajitas need bold spice. Don’t skimp on the fajita seasoning.
4. Cold Tortillas → Tortillas become stiff and crack. Warm them in a dry skillet for 30 seconds per side or wrap in foil and heat in a 300°F oven for 10 minutes.
5. Skipping the Rest → Tented meat stays juicy. Resting for 5 minutes redistributes juices.
Storage & Meal Prep Tips
– Refrigeration: Store cooked meat and veggies in an airtight container for up to 4 days.
– Freezing: Freeze the cooked mix in freezer-safe bags for up to 3 months. Thaw overnight in the fridge.
– Reheating: For best texture, reheat in a hot skillet over medium-high heat for 2–3 minutes. Avoid microwaving, which makes meat rubbery.
– Meal Prep: Prep the fajita seasoning in a jar (keeps 6 months). Slice veggies and store in water to stay crisp for 2 days.
Conclusion
Mastering Fajitas (Chicken or Beef) at home is a game-changer for weeknight dinners and entertaining. With a bold homemade fajita seasoning and the simple technique of high-heat searing, you can consistently produce juicy, smoky, and vibrant results. The nutritional boost from lean protein and colorful vegetables makes this a guilt-free indulgence. Now it’s your turn—fire up that skillet, gather your toppings, and create a sizzling masterpiece. Share your fajita creations on social media or comment below with your favorite twist. For more Mexican-inspired recipes, explore our guide to authentic street tacos!
FAQs
1. Can I use pre-made fajita seasoning instead of homemade?
Yes, but homemade allows you to control salt and spice levels. If using store-bought, reduce added salt in the recipe.
2. How do I prevent the meat from drying out?
Don’t overcook: Chicken should reach 165°F, beef to 130–140°F (medium-rare). Always rest after cooking, and slice against the grain.
3. Can I make this dish vegetarian?
Absolutely! Replace meat with portobello mushrooms, extra-firm tofu, or jackfruit. Use the same fajita seasoning and cooking method.
4. Why are my fajitas watery?
You likely overcrowded the pan, causing steam. Cook in batches and ensure your skillet is screaming hot before adding ingredients.
5. What’s the best tortilla for fajitas?
Flour tortillas are traditional for their pliability, but corn tortillas (gluten-free) work well. Warm them properly to avoid cracking.
Proven way to grow delicious Fajitas (Chicken or Beef)
Ingredients
Equipment
Method
- Slice the chicken or beef into thin strips and combine with lime juice, olive oil, chili powder, cumin, paprika, garlic powder, onion powder, salt, and black pepper in a bowl. Mix well to ensure the meat is fully coated, then cover and refrigerate for at least 30 minutes, or up to 2 hours for enhanced flavor.
- Slice the bell peppers and onion into thin strips. In a large skillet or cast-iron pan, heat 1 tablespoon of olive oil over medium-high heat. Add the sliced vegetables to the pan, season with salt and pepper, and sauté for 5-7 minutes until they are tender-crisp and slightly charred.
- Remove the vegetables from the skillet and set them aside. Add the marinated meat to the same hot skillet, ensuring not to overcrowd the pan; cook in batches if necessary. Cook the meat for 3-5 minutes per side, or until it is fully cooked through and has a nice char.
- Once the meat is cooked, return the sautéed vegetables to the skillet and toss everything together to combine. Warm the flour tortillas according to package directions. Serve the fajita mixture in the warm tortillas with your favorite toppings such as salsa, sour cream, guacamole, and shredded cheese.