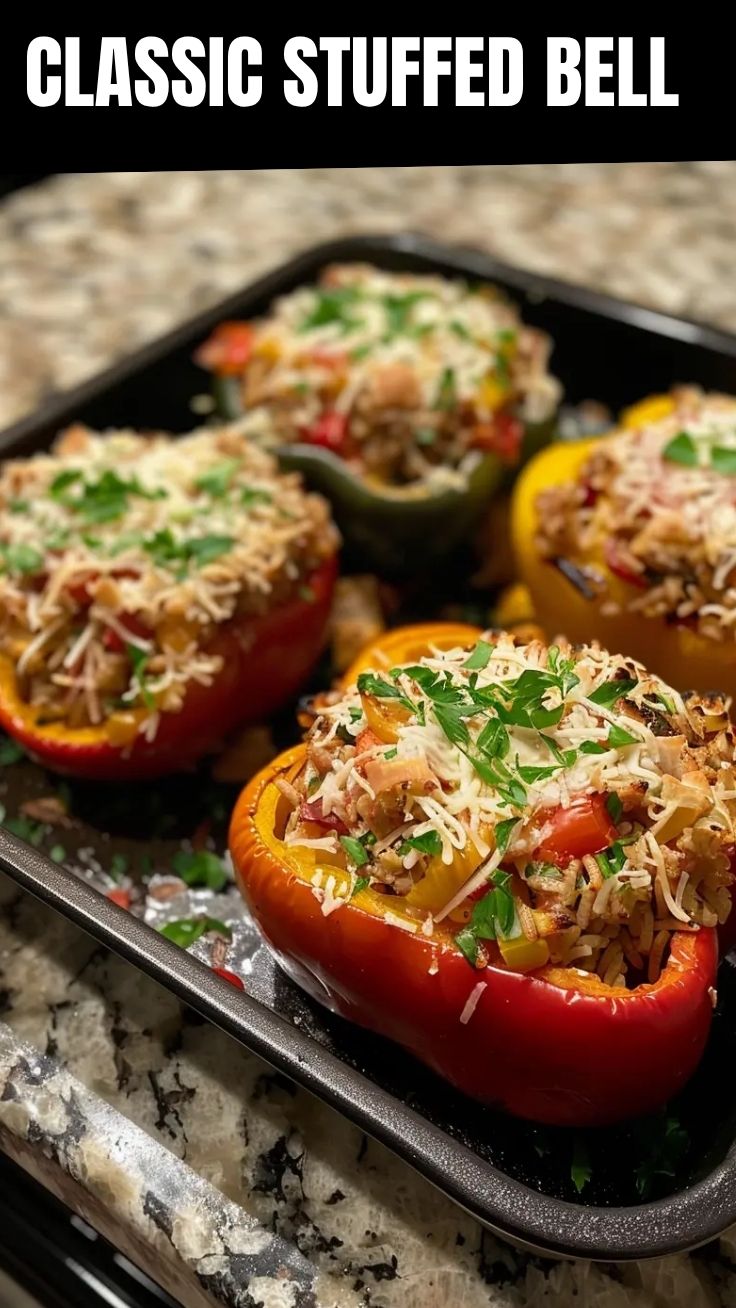
Why Everyone Should Master This Classic Comfort Dish at Home
Have you ever wondered why restaurant versions of Stuffed Bell Peppers often lack that homemade soul? The answer lies in control—control over ingredients, spice levels, and cooking techniques. When you prepare Stuffed Bell Peppers at home, you’re not just following a recipe; you’re crafting a personalized meal that respects dietary needs, budget constraints, and flavor preferences. The star ingredient—bell peppers—brings natural sweetness and vibrant color, but their true potential unlocks only when properly prepared. From selecting the freshest peppers at the market to balancing fillings like seasoned ground meat, rice, and melted cheese, homemade Stuffed Bell Peppers deliver unmatched nutrition, versatility, and satisfaction. Whether you’re cooking for a busy weeknight or a special family dinner, mastering this dish ensures you’ll never settle for bland, soggy versions again.
Ingredients & Kitchen Tools
Main Ingredients
– 6 large bell peppers (any color—red for sweetness, green for earthiness)
– 1 lb ground beef or turkey (or plant-based crumbles for vegetarian option)
– 1 cup cooked white or brown rice (absorbs flavors and adds texture)
– 1 medium onion, diced (adds savory depth)
– 3 garlic cloves, minced (essential for aromatic base)
– 1 can (15 oz) tomato sauce (divided—half for filling, half for topping)
– 1 cup shredded cheese (cheddar, mozzarella, or pepper jack)
– 1 teaspoon dried oregano (Mediterranean flair)
– 1 teaspoon smoked paprika (subtle smokiness)
– Salt and black pepper to taste
– 2 tablespoons olive oil (for sautéing)
Kitchen Tools
– Large pot (for blanching peppers)
– Sharp chef’s knife and cutting board
– Medium skillet (for sautéing filling)
– Mixing bowl (for combining ingredients)
– 9×13 baking dish (fits all peppers snugly)
– Aluminum foil (to prevent drying during baking)
– Serving spoon and tongs
Prep Time & Cooking Schedule
– Prep Time: 20 minutes (washing, seeding, dicing, sautéing)
– Cook Time: 35–40 minutes (blanching + baking)
– Resting Time: 5 minutes after baking (for juices to redistribute)
– Total Time: Approximately 1 hour
Planning Tip: You can cook the rice a day ahead and refrigerate. Pre-chop onions and garlic the night before to cut morning prep time in half. This dish fits perfectly into a Sunday meal prep routine—make extra for Monday lunches.
Step-by-Step Instructions
1. Preheat oven to 375°F (190°C). Bring a large pot of salted water to a boil.
2. Prepare the bell peppers. Cut tops off and remove seeds/membranes. Reserve tops for garnish if desired.
3. Blanch the peppers. Submerge them in boiling water for 3 minutes. Transfer to ice water to stop cooking. Drain upside down on paper towels.
4. Sauté aromatics. Heat olive oil in a skillet over medium heat. Cook onions 4 minutes until translucent. Add garlic, cook 1 minute.
5. Brown the meat. Add ground meat, breaking it up. Cook until no longer pink (about 5–7 minutes). Drain excess fat if needed.
6. Combine the filling. In a mixing bowl, mix cooked meat-onion mixture with rice, half the tomato sauce, oregano, paprika, salt, pepper, and half the shredded cheese. Taste and adjust seasoning.
7. Stuff the peppers. Place peppers upright in baking dish. Spoon filling evenly into each pepper, pressing gently. Top with remaining tomato sauce and shredded cheese.
8. Bake covered. Cover dish with foil and bake 25 minutes. Remove foil and bake another 10–15 minutes until cheese is bubbly and golden.
9. Rest and serve. Let sit 5 minutes. Garnish with fresh parsley or chopped pepper tops.
Pro Tip: For crisp-tender bell peppers, don’t over-blanch—3 minutes is the sweet spot. To make perfect Stuffed Bell Peppers, check internal temperature reaches 165°F (74°C) for meat fillings.
Nutritional Benefits & Advantages
Each serving of Stuffed Bell Peppers provides approximately 350–400 calories, 25g protein, 30g carbohydrates, and 18g fat (values vary based on ingredients). Bell peppers are exceptionally rich in vitamin C—one medium pepper provides over 150% of daily recommended intake. They also supply vitamin A (beta-carotene), vitamin B6, and antioxidants like quercetin and lutein. The combination of lean protein and complex carbohydrates from rice promotes stable blood sugar levels and prolonged satiety. Using lean ground turkey or plant-based protein reduces saturated fat while maintaining satisfying texture. This dish is naturally gluten-free (ensure no cross-contamination with grains) and can be adapted for low-carb diets by replacing rice with cauliflower rice or quinoa for extra fiber.
Tips, Variations & Cooking Advice
Flavor Twists
– Mexican-inspired: Add cumin, chili powder, black beans, corn, and top with salsa verde.
– Mediterranean: Use ground lamb, feta cheese, olives, and fresh mint instead of oregano.
– Italian: Replace oregano with basil, add Parmesan, and use marinara sauce.
Dietary Adaptations
– Vegetarian: Swap meat for lentils, quinoa, or crumbled tofu seasoned with soy sauce.
– Dairy-free: Omit cheese or use vegan cheese alternatives; nutritional yeast adds umami.
– Low-carb: Replace rice with riced cauliflower (squeeze out excess moisture).
Cooking Methods
– Instant Pot: Brown filling using sauté function, stuff peppers, add ½ cup water, pressure cook 8 minutes, then quick release.
– Air Fryer: Air fry stuffed peppers at 350°F for 15–18 minutes; brush tops with oil for browning.
Common Mistakes to Avoid
1. Skipping the blanching step – Raw peppers remain crunchy and release excess water, making filling watery. Always blanch for 3 minutes.
2. Overfilling the peppers – Filling expands during baking. Leave ½ inch space at the top to prevent overflow.
3. Using dry, leftover rice – Freshly cooked rice binds the filling. If using day-old rice, add 2–3 tablespoons broth to rehydrate.
4. Baking uncovered from start – The exposed cheese burns while peppers remain undercooked. Cover for the first 25 minutes.
5. Not draining meat fat – Excess grease saturates the filling. Use lean meat and drain thoroughly after browning.
Storage & Meal Prep Tips
– Refrigeration: Store cooled stuffed peppers in an airtight container for up to 4 days. Keep sauce separate if possible to prevent sogginess.
– Freezing: Wrap each pepper individually in plastic wrap, then aluminum foil. Freeze for up to 3 months. Thaw overnight in refrigerator before reheating.
– Reheating: Microwave on medium power for 2–3 minutes (add a splash of water). Oven reheat at 350°F for 15 minutes covered with foil. Air fry at 350°F for 8 minutes for a crispy top.
– Meal prep assembly: Prepare filling and blanch peppers up to 2 days ahead. Stuff just before baking for freshest texture.
Conclusion
Mastering homemade Stuffed Bell Peppers transforms a simple casserole into a reliable, nutritious staple. By controlling every element—from the sweetness of ripe bell peppers to the seasoning in your filling—you create a dish that adapts to your family’s cravings and dietary needs. The technique of blanching ensures perfect tenderness, while smart variations keep the recipe exciting week after week. Whether you serve it with a side salad or crusty bread, this meal delivers comfort and confidence in every bite. Try this recipe tonight, share your creations, and discover why homemade always wins.
FAQs
Q: Can I use different colored bell peppers?
A: Absolutely. Red peppers are sweetest and most tender; green peppers have firmer texture and slightly bitter notes. For best results, mix colors for visual appeal and balanced flavor.
Q: Why are my stuffed peppers watery?
A: This usually happens when peppers aren’t blanch properly (or skipped) or when filling contains too much moisture. Drain canned tomatoes, squeeze excess liquid from sautéed mushrooms, and don’t overcook the filling.
Q: Can I make this ahead for a party?
A: Yes! Assemble peppers completely (without baking) up to 24 hours ahead. Refrigerate covered. Add 10 extra minutes to baking time if starting from cold.
Q: What if I don’t have tomato sauce?
A: Substitute equal parts crushed tomatoes plus 1 tablespoon tomato paste, or use pasta sauce (reduce additional salt). For creamier version, try fire-roasted diced tomatoes blended smooth.
Q: How do I prevent cheese from burning?
A: Add cheese during the last 10–15 minutes of baking, or cover with foil for the first 25 minutes. If cheese browns too quickly, tent with foil and reduce oven temperature by 25°F.
Best way to grow Stuffed Bell Peppers with 7 secrets
Ingredients
Equipment
Method
- Secret 1: Cut bell peppers in half lengthwise and remove seeds; for extra tenderness, blanch them in boiling water for 3-5 minutes, then drain and pat dry.
- Secret 4: Cook rice according to package instructions, ensuring it is slightly undercooked as it will continue cooking in the oven.
- Secret 2: In a large skillet over medium heat, brown the ground beef, then drain any excess fat and add diced onion and minced garlic, cooking until softened.
- Secret 3 & 5: In a large bowl, combine the browned meat mixture, cooked rice, tomato sauce, beef broth, Italian seasoning, salt, and black pepper, mixing until well combined for a flavorful filling with a secret spice blend.
- Carefully stuff each bell pepper half generously with the prepared filling.
- Arrange the stuffed bell peppers in a baking dish and pour any remaining tomato sauce or a little extra broth around them.
- Secret 6: Cover the baking dish with foil and bake at 375°F (190°C) for 25 minutes to ensure moisture retention and even cooking.
- Remove the foil, sprinkle shredded mozzarella cheese over each pepper, and continue baking for another 10-15 minutes, or until the cheese is melted and bubbly.
- Secret 7: Garnish with fresh chopped parsley before serving for a burst of fresh flavor and color.