Elevate Your Appetizer Game: The Ultimate Guide to Perfect Deviled Eggs
Ever wondered how to create those unbelievably creamy, perfectly seasoned Deviled Eggs that disappear in a flash at any gathering? Preparing this classic at home isn’t just about saving money; it’s about crafting a personalized, show-stopping appetizer that reflects your culinary flair. Forget bland, store-bought versions – with our comprehensive guide, you’ll master the art of making the best Deviled Eggs, transforming humble eggs into an irresistible delicacy. This recipe for Deviled Eggs is designed to help you create truly memorable Egg appetizers that will delight everyone.
Ingredients & Kitchen Tools
Crafting exceptional deviled eggs begins with quality ingredients and the right tools.
Ingredients:
- 6 large eggs: Ideally, choose eggs that are a few days old; they’re easier to peel. Fresh eggs can be a nightmare to peel cleanly.
- 1/4 cup mayonnaise: Use a good quality, full-fat mayonnaise for the best creaminess and flavor. Vegan mayonnaise can be substituted for a dairy-free option.
- 1 tsp Dijon mustard: Adds a tangy, slightly spicy depth. Yellow mustard can be used for a milder flavor, or a touch of spicy brown mustard for more kick.
- 1 tsp white vinegar: Brightens the flavor and helps emulsify the filling. Lemon juice is an excellent alternative.
- 1/4 tsp salt: Essential for seasoning; adjust to taste.
- 1/8 tsp black pepper: Freshly ground is always best.
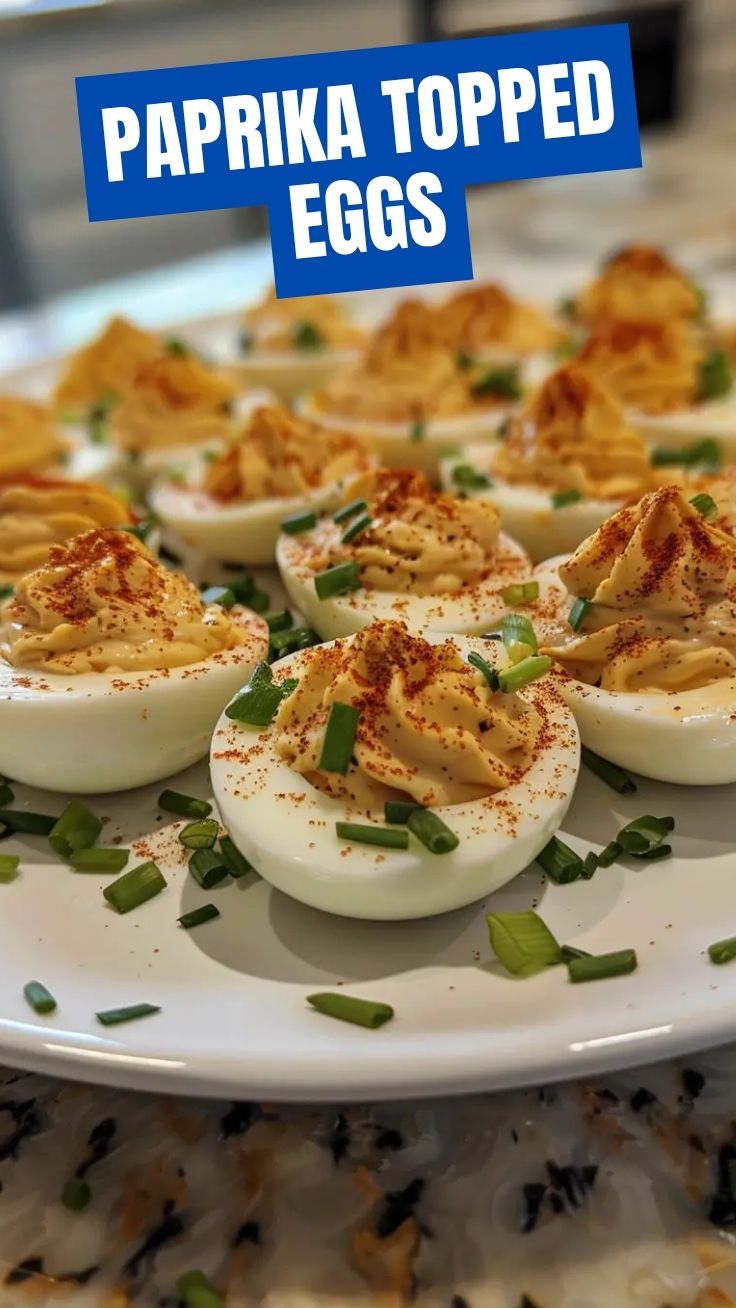
- Paprika (for garnish): Sweet, smoked, or hot paprika adds color and a subtle smoky note.
- Optional garnishes: Fresh chives (finely chopped), dill, crispy bacon bits, a sprinkle of cayenne pepper, or thinly sliced jalapeños for a spicy twist.
Kitchen Tools:
- Large saucepan with lid: For boiling the eggs.
- Slotted spoon: To transfer eggs safely.
- Bowl of ice water: Essential for stopping the cooking process and making peeling easier.
- Small mixing bowl: For the yolk mixture.
- Fork or potato masher: To mash the yolks smoothly.
- Rubber spatula: For mixing and scraping.
- Piping bag with a star tip (optional, but recommended): For an elegant presentation. A zip-top bag with a corner snipped off works just as well.
- Serving platter: For showcasing your beautiful deviled eggs.
Prep Time & Cooking Schedule
- Prep time: 15 minutes
- Cook time: 10-12 minutes (for boiling eggs)
- Chill time: 30 minutes (minimum, for flavors to meld)
Plan for about an hour from start to finish, allowing adequate time for chilling. The chilling phase is crucial for firming up the filling and allowing the flavors to fully develop, resulting in a more cohesive and delicious end product.
Step-by-Step Instructions
1. Boil the Eggs: Gently place eggs in a large saucepan. Add enough cold water to cover the eggs by about an inch. Bring the water to a rolling boil over high heat. Once boiling, immediately turn off the heat, cover the pan, and let the eggs sit in the hot water for 10-12 minutes for firm, perfectly cooked yolks.
2. Ice Bath & Peel: Prepare a large bowl of ice water. Using a slotted spoon, carefully transfer the cooked eggs from the hot water to the ice bath. Let them cool completely for at least 5 minutes. This stops the cooking process and helps with easier peeling. Once cooled, gently tap and roll each egg on a hard surface to crack the shell, then peel under cool running water.
3. Halve and Scoop: Once peeled, carefully slice each egg in half lengthwise. Gently scoop out the bright yellow yolks into a small mixing bowl. Place the hollowed-out egg white halves on your serving platter.
4. Mash and Mix: Using a fork or potato masher, thoroughly mash the egg yolks until smooth and no lumps remain.
5. Create the Filling: Add the mayonnaise, Dijon mustard, white vinegar, salt, and black pepper to the mashed yolks. Mix well with a rubber spatula until the mixture is completely smooth and creamy. Taste and adjust seasonings as needed – you might want a pinch more salt or mustard. This is where your Deviled Eggs start to take their delectable form.
6. Fill the Whites: Spoon the yolk mixture into a piping bag fitted with a star tip, or into a zip-top bag with a corner snipped off. Carefully pipe or spoon the filling into each egg white half, creating an attractive swirl or simply a neat mound. These beautiful Egg appetizers are almost ready!
7. Garnish and Chill: Lightly sprinkle each filled egg with paprika for color. If desired, add other garnishes like fresh chives or dill. Cover the platter loosely with plastic wrap and refrigerate for at least 30 minutes to allow the flavors to meld and the filling to firm up.
Nutritional Benefits & Advantages
Eggs are a powerhouse of nutrition! They are an excellent source of high-quality protein, essential for muscle repair and growth. Rich in vitamins D, B12, and A, as well as minerals like iron and selenium, eggs support bone health, cognitive function, and immune strength. The healthy fats in the yolk contribute to satiety, making deviled eggs a satisfying and nutritious snack or appetizer.
Tips, Variations & Cooking Advice
- Creamier Filling: For an extra-creamy texture, pass your mashed yolk mixture through a fine-mesh sieve before adding the wet ingredients.
- Flavor Boosts:
* Spicy: Add a dash of hot sauce, finely diced jalapeños, or a pinch of cayenne pepper.
* Herby: Mix in fresh chopped dill, chives, or parsley.
* Smoky: Incorporate a touch of smoked paprika or a tiny bit of liquid smoke.
* Tangy: A splash of pickle juice or capers can add a delightful brine.
- Dietary Adaptations:
* Dairy-Free: Use a good quality vegan mayonnaise.
* Lower Fat: While full-fat mayo offers the best texture, you can experiment with a reduced-fat version, though the creaminess might differ.
- Perfect Peeling Trick: After the ice bath, gently crack the egg all around its circumference, then roll it to loosen the shell. Peel under cold running water – the water helps seep under the membrane, making it easier to separate.
Common Mistakes to Avoid
- Overcooking Eggs: Leads to green/grayish yolks and a rubbery texture. Follow the timing precisely for perfect hard-boiled eggs.
- Underseasoning: The filling needs adequate salt and tang to shine. Taste and adjust!
- Warm Eggs: Attempting to fill warm egg whites will make the filling melt and become messy. Ensure eggs are fully chilled.
- Using Very Fresh Eggs: Extremely fresh eggs are notorious for being difficult to peel, often taking chunks of the white with the shell. Use eggs that are at least a few days old.
Storage & Meal Prep Tips
Deviled Eggs are best enjoyed within 24-48 hours. Store them in an airtight container in the refrigerator to prevent them from drying out or absorbing other odors. For presentation, you can cover your serving platter with plastic wrap, but ensure it doesn’t touch the filling. They do not freeze well, as the texture of the whites becomes rubbery and the filling can separate. For meal prep, you can boil and peel the eggs a day ahead, keeping them in the fridge. Prepare the filling just before serving for the freshest taste and best texture.
Conclusion
Mastering the art of Deviled Eggs is a rewarding culinary achievement, transforming a simple ingredient into a sophisticated and satisfying appetizer. With this detailed guide, you’re now equipped to create flawless Deviled Eggs that will impress at any occasion. We encourage you to experiment with variations and make these delicious Egg appetizers truly your own. Share your creative takes in the comments below – we’d love to hear how you elevate this classic!
FAQs
Q1: How do I prevent my egg yolks from turning green?
A1: The green ring around the yolk is caused by overcooking. Ensure you stick to the recommended cooking time of 10-12 minutes and immediately transfer the eggs to an ice bath to stop the cooking process.
Q2: Can I make deviled eggs ahead of time?
A2: Yes, partially. You can boil and peel the eggs up to 2 days in advance, storing them in the refrigerator. Prepare the filling and assemble the deviled eggs up to 24 hours before serving for the best quality, but ideally, assemble them closer to serving time.
Q3: What can I use if I don’t have a piping bag?
A3: A simple zip-top bag works perfectly! Just spoon the filling into one corner of the bag, snip off the very tip of that corner, and pipe away.
Q4: My filling is too thin/thick. How can I fix it?
A4: If the filling is too thin, add a bit more mashed yolk (if you have any extra) or a tiny pinch of cornstarch (though this can alter texture slightly). If it’s too thick, add a small amount more mayonnaise, a splash of milk, or additional pickle juice until it reaches your desired consistency.
Q5: What are some unique garnish ideas?
A5: Beyond paprika, consider crumbled bacon, a tiny piece of smoked salmon, a caper, a very thin slice of radish, a sprig of fresh dill, or a few grains of coarse sea salt.
Proven way to grow 5 Deviled Eggs Recipes
Ingredients
Equipment
Method
- Place eggs in a single layer in a saucepan and cover with cold water by 1 inch. Bring to a boil, then immediately turn off the heat; cover and let stand for 10-12 minutes.
- Drain the hot water and run cold water over the eggs until they are completely cool; peel the cooled eggs.
- Slice each egg in half lengthwise and carefully remove the yolks, placing them in a medium bowl.
- Mash the yolks with a fork until smooth, then add mayonnaise, mustard, vinegar, salt, and pepper; mix well.
- Spoon or pipe the yolk mixture back into the egg white halves; garnish with a sprinkle of paprika before serving.