The Secret to Perfectly Soft and Fluffy Dinner Rolls: A Step-by-Step Guide
Have you ever pulled a tray of golden, butter-glazed rolls from the oven, only to watch them deflate into dense hockey pucks within minutes? If so, you’re not alone. Achieving bakery-quality Dinner Rolls at home is a culinary milestone worth mastering—not just for the bragging rights, but for the unmatched comfort of pulling apart a warm, pillowy roll at your dinner table. Preparing these Dinner Rolls yourself ensures you control every ingredient, avoid preservatives, and customize the flavor to your liking. Plus, the process of shaping and baking homemade dinner rolls is deeply therapeutic—a small act of mindfulness that rewards you with tangible, delicious results. In this guide, we’ll walk through every step, from mixing the dough to brushing on the final butter glaze, so you can serve rolls that rival any bakery.
Ingredients & Kitchen Tools
For the Dough:
– 3½ cups (440g) all-purpose flour – Provides structure; bread flour can be substituted for a chewier texture.
– 1 packet (2¼ tsp) active dry yeast – The rising agent; ensure it’s fresh for best results.
– ½ cup (120ml) warm milk (110°F/43°C) – Activates yeast; use whole milk for richness or plant-based milk for dairy-free.
– ¼ cup (50g) granulated sugar – Feeds yeast and adds slight sweetness.
– 1 large egg – Enriches the dough; can replace with ¼ cup unsweetened applesauce for vegan.
– 4 tbsp (56g) unsalted butter, softened – Adds tenderness; coconut oil works for dairy-free.
– 1 tsp salt – Balances sweetness and strengthens gluten.
For the Glaze:
– 2 tbsp (28g) melted butter – Brushed post-bake for a glossy, soft crust.
Essential Tools:
– Stand mixer with dough hook (or large bowl + wooden spoon)
– Measuring cups and spoons
– Kitchen scale (recommended for accuracy)
– 9×13-inch baking dish or two 8-inch round pans
– Clean kitchen towel or plastic wrap
– Pastry brush for butter glaze
Prep Time & Cooking Schedule
| Task | Time Needed | Notes |
|——|————-|——-|
| Yeast activation | 5–10 minutes | Look for frothy bubbles on milk surface |
| Dough mixing & kneading | 10–12 minutes | Use stand mixer on medium speed; dough should be smooth and elastic |
| First rise (bulk fermentation) | 1–1.5 hours | Until doubled in size, in a warm draft-free spot (75°F/24°C ideal) |
| Shaping rolls | 10–15 minutes | Divide into 12–15 equal pieces; roll into smooth balls |
| Second rise (proofing) | 45–60 minutes | Rolls should puff up and touch each other in the pan |
| Baking | 18–22 minutes at 375°F (190°C) | Gold-brown tops; internal temp 190°F (88°C) |
| Cooling | 10 minutes in pan | Then transfer to wire rack to steam escape |
Pro Tip: Start your dough about 3 hours before you plan to serve. If preparing ahead, let the dough do its first rise in the fridge overnight—the slow fermentation develops deeper flavor.
Step-by-Step Instructions
1. Activate the Yeast: In a small bowl, combine warm milk (110°F/43°C) with 1 tablespoon of sugar from the measured amount. Sprinkle yeast on top, stir gently, and let sit for 5–10 minutes until frothy. If no foam forms, your yeast may be expired—start over with fresh yeast.
2. Mix the Dough: In your stand mixer bowl (or large mixing bowl), whisk together remaining sugar, flour, and salt. Add the yeast mixture, egg, and softened butter. Using the dough hook on low speed, mix until a shaggy dough forms—about 2 minutes.
3. Knead Properly: Increase speed to medium and knead for 8–10 minutes. The dough should pull away from the bowl sides and feel supple. Stretch test: Pinch off a small piece and stretch it—if it forms a thin, translucent “windowpane” without tearing, you’ve developed enough gluten. If it tears, knead 2 more minutes.
4. First Rise: Transfer dough to a lightly greased bowl, turning once to coat. Cover with plastic wrap or a damp towel. Place in a warm spot (like your oven with just the light on) for 1–1.5 hours until doubled.
5. Punch Down & Shape: Gently deflate the dough by pressing with your palm. Turn onto a lightly floured surface. Divide into 12–15 equal pieces (a kitchen scale makes this foolproof—~60g each). Roll each piece into a tight ball: cup your hand over the dough and roll in circular motions against the counter.
6. Second Rise: Arrange rolls in a greased 9×13-inch dish or two 8-inch round pans, spacing about ½ inch apart. Cover loosely with greased plastic wrap. Let rise until doubled and rolls touch each other—45–60 minutes. Meanwhile, preheat oven to 375°F (190°C).
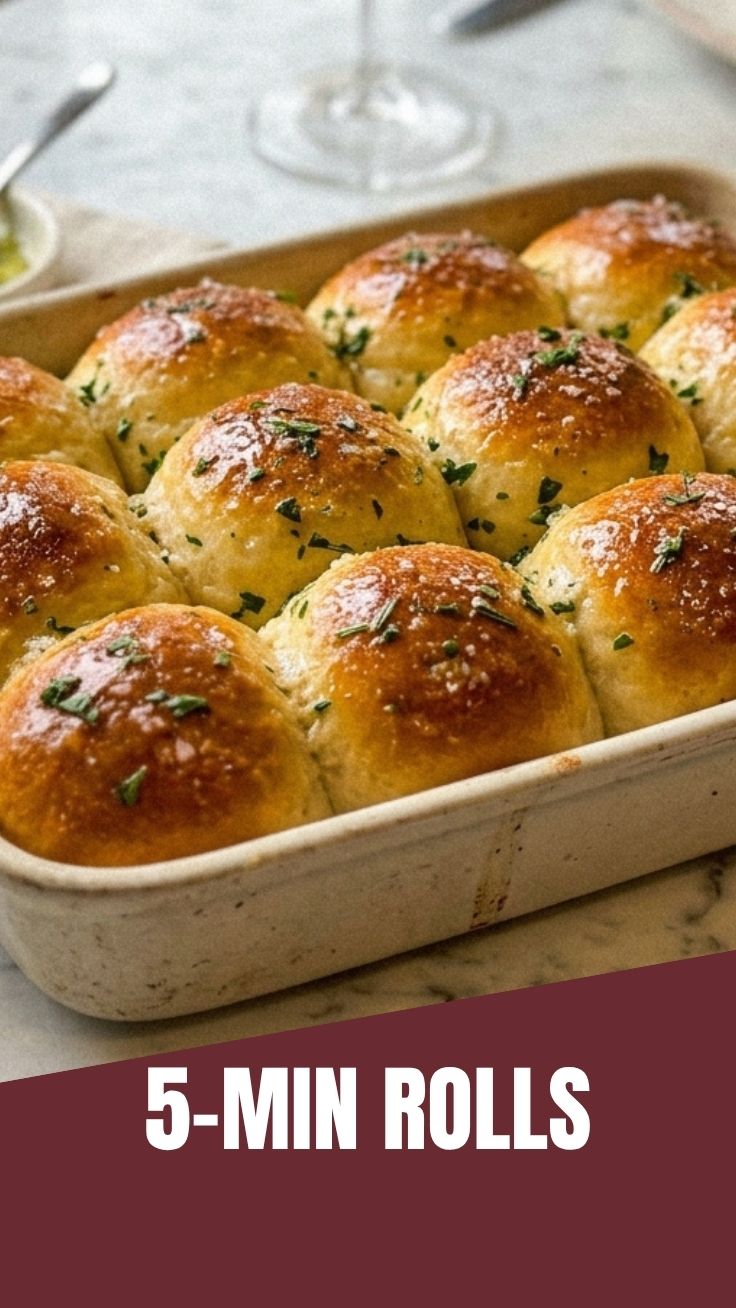
7. Bake to Perfection: Brush the tops gently with melted butter (reserve some for finishing). Bake 18–22 minutes, rotating the pan halfway through. The rolls should be deep golden brown and sound hollow when tapped. For extra softness, brush immediately after baking with remaining melted butter.
Note: When shaping these Dinner Rolls, keep your hands slightly oiled to prevent sticking—this also ensures a smooth, even surface. For a true homemade dinner rolls experience, avoid over-flouring the work surface; excessive flour makes rolls dry.
Nutritional Benefits & Advantages
These Dinner Rolls aren’t just comfort food—they offer several nutritional perks when made from scratch. Each roll (assuming 12 servings) contains approximately:
– 180–200 calories
– 6g protein (from milk, egg, and flour)
– 3g fiber (if using whole wheat blend)
– 30g carbohydrates (energy-rich for active lifestyles)
Key Advantages:
– No preservatives – You control everything; no dough conditioners or stabilizers.
– Customizable gluten content – Swap 50% of all-purpose flour for whole wheat for added fiber and nutrients.
– Hidden vegetable boost – Puree steamed cauliflower or sweet potato into the milk for extra vitamins A and C without altering taste.
– Portion control – Unlike store-bought rolls that vary wildly, you decide the exact size.
The fermentation process also reduces phytic acid in flour, making minerals like iron and zinc more bioavailable. And let’s not forget the mental health benefit—the rhythmic kneading and shaping can lower cortisol levels, turning dinner prep into stress relief.
Tips Variations & Cooking Advice
Flavor Variations:
– Garlic Parmesan: Add 1 tsp garlic powder to the flour mixture; brush with garlic butter and sprinkle Parmesan in the last 5 minutes of baking.
– Rosemary Sea Salt: Mix 1 tbsp finely chopped fresh rosemary into the dough; top with flaky sea salt before baking.
– Cheddar Jalapeño: Fold ½ cup shredded sharp cheddar and 2 finely diced jalapeños into the dough after kneading.
Ingredient Swaps:
– Dairy-free: Substitute oat milk for milk, vegan butter for butter, and a flax egg (1 tbsp flax + 3 tbsp water) for the egg.
– Gluten-free: Use a 1:1 gluten-free flour blend with xanthan gum. Expect slightly denser rolls—add 1 extra tablespoon of milk.
– Whole grain: Replace up to 50% of all-purpose flour with whole wheat pastry flour; increase liquid by 1–2 tablespoons.
Alternative Methods:
– No-knead version: Mix dough, let rest 18 hours in the fridge, then shape and proof—develops rich flavor with minimal effort.
– Air fryer: Bake at 330°F (165°C) for 10–12 minutes for smaller batches; reduce quantity to avoid crowding.
– Bread machine: Use the dough cycle, then shape and bake conventionally.
Portion Changes:
– Mini sliders: Divide into 24 pieces (30g each) and bake in a 9×13 pan for 15–18 minutes.
– Monster rolls: Make 8 large rolls (90g each) for a hearth-style presentation; extend baking time by 3–5 minutes.
Common Mistakes to Avoid
| Mistake | Solution |
|———|———-|
| Killer 1: Yeast doesn’t activate | Always check milk temperature with a thermometer; over 120°F kills yeast, under 100°F leaves it sluggish |
| Killer 2: Dough is too sticky | Add flour 1 tablespoon at a time during kneading, but don’t exceed ¼ cup extra |
| Killer 3: Rolls come out dense | Under-proofing is the culprit—ensure dough doubles before first and second rises |
| Killer 4: Crust is too hard | Brush with butter immediately out of the oven and cover loosely with foil for 5 minutes |
| Killer 5: Uneven baking | Rotate pan halfway through; use an oven thermometer to confirm 375°F setting |
Pro Troubleshooting: If you forget to add salt, dissolve it in 1 tablespoon of water and knead into dough after first rise—it will still incorporate.
Storage & Meal Prep Tips
Short-Term Storage (1–3 days):
– Cool rolls completely on a wire rack (about 30 minutes).
– Place in a zip-top bag or airtight container at room temperature. They’ll stay soft for 2 days.
– Reviving: Microwave a roll for 10–15 seconds with a damp paper towel to restore steam.
Freezing (Up to 3 months):
– Unbaked: After shaping and second rise, freeze on a baking sheet until solid (about 1 hour). Transfer to a freezer bag. To bake from frozen: add 5–7 minutes to the listed time at 375°F.
– Baked: Wrap each cooled roll individually in plastic wrap, then foil. Thaw at room temperature for 30 minutes; reheat at 350°F for 6–8 minutes.
Meal Prep Strategy:
– Make dough up to the first rise, punch down, and refrigerate for up to 48 hours (the flavor deepens beautifully).
– Double the batch: freeze half the shaped rolls straight after second rise—perfect for holiday dinners without last-minute prep.
Reheating for Best Texture:
– Oven: Preheat to 350°F, place rolls on a sheet, tent with foil, heat 6–8 minutes.
– Stovetop: Slice rolls in half, place cut-side down in a buttered pan for 1–2 minutes.
– Avoid microwaving (makes them rubbery) unless adding moisture via a damp paper towel.
Anyone who bakes these Dinner Rolls immediately notices the difference: a tender, pull-apart crumb that holds its shape, a golden crust that shatters slightly when brushed with butter, and a flavor that tastes unmistakably homemade. By following this guide, you’ve learned not just a recipe, but a reliable method that produces consistent results. The beauty of homemade dinner rolls is their versatility—they adapt to any meal, from Thanksgiving
Quick way to grow 4 Dinner RollsDinner Rolls
Ingredients
Equipment
Method
- Combine flour, yeast, sugar, and salt in a large bowl, then warm milk and melted butter and a whisked egg.
- Mix until a shaggy dough forms, then knead on a floured surface for 5-7 minutes until smooth and elastic.
- Place the dough in a greased bowl, cover, and let it rise in a warm place for about 15-20 minutes, or until doubled in size.
- Divide the dough into four equal pieces and shape each into a smooth ball.
- Place the rolls on a baking sheet, cover lightly, and let them rise for another 10-15 minutes.
- Preheat your oven to 375°F (190°C).
- Bake the rolls for 12-15 minutes, or until golden brown.
- Brush with melted butter if desired, then serve warm.