No-Bake Peanut Butter Bars: The Ultimate School Snack Prep for Busy Parents
Are you tired of spending hours in the kitchen preparing healthy snacks that your kids barely touch? What if you could whip up a batch of irresistible treats in under 20 minutes—with zero oven time and ingredients you probably already have in your pantry? That’s exactly what these No-Bake Peanut Butter Bars deliver. By making them at home, you control the sugar, skip the preservatives, and save money while giving your family a protein-packed energy boost. These bars are the perfect addition to your collection of No-Bake Dessert Recipes, proving that wholesome snacks don’t need complicated methods. In this post, we’ll walk you through every detail so you can master this recipe on your first try.
—
Ingredients & Kitchen Tools
Ingredients (with clarifications and optional substitutions)
– 1 cup creamy peanut butter – Use natural peanut butter (no added sugar or oil) for a cleaner taste. Substitute with almond butter or sunflower seed butter for nut-free versions.
– ½ cup honey or maple syrup – Honey adds floral sweetness; maple syrup gives a subtle caramel note. For vegan options, stick with maple syrup.
– 1 cup rolled oats – Not instant oats, as they turn mushy. Gluten-free certified oats work perfectly.
– ½ cup dark chocolate chips (optional) – Use sugar-free or dairy-free chips for dietary needs.
– ¼ cup coconut flour or almond flour – Helps bind the mixture. Coconut flour absorbs more moisture, so add 1–2 tablespoons extra liquid if needed.
– 1 teaspoon vanilla extract – Enhances flavor. Omit if you prefer pure peanut taste.
– Pinch of sea salt – Balances sweetness and amplifies the peanut butter flavor.
Kitchen Tools & Utensils
– 8×8-inch baking dish – Line with parchment paper for easy removal.
– Microwave-safe bowl – For melting peanut butter and honey.
– Spatula – A silicone spatula works best for mixing without sticking.
– Measuring cups and spoons – Precision matters, especially for the flour.
– Parchment paper – Prevents sticking and simplifies cleanup.
– Refrigerator – For setting the bars (at least 2 hours).
—
Prep Time & Cooking Schedule
– Prep Time: 15 minutes (includes melting, mixing, and layering)
– Resting Time: 2 hours in the refrigerator (or 1 hour in the freezer for a firmer texture)
– Total Time: 2 hours 15 minutes
Plan Ahead: These bars are ideal for weekend meal prep. Make them on Sunday, and you’ll have grab-and-go snacks all week. The resting time is mostly hands-off—perfect for multitasking while helping with homework or catching up on chores.
—
Step-by-Step Instructions
1. Line your baking dish with parchment paper, leaving an overhang on two opposite sides. This allows you to lift the bars out cleanly later.
2. Melt the peanut butter and honey together in a microwave-safe bowl. Heat in 20-second intervals, stirring between each, until smooth and runny (about 60–90 seconds total). Do not overheat, or the mixture will separate.
3. Stir in the vanilla extract and salt until fully combined. The salt should dissolve completely.
4. Add the rolled oats and coconut flour to the wet mixture. Fold gently with a spatula until every oat is coated. The dough will be thick but pliable—if it feels too dry (especially if using natural peanut butter), add 1 tablespoon of warm water.
5. Press the mixture firmly into the prepared dish. Use the back of a measuring cup or a flat-bottomed glass to compress evenly. This step ensures the bars hold together after chilling.
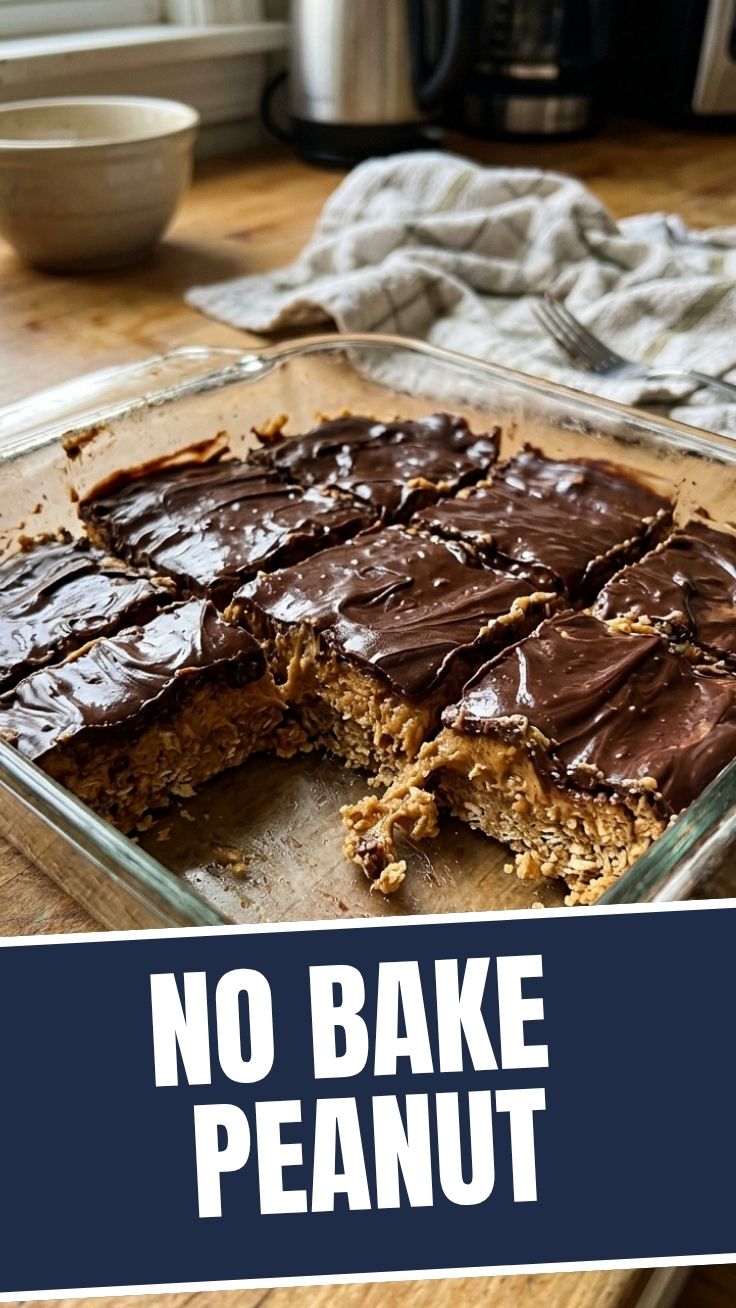
6. Optional: Melt the dark chocolate chips in a separate bowl (30-second bursts), then drizzle over the pressed base. Spread with a spatula or simply let it drip for a rustic look.
7. Refrigerate for at least 2 hours (or freeze for 1 hour). The bars should feel firm to the touch before cutting.
8. Lift the block out using the parchment overhang. Slice into 12 squares or 16 smaller rectangles. For clean cuts, use a sharp knife and wipe it between slices.
Keyword mentions: By following these steps, you’ll create perfect No-Bake Peanut Butter Bars every time. They are a standout among No-Bake Dessert Recipes because they require no oven, no mixing bowls galore, and no fuss.
—
Nutritional Benefits & Advantages
Each bar (based on 12 servings) contains approximately:
– Calories: 210
– Protein: 7 g
– Healthy Fats: 12 g (mostly monounsaturated from peanut butter)
– Fiber: 3 g
– Sugar: 12 g (naturally occurring from honey and oats; less than store-bought granola bars)
Why this snack wins:
– Peanut butter provides sustained energy and satiety thanks to its protein and healthy fat profile.
– Oats are a source of complex carbohydrates and beta-glucan, which supports heart health.
– No refined sugar if you use honey or maple syrup—ideal for reducing blood sugar spikes.
– No baking preserves heat-sensitive nutrients like B vitamins in oats and antioxidants in dark chocolate.
Plus, these bars are naturally gluten-free (if using certified oats) and can be made dairy-free by choosing appropriate chocolate chips.
—
Tips Variations & Cooking Advice
Flavor Variations
– Chocolate Peanut Butter Swirl: Mix 2 tablespoons cocoa powder into the dough before pressing.
– Crunchy Nut Bar: Fold in ¼ cup chopped peanuts, almonds, or sunflower seeds.
– Berry Burst: Add ⅓ cup dried cranberries or freeze-dried strawberries for tartness.
Dietary Adaptations
– Oat-Free: Replace oats with crispy rice cereal (gluten-free) for a different texture.
– Nut-Free: Use sunflower seed butter instead of peanut butter. Add ½ teaspoon baking soda to neutralize the green tint that sunflower butter can develop when combined with baking soda? No—actually, avoid baking soda here. Just use sunflower butter as-is.
– Low-Sugar: Reduce honey to ⅓ cup and add ¼ cup unsweetened applesauce to maintain moisture.
Cooking Advice
– Temperature control: If your kitchen is warm, the dough may be too sticky. Chill the peanut butter and honey mixture for 10 minutes before adding oats.
– Texture cues: The dough should hold together when squeezed. If it crumbles, add more melted peanut butter or a splash of milk (dairy or plant-based).
—
Common Mistakes to Avoid
| Mistake | Why It Happens | Solution |
|———|—————-|———-|
| Bars crumble after cutting | Dough too dry or not pressed firmly enough. | Add a tablespoon of warm water during mixing; press very firmly with a glass. |
| Bars are too soft/sticky | Too much liquid (honey or peanut butter). | Reduce honey by 2 tablespoons or add 2 tablespoons more coconut flour. |
| Chocolate drizzle seizes | Water got into melted chocolate (even a drop). | Ensure bowl is completely dry; melt chocolate slowly. |
| Uneven thickness | Dough not spread evenly. | Use a ruler or the back of a spatula to level the top before refrigerating. |
—
Storage & Meal Prep Tips
– Refrigerator: Store in an airtight container for up to 1 week. Separate layers with parchment paper to prevent sticking.
– Freezer: Wrap each bar individually in plastic wrap, then place in a freezer bag. They’ll stay fresh for 3 months. Thaw at room temperature for 10 minutes before eating.
– Reheating: Not necessary—enjoy cold or at room temperature. If you prefer a softer texture, microwave a bar for 10 seconds.
– Meal prep hack: Cut the entire block, store in a single layer in a freezer-safe container, and grab one each morning before school or work.
—
Conclusion
Making your own snacks doesn’t have to be time-consuming or complicated. These No-Bake Peanut Butter Bars prove that with a handful of simple ingredients and a few minutes of active effort, you can create something delicious, nutritious, and kid-approved. They’re a shining example of why No-Bake Dessert Recipes are a lifesaver for busy families. Now that you have the complete guide, I encourage you to try this recipe this weekend, share a photo of your bars, and explore more quick and healthy snacks on our site.
—
FAQs
Q1: Can I use crunchy peanut butter instead of creamy?
Yes, but the texture will be less uniform. If you prefer a smooth base, stick with creamy. Crunchy adds a nice nutty bite.
Q2: My mixture is too dry—what went wrong?
Most likely your peanut butter was natural and separated (oil on top). Stir it thoroughly before measuring. Add 1–2 tablespoons of melted coconut oil or warm water to fix the consistency.
Q3: How can I make these bars vegan?
Use maple syrup instead of honey, and choose vegan dark chocolate chips. All other ingredients are naturally plant-based.
Q4: Can I skip the coconut flour?
Yes. Replace it with an equal amount of almond flour or additional rolled oats (ground into oat flour). The bars may be slightly less firm.
Q5: Why did my bars get oily after a few days?
Natural peanut butter can separate over time. Store them in the fridge, and if oil appears, blot it with a paper towel before serving.
Quick way to grow No-Bake Peanut Butter Bars
Ingredients
Equipment
Method
- In a large bowl, combine the graham cracker crumbs, powdered sugar, peanut butter, and melted butter until well mixed.
- Press the mixture evenly into a greased 9x13 inch pan and refrigerate for 30 minutes to set.
- In a microwave-safe bowl, melt the chocolate chips, peanut butter, and butter together, stirring until smooth.
- Pour the melted chocolate mixture over the chilled peanut butter layer and spread evenly.
- Refrigerate for at least one hour, or until the chocolate topping is firm, then cut into squares and serve.