The Ultimate Guide to Perfect Smash Burgers at Home
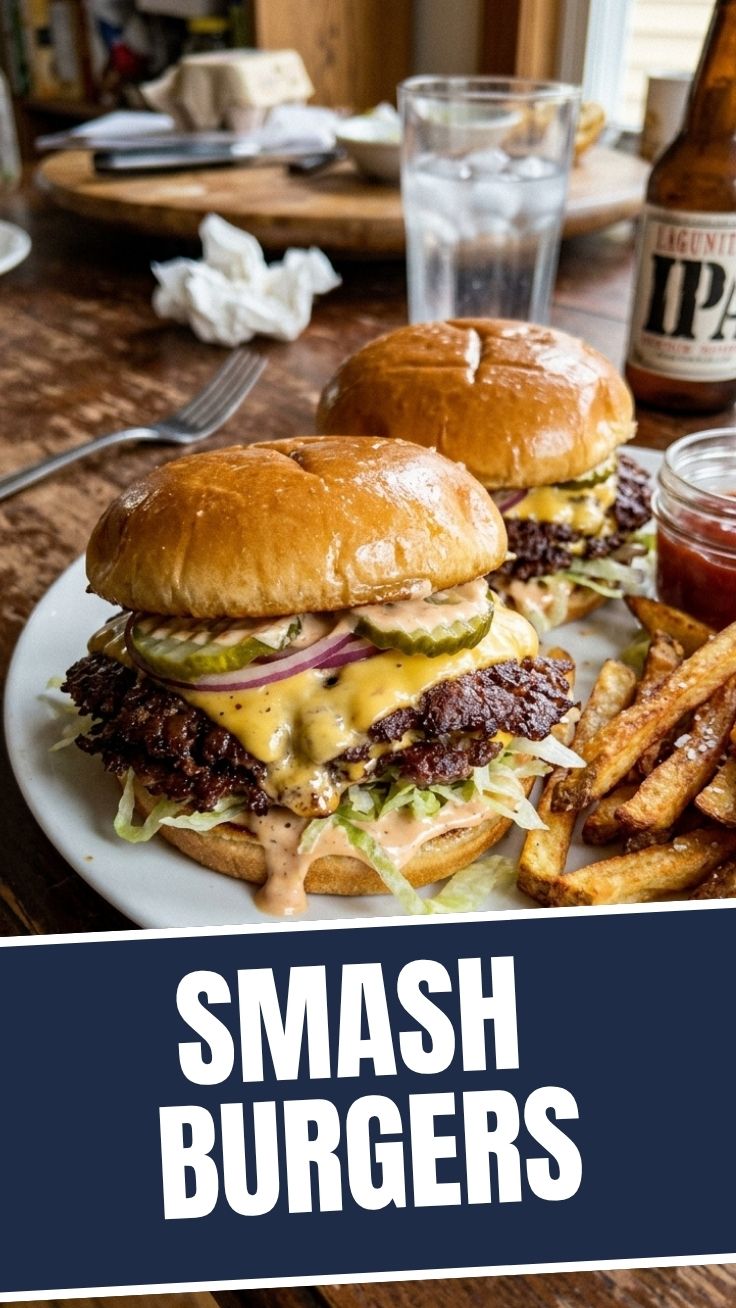
Have you ever wondered why diner-style burgers taste so much better than anything you can grill at home? The secret lies in the technique—specifically, the Maillard reaction created by pressing a ball of ground beef into a hot, flat surface. This is the hallmark of authentic Smash Burgers, and mastering a reliable Smashburger recipe at home saves you money while delivering that same crispy, juicy perfection. In this post, I’ll guide you through every detail so you can recreate this diner classic in your own kitchen.
Ingredients & Kitchen Tools
Ingredients:
– Ground beef (80/20 blend): The 20% fat content ensures juicy, flavorful patties that don’t dry out during the quick cooking process.
– Soft burger buns: Brioche or potato rolls work best; they hold up to the juices without becoming soggy.
– American cheese slices: Melts perfectly and complements the beef without overpowering it.
– Salt and freshly ground black pepper: Simple seasoning is all you need—avoid pre-mixed blends that can burn.
– Optional toppings: Pickles, shredded lettuce, sliced onions, tomatoes, and your favorite sauce (ketchup, mustard, or special sauce).
Kitchen Tools:
– Cast-iron skillet or flat-top griddle: Retains high heat essential for the smash technique.
– Metal spatula (sturdy, thin-edged): Must be strong enough to scrape the crispy crust off the cooking surface.
– Parchment paper squares: Prevents the spatula from sticking to the meat when pressing down.
– Bench scraper or second spatula: Helps lift stubborn crispy edges.
– Paper towels: For blotting excess oil and keeping the workspace tidy.
Prep Time & Cooking Schedule
– Prep time: 10 minutes (dividing beef, toasting buns, slicing toppings)
– Cook time: 4–6 minutes per batch (2 minutes per side for the patties)
– Resting time: 2 minutes after assembling (allows juices to redistribute)
– Total time: Approximately 20 minutes from start to table
Plan your cooking in batches if making more than 2 burgers. The high heat required means you need space between patties to maintain temperature. Start toasting your buns during the last minute of cooking so everything finishes together.
Step-by-Step Instructions
1. Preheat your skillet or griddle over medium-high heat for at least 5 minutes until it’s smoking hot. You need surface temperature around 400–425°F for proper searing.
2. Divide the ground beef into 2-ounce portions (about the size of a golf ball). Form them loosely—do not compact or season yet.
3. Place one ball of meat onto the hot surface. Immediately cover with a piece of parchment paper and press down firmly with a flat spatula until the patty is about ¼-inch thick. Hold for 10 seconds, then remove the paper.
4. Season generously with salt and pepper immediately after smashing. This is the critical moment for achieving flavorful Smash Burgers—seasoning post-smash ensures the salt doesn’t break down the meat structure before cooking. Follow this Smashburger recipe precisely to lock in that crust.
5. Cook undisturbed for 2 minutes until the edges are deep brown and crispy. The patty should release easily when lifted.
6. Flip and immediately add cheese. Cook for another 60–90 seconds until the cheese melts and the second side develops a lighter crust.
7. Rest assembled burgers on a wire rack for 2 minutes before serving to prevent soggy buns.
Nutritional Benefits & Advantages
This cooking method actually preserves more nutrients than traditional grilling. The quick, high-heat sear minimizes the time fat renders out, keeping the beef’s natural B vitamins and conjugated linoleic acid intact. Using 80/20 beef provides a good balance of protein (about 20g per patty) and healthy fats that help absorb fat-soluble vitamins from your toppings. Plus, controlling portion sizes (2 ounces per patty) makes it easier to manage calorie intake compared to thick restaurant burgers often exceeding 8 ounces.
Tips Variations & Cooking Advice
Flavor variations:
– Add finely minced garlic or onion powder to the beef before forming balls
– Use shredded cheese in the patty itself for an inside-out cheeseburger effect
– Experiment with spicy mayo, chipotle aioli, or truffle sauce
Dietary adaptations:
– Gluten-free: Use gluten-free buns or lettuce wraps; the beef itself is naturally gluten-free
– Dairy-free: Skip the cheese or use vegan alternatives; caramelized onions add richness as a substitute
– Lower fat: Use 85/15 beef but expect slightly less crispy edges
Cooking method swaps: If you don’t have a cast-iron skillet, a stainless steel pan works well but avoid non-stick surfaces—they can’t achieve the high heat needed for proper smashing.
Common Mistakes to Avoid
| Mistake | Why It Happens | Solution |
|————-|——————-|————–|
| Bland patties | Seasoning before smashing causes salt to draw moisture out | Season immediately after smashing, not before |
| Burgers sticking | Insufficient heat or not enough fat in the pan | Heat until surface is smoking; add a thin layer of oil |
| Dry texture | Overcooking or pressing too hard | 2 minutes per side is plenty; don’t press during cooking |
| Uneven browning | Patience issues leading to early flipping | Wait for edges to turn deep brown before attempting to flip |
| Soggy buns | Resting on flat surface traps steam | Let assembled burgers rest on a wire rack for 2 minutes |
Storage & Meal Prep Tips
– Refrigeration: Store cooked patties (without buns or toppings) in an airtight container for up to 3 days. Reheat in a hot skillet for 60 seconds per side to restore crispiness.
– Freezing: Uncooked beef balls freeze beautifully on a parchment-lined tray, then transfer to a freezer bag for up to 3 months. Cook directly from frozen—add 30 seconds per side.
– Reheating: Never microwave assembled burgers. Instead, reheat patties separately in a skillet and toast fresh buns. This maintains the textural contrast that makes these burgers special.
– Prep ahead: Portion beef balls and store them in the fridge for up to 24 hours before cooking. Season only when you’re ready to smash.
Conclusion
Mastering the smash technique transforms humble ground beef into a restaurant-quality meal with minimal effort and maximum flavor. By following this guide, you’ve learned how to create authentic Smash Burgers with that perfectly crispy lacy edge and juicy center. Remember that this Smashburger recipe is just a starting point—feel free to experiment with toppings, sauces, and cheese combinations. I’d love to hear how your first batch turns out! Share your results in the comments, and don’t forget to explore our other quick-cooking guides for more kitchen victories.
FAQs
Can I use lean ground beef (90/10) for smash burgers?
Technically yes, but you’ll sacrifice flavor and texture. Lean meat lacks the fat needed for proper crust formation and can become dry quickly. Stick with 80/20 for best results.
Why do my burgers stick to the spatula when I smash them?
Use parchment paper squares between the spatula and meat. This prevents sticking and allows you to press with full force without tearing the patty.
How do I know when the skillet is hot enough?
Sprinkle a few drops of water on the surface—they should evaporate immediately upon contact. If they sizzle gently, keep heating. You want vigorous, instant evaporation.
Can I make these on an outdoor grill?
Yes, but use a cast-iron griddle placed directly over the grill grate. The key is achieving the same high, consistent heat—a standard grill grate won’t work because the meat falls through.
What’s the best way to toast buns for smash burgers?
After flipping the patties, place split buns cut-side down in the rendered beef fat around the edges of the skillet. Toast for 30–45 seconds until golden and fragrant. This adds incredible flavor.
Best way to grow
Ingredients
Equipment
Method
- Begin by dedicating at least 15 minutes each day to self-reflection and journaling.
- Identify areas for improvement to help set clear and measurable growth objectives.
- Consistently engage with various learning resources aligned with your goals.
- Seek feedback from mentors or trusted peers regularly for personalized insights and guidance.
- Practice new skills to reinforce learning and build confidence.
- Track your progress to celebrate small victories and stay motivated.
- Regularly review and adjust your goals to ensure they remain relevant.
- Embrace challenges as opportunities for further learning and development.