Why This Cornbread Recipe Will Become Your Go-To Side Dish
Have you ever pulled a golden, steaming pan of Cornbread out of the oven only to have it crumble into dust the moment you try to slice it? If you’ve struggled with dry, flavorless versions from box mixes or failed from-scratch attempts, you’re not alone. The secret to truly unforgettable Cornbread lies not in complicated techniques but in understanding a few critical ratios and temperature tricks. Preparing it at home gives you total control over moisture, sweetness, and texture—whether you prefer it dense and Southern-style or light and fluffy. In this guide, I’ll walk you through every detail so you can achieve bakery-quality results right in your own kitchen, using simple pantry staples.
—
Ingredients & Kitchen Tools
For the Cornbread Batter:
– 1 cup yellow cornmeal (stone-ground preferred for texture)
– 1 cup all-purpose flour (or gluten-free 1:1 blend)
– 1/4 cup granulated sugar (adjust to taste; omit for savory version)
– 1 tablespoon baking powder (ensure fresh for proper rise)
– 1/2 teaspoon baking soda (balances acidity from buttermilk)
– 1 teaspoon salt (fine sea salt works best)
– 2 large eggs (room temperature for better emulsion)
– 1 cup buttermilk (or whole milk + 1 tablespoon lemon juice)
– 1/3 cup melted butter (unsalted preferred; coconut oil for dairy-free)
– 1/4 cup honey (optional for sweetness and moisture)
Kitchen Tools:
– 9-inch cast iron skillet or 8×8-inch baking dish
– Large mixing bowl and medium bowl
– Whisk and rubber spatula
– Measuring cups and spoons
– Cooling rack
Optional Substitutions:
– Buttermilk swap: 1 cup milk + 1 tablespoon vinegar or lemon juice
– Egg replacement: 1/4 cup applesauce for moisture, though rise may differ
– Flour alternative: 1 cup fine almond flour + 1/4 cup tapioca starch (adjust liquid)
—
Prep Time & Cooking Schedule
| Stage | Time |
|——-|——|
| Prep Time | 10 minutes |
| Cook Time | 20–25 minutes |
| Resting Time | 5–10 minutes (in pan) |
| Total Time | 35–40 minutes |
Planning Note: Preheat your cast iron skillet in the oven while it heats—this creates an instant crispy crust. For best results, make the batter while the oven preheats, so everything comes together seamlessly.
—
Step-by-Step Instructions
Step 1: Preheat and Prepare the Pan
Place your cast iron skillet in the oven and preheat to 400°F (200°C). The hot pan ensures a golden, crispy bottom crust. If using a glass or ceramic dish, skip preheating and simply grease lightly.
Step 2: Mix Dry Ingredients
In a large bowl, whisk together cornmeal, flour, sugar, baking powder, baking soda, and salt. This ensures even distribution of leavening agents. Pro tip: Sift if your flour is lumpy.
Step 3: Combine Wet Ingredients
In a medium bowl, whisk eggs until frothy. Add buttermilk, melted butter, and honey. Whisk until smooth and fully combined.
Step 4: Create the Batter
Pour wet ingredients into dry mixture. Stir gently with a rubber spatula until just combined—about 10–15 strokes. Overmixing develops gluten, leading to tough Cornbread. A few lumps are perfectly fine.
Step 5: Bake to Perfection
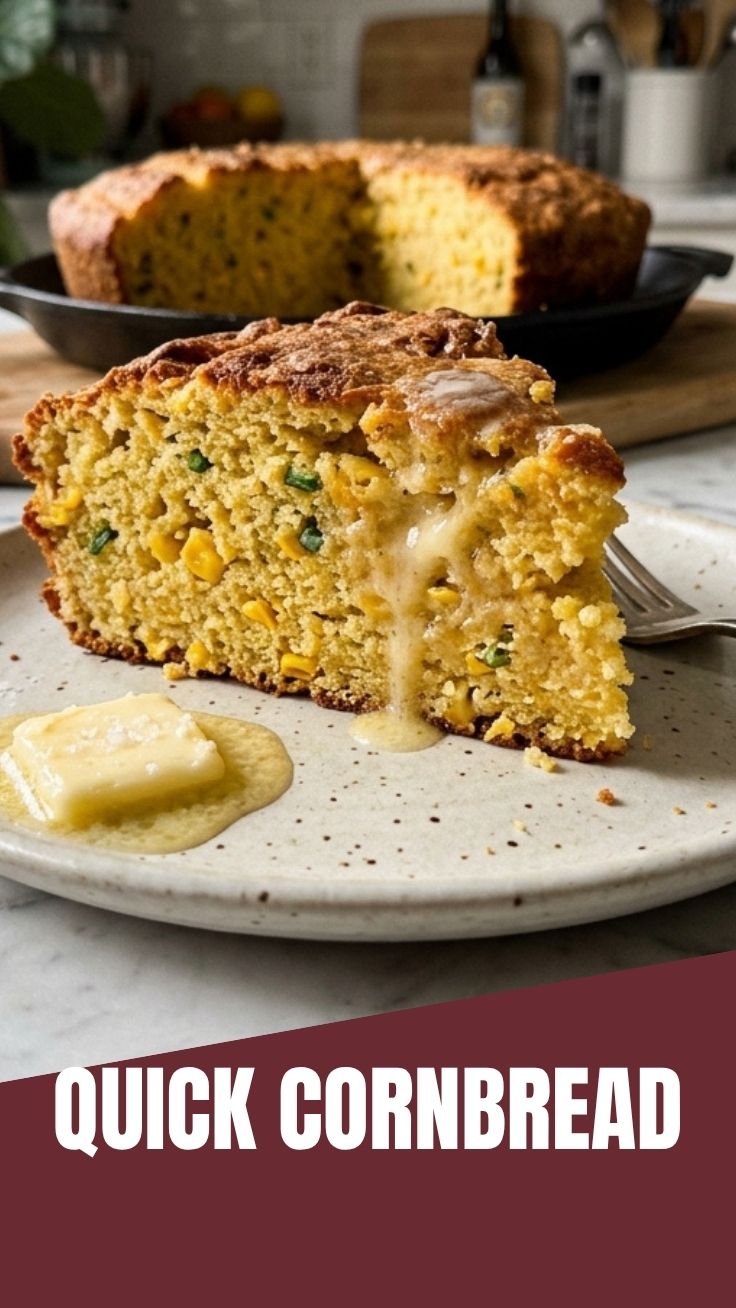
Carefully remove hot skillet from oven. Pour batter into the sizzling pan—it should hiss on contact. Bake for 20–25 minutes until golden brown and a toothpick inserted in center comes out clean. The edges should pull slightly away from pan. A perfectly baked batch of Homemade cornbread will have a crackled top and spring back when touched.
Step 6: Rest and Serve
Let cool in pan for 5–10 minutes before slicing. This allows steam to redistribute, preventing crumbling. Serve warm with butter, honey, or alongside chili.
—
Nutritional Benefits & Advantages
This recipe offers significant nutritional value beyond its comforting taste:
– Cornmeal provides complex carbohydrates, fiber, and B vitamins for sustained energy.
– Buttermilk adds probiotics and calcium while reducing fat compared to cream.
– Eggs contribute complete protein and choline for brain health.
– Honey offers antioxidants and natural sweetness with a lower glycemic impact than refined sugar.
Health advantage: By making Cornbread at home, you control sodium (50% less than most box mixes) and eliminate preservatives. For a whole-grain boost, substitute whole wheat flour for half the all-purpose flour without sacrificing texture.
—
Tips Variations & Cooking Advice
Flavor Variations:
– Savory Cheddar-Jalapeño: Fold in 1/2 cup shredded cheddar + 2 diced jalapeños
– Sweet Honey-Butter: Increase honey to 1/3 cup + top with honey butter glaze
– Herb-Seasoned: Add 1 tablespoon fresh rosemary or thyme
Cooking Method Alternatives:
– Muffins: Divide into greased muffin tin; bake 15–18 minutes at 375°F
– Skillet Cornbread: Classic choice—preheat skillet for crispy crust
– Gluten-Free Version: Use certified gluten-free 1:1 flour blend; add 1 tablespoon extra milk for moisture
Dietary Adaptations:
– Dairy-Free: Replace buttermilk with unsweetened almond milk + lemon juice; use coconut oil for butter
– Egg-Free: Use flax egg (1 tablespoon ground flax + 3 tablespoons water) but expect slightly denser texture
—
Common Mistakes to Avoid
| Mistake | Solution |
|———|———-|
| Dry, crumbly texture | Reduce bake time by 2–3 minutes; check doneness early |
| Dense, heavy loaf | Ensure baking powder/baking soda are fresh (test with hot water) |
| Soggy bottom | Always preheat skillet; add 2 extra minutes if using glass dish |
| Uneven browning | Rotate pan halfway through baking |
| Metallic taste | Avoid aluminum pans—use cast iron or ceramic instead |
Critical tip: If your Cornbread consistently turns out dry, reduce oven temperature to 375°F and bake longer. The low-and-slow approach preserves moisture while ensuring the center cooks through.
—
Storage & Meal Prep Tips
Refrigeration: Store leftover Homemade cornbread in an airtight container or wrapped tightly in foil for up to 4 days at room temperature (or 5 days refrigerated). To retain moisture, place a paper towel in the container to absorb excess humidity without making bread soggy.
Freezing: Wrap individual slices in plastic wrap, then foil. Freeze for up to 3 months. Thaw at room temperature (about 30 minutes) or reheat directly from frozen.
Reheating: For best texture, reheat in a 350°F oven for 5–7 minutes. Avoid microwaving for more than 15 seconds—it can make bread rubbery. For a quick fix, split slices and toast under broiler for 1-2 minutes.
Meal prep tip: Double the recipe and freeze half for busy weeknights. Cornbread pairs beautifully with soups, stews, or as a breakfast side with eggs.
—
Conclusion
Making Cornbread from scratch transforms a simple side into something truly special—a golden, tender, and flavorful bread that complements everything from chili to barbecue. By following these steps—preheating your pan, mixing gently, and watching for the perfect golden edge—you’ll consistently achieve bakery-quality Cornbread at home. Remember that even a perfectly baked Homemade cornbread deserves patience: letting it rest for those final minutes makes all the difference in texture. I encourage you to try this recipe for your next family dinner or potluck. Once you taste the difference homemade makes, you’ll never go back to boxed mixes. Share your results in the comments or tag me in your photos!
—
FAQs
1. Can I make this cornbread ahead of time?
Absolutely! Bake up to 2 days in advance and store airtight at room temperature. Reheat in a 350°F oven for 5 minutes before serving.
2. Why did my cornbread turn out too dry?
Likely overbaking or overmixing. Bake until just golden (20-22 minutes) and stop mixing when dry ingredients are barely incorporated. Also ensure your oven temperature is accurate.
3. Can I use white cornmeal instead of yellow?
Yes, white cornmeal produces a milder flavor and lighter color. Expect slightly less corn-forward taste, but texture remains similar.
4. How do I make this recipe sweeter or less sweet?
Reduce sugar to 2 tablespoons for savory version, or increase to 1/3 cup for dessert-style cornbread. Honey can also be adjusted by 1-2 tablespoons.
5. What’s the best way to prevent cornbread from sticking?
Preheat your cast iron skillet with butter or oil in the oven before adding batter. For glass dishes, line with parchment paper for easy removal.
How to grow Cornbread in 5 simple steps. Cornbread
Ingredients
Equipment
Method
- Preheat your oven to 400°F (200°C) and grease a 9-inch cast-iron skillet or an 8x8 inch baking dish.
- In a large bowl, whisk together the cornmeal, flour, sugar, baking powder, and salt.
- In a separate medium bowl, whisk together the milk, egg, and oil/melted butter.
- Pour the wet ingredients into the dry ingredients and stir until just combined; be careful not to overmix, as lumps are acceptable.
- Pour the batter into the prepared skillet or baking dish and bake for 20-25 minutes, or until golden brown and a toothpick inserted into the center comes out clean.
- Allow the cornbread to cool in the pan for a few minutes before slicing and serving.
- Serve warm with butter, honey, or your favorite chili.