The Ultimate Homemade Pumpkin Muffins: Fluffy, Spiced, and Perfectly Moist
Have you ever bitten into a store-bought muffin only to find it dry, crumbly, and lacking that warm, aromatic spice that makes autumn baking so magical? If you’ve been searching for a recipe that delivers bakery-quality results with minimal effort, you’ve come to the right place. These Pumpkin Muffins are the answer to your cravings—bursting with cozy cinnamon, nutmeg, and clove, each bite is tender, moist, and perfectly sweetened. What makes preparing them at home truly valuable is complete control over ingredients, from reducing sugar to swapping in whole-grain flour, plus the incomparable aroma that fills your kitchen while they bake. Whether you’re a seasoned baker or a complete beginner, this guide will walk you through every step, ensuring your Pumpkin Muffins turn out flawless every time. Ready to transform a simple can of pumpkin puree into something extraordinary? Let’s dive in.
Ingredients & Kitchen Tools
Ingredients
– 1 ¾ cups all-purpose flour – Spoon and level for accuracy; substitute with whole wheat pastry flour for a nuttier flavor.
– 1 cup granulated sugar – Light brown sugar adds deeper molasses notes; coconut sugar works for a lower glycemic option.
– 1 teaspoon baking soda – Ensure it’s fresh for proper rise.
– 1 ½ teaspoons ground cinnamon – Ceylon cinnamon is milder; Cassia is bolder.
– ½ teaspoon ground nutmeg – Freshly grated is aromatic and potent.
– ½ teaspoon ground cloves – A little goes a long way; omit if you prefer milder spice.
– ½ teaspoon salt – Fine sea salt dissolves easily.
– 2 large eggs – Room temperature for better emulsification.
– 1 cup pumpkin puree – Not pumpkin pie filling; homemade or canned works.
– ½ cup vegetable oil – Melted coconut oil or unsweetened applesauce for lower fat.
– 2 tablespoons milk – Any milk works: dairy, almond, oat, or soy.
– 1 teaspoon vanilla extract – Pure vanilla, not imitation.
– Optional mix-ins: ½ cup chocolate chips, chopped pecans, or dried cranberries.
Kitchen Tools
– Large mixing bowl (stainless steel or glass)
– Medium mixing bowl
– Whisk and rubber spatula
– Standard 12-cup muffin tin
– Paper liners or non-stick spray (coconut oil spray is excellent)
– Cooling rack
– Measuring cups and spoons
– Ice cream scoop or ¼-cup measure for even batter
Prep Time & Cooking Schedule
– Prep Time: 15 minutes (including measuring, mixing, and lining the pan)
– Bake Time: 18–22 minutes at 350°F (177°C)
– Cooling Time: 5 minutes in the pan, then transfer to a rack for 15 minutes
– Total Time: Approximately 40 minutes
Context: This recipe is ideal for a weekend morning or a quick weekday treat. Muffins are fully ready to serve after 20 minutes of cooling—no waiting for yeast or overnight chilling. For best texture, let them cool completely before storing.
Step-by-Step Instructions
1. Preheat and Prepare: Set your oven to 350°F (177°C). Line a 12-cup muffin tin with paper liners or lightly grease each cup with non-stick spray. This ensures easy release and clean edges.
2. Mix Dry Ingredients: In a large bowl, whisk together 1 ¾ cups all-purpose flour, 1 cup granulated sugar, 1 teaspoon baking soda, 1 ½ teaspoons cinnamon, ½ teaspoon nutmeg, ½ teaspoon cloves, and ½ teaspoon salt. Whisk thoroughly until evenly combined—about 15 seconds.
3. Combine Wet Ingredients: In a separate medium bowl, whisk 2 large eggs until frothy. Add 1 cup pumpkin puree, ½ cup vegetable oil, 2 tablespoons milk, and 1 teaspoon vanilla extract. Whisk until smooth and fully emulsified—no streaks of oil should remain.
4. Fold Batter Together: Pour the wet mixture into the dry ingredients. Use a rubber spatula to fold gently, scraping from the bottom, until just combined. A few small lumps are fine—overmixing leads to tough, dense muffins. Tip: If adding chocolate chips or nuts, fold them in at this stage with 3–4 strokes.
5. Fill Muffin Cups: Divide batter evenly among the 12 cups. An ice cream scoop ensures uniform portions and even baking. Each cup should be about ¾ full.
6. Bake to Perfection: Place the tin in the center rack. Bake for 18–22 minutes, rotating halfway through. The tops should be domed, golden, and spring back when lightly pressed. A toothpick inserted into the center should come out clean or with a few moist crumbs. For perfectly moist Pumpkin Muffins, avoid overbaking—check at 18 minutes.
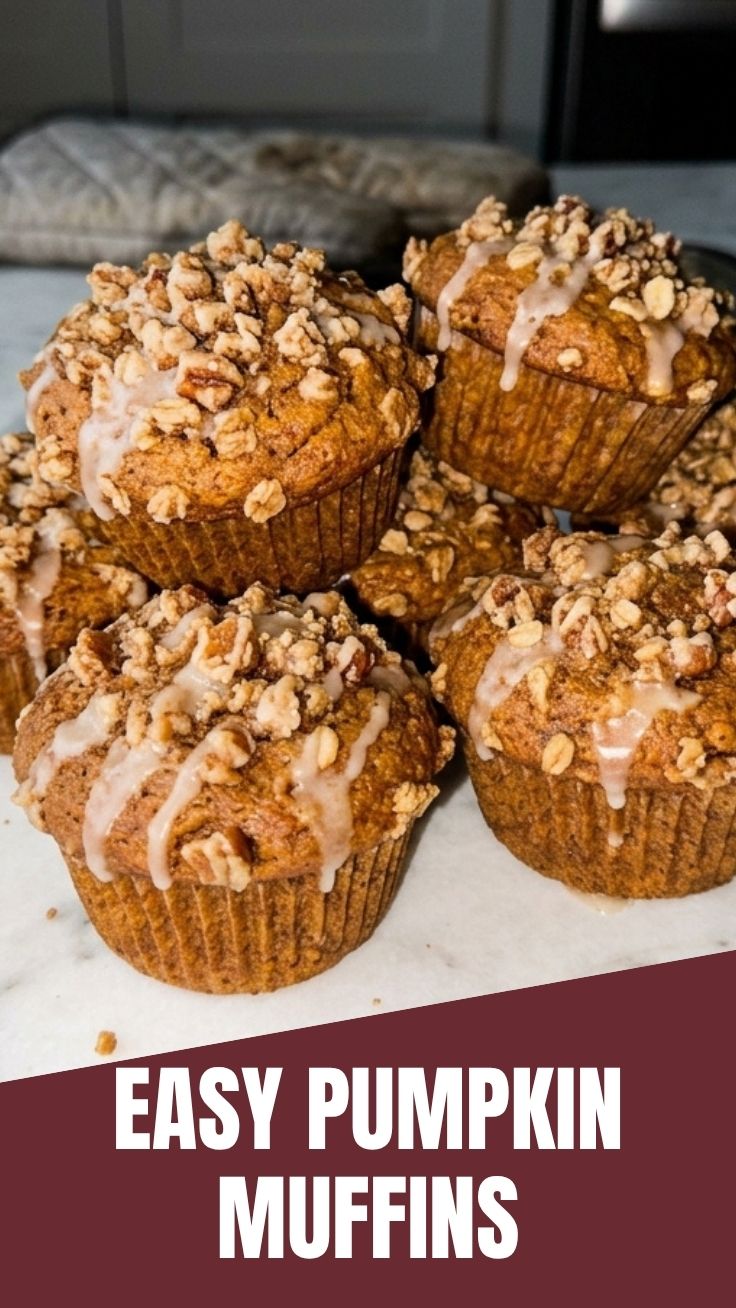
7. Cool and Enjoy: Let muffins cool in the pan for 5 minutes, then transfer to a wire rack. Serve warm or at room temperature. These Pumpkin Muffins pair beautifully with a hot cup of coffee or a dollop of honey butter.
Nutritional Benefits & Advantages
Pumpkin puree is a powerhouse of nutrition—rich in vitamin A (beta-carotene), fiber, and antioxidants like alpha-carotene and lutein. A single muffin (using standard ingredients) provides approximately 210 calories, 8g fat, 32g carbs, 3g protein, and 2g fiber. The natural sweetness of pumpkin allows for reduced added sugar compared to other baked goods. Additionally, using oil instead of butter keeps these muffins dairy-friendly and exceptionally moist without sacrificing texture. For an even healthier version, substitute half the flour with whole wheat pastry flour and use applesauce in place of oil—this cuts fat by 30% while maintaining tenderness.
Tips Variations & Cooking Advice
– Spice It Up: Add a pinch of ground ginger or cardamom for a more complex flavor profile.
– Make It Vegan: Replace eggs with flax eggs (1 tablespoon ground flaxseed + 3 tablespoons water per egg) and use plant-based milk.
– Gluten-Free Version: Use a 1:1 gluten-free flour blend (like Bob’s Red Mill) and add ½ teaspoon xanthan gum if the blend doesn’t include it.
– Mini Muffins: Reduce bake time to 10–12 minutes; yield about 24 mini muffins.
– Muffin Tops: For extra-domed tops, fill cups to the brim, chill batter for 15 minutes, and bake at 400°F for the first 5 minutes, then reduce to 350°F.
Common Mistakes to Avoid
– Overmixing the Batter: Leads to dense, rubbery muffins. Mix only until dry ingredients are moistened—lumps are okay.
– Using Cold Ingredients: Room temperature eggs and milk emulsify better, creating a lighter crumb.
– Baking Too Long: Pumpkin-based batters are prone to drying out. Always check at the minimum time.
– Skipping the Liner: Even with greased pans, liners prevent sticking and make cleanup effortless.
– Not Measuring Flour Correctly: Scooping directly from the bag compacts flour. Always spoon it into the measuring cup and level with a knife.
Storage & Meal Prep Tips
– Room Temperature: Store in an airtight container for up to 3 days. Place a paper towel at the bottom to absorb excess moisture.
– Refrigeration: Extends freshness to 5 days but may dry muffins slightly—reheat briefly before serving.
– Freezer: Wrap individually in plastic wrap, then place in a freezer bag for up to 3 months. Thaw at room temperature or microwave for 20 seconds.
– Reheating: Warm in a 300°F oven for 5 minutes or microwave for 10–15 seconds to revive moisture.
Conclusion
There you have it—a foolproof recipe for the most tender, spiced, and satisfying Pumpkin Muffins you’ll ever make at home. By following these steps, you’ve unlocked a versatile base that adapts to countless variations, from vegan to gluten-free, while delivering consistent, bakery-quality results every time. The beauty of this recipe lies in its simplicity: everyday ingredients, straightforward techniques, and a final product that tastes like autumn in every bite. I encourage you to try these muffins for your next breakfast, brunch, or snack—and don’t forget to share your creations with friends or on social media. If you love this recipe, you might also enjoy my homemade Pumpkin Bread, which uses a similar batter but bakes into a loaf perfect for slicing and toasting. Happy baking!
FAQs
Q: Can I use pumpkin pie filling instead of pumpkin puree?
A: No—pumpkin pie filling contains added sugar and spices, which will throw off the sweetness and texture. Stick with 100% pure pumpkin puree (canned or homemade).
Q: Why are my muffins flat and not domed?
A: This usually happens if the oven temperature is too low, the batter is overmixed, or the baking soda is old. Always preheat fully and check the temperature with an oven thermometer.
Q: Can I reduce the sugar without ruining the recipe?
A: Yes, you can safely reduce to ¾ cup granulated sugar without affecting texture. For further reduction, use a sugar substitute like monk fruit or allulose—note that muffins may be slightly less tender.
Q: How do I make these muffins dairy-free?
A: Use oil instead of butter (this recipe already does), and substitute the 2 tablespoons of milk with any non-dairy milk of your choice (almond, oat, or soy).
Q: My muffins stuck to the liners—what went wrong?
A: This happens with low-quality paper liners. Use parchment-style liners or grease the tin directly. Also, ensure the muffins are fully cooled before peeling off the liners.
Q: Can I freeze the batter instead of baked muffins?
A: Absolutely! Portion batter into lined muffin tins, freeze until solid, then transfer the frozen batter pucks to a freezer bag. Bake directly from frozen, adding 5–7 minutes to the bake time.
Quick way to grow perfect Pumpkin Muffins in 5 minutes
Ingredients
Equipment
Method
- Preheat the oven to 375°F (190°C) and line a 12-cup muffin tin with paper liners.
- In a large bowl, whisk together all the dry ingredients until thoroughly combined.
- In a separate medium bowl, combine the pumpkin puree, eggs, vegetable oil, and vanilla extract.
- Pour the wet ingredients into the dry mixture and stir until just combined, taking care not to overmix.
- Divide the batter evenly among the prepared muffin cups, filling each about two-thirds full.
- Bake for 18-22 minutes, or until a wooden skewer inserted into the center comes out clean.
- Allow the muffins to cool in the tin for a few minutes before transferring them to a wire rack to cool completely.