The Ultimate Guide to Making the Best Slow Cooker Pot Roast
Have you ever wondered why some pot roast recipes turn out fork-tender and deeply flavorful while others end up dry and bland? The secret lies not in expensive ingredients, but in mastering the cooking method and understanding how a slow cooker pot roast transforms tough cuts of meat into melt-in-your-mouth perfection. Preparing this classic comfort dish at home allows you to control the quality of ingredients, customize the seasoning to your taste, and fill your kitchen with an irresistible aroma that signals something truly special is simmering. Whether you are a busy professional seeking a hands-off dinner solution or a home cook wanting to impress guests, learning to make a proper pot roast in your slow cooker is a skill that will reward you for years to come.
Ingredients & Kitchen Tools
Main Ingredients
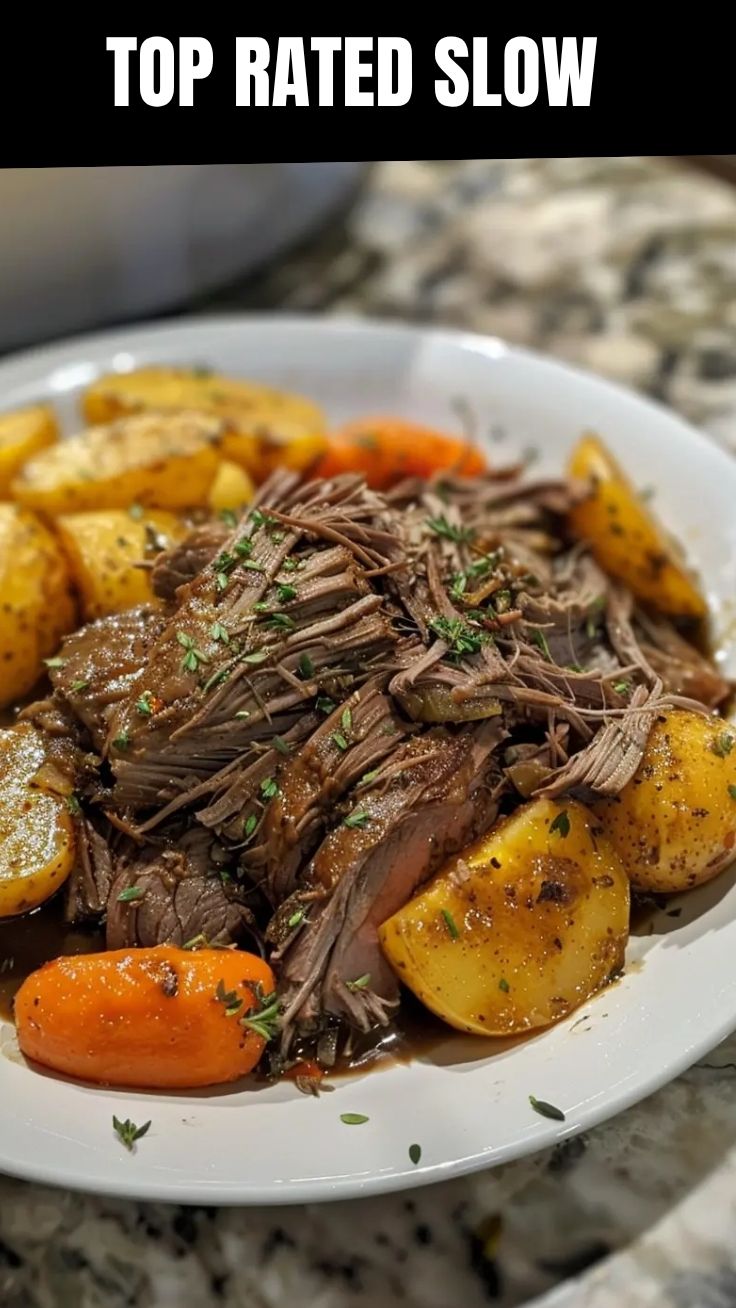
– Chuck roast (3–4 pounds): The ideal cut for slow cooking due to its marbling and connective tissue
– Beef broth (2 cups): Low-sodium preferred to control salt levels
– Carrots (4–5 medium): Cut into 2-inch chunks for even cooking
– Potatoes (6–8 small Yukon Gold): Hold shape better than russets during long cooking
– Yellow onion (1 large): Quartered for natural sweetness
– Garlic (4 cloves): Minced for aromatic depth
– Tomato paste (2 tablespoons): Adds umami and rich color
– Worcestershire sauce (2 tablespoons): Enhances beefy flavor
– Fresh thyme (3 sprigs) and rosemary (2 sprigs): For earthy herbal notes
– Bay leaves (2): Removed before serving
Seasonings
– Kosher salt and black pepper: To taste, applied generously before searing
– Smoked paprika (1 teaspoon): Adds subtle smokiness
– Optional: Balsamic vinegar (1 tablespoon): Brightens final flavor
Kitchen Tools
– 4–6 quart slow cooker: Ensures even heat distribution
– Cast iron or heavy skillet: For proper meat searing before slow cooking
– Chef’s knife and cutting board: For uniform vegetable sizing
– Tongs and slotted spoon: For handling meat and vegetables
– Meat thermometer (optional): Target 200–205°F internal for shreddable texture
Substitutions
– Meat: Brisket or bottom round work, though chuck remains optimal
– Vegetables: Add parsnips, celery root, or mushrooms for variety
– Liquid: Red wine can replace half the broth for deeper complexity
– Thickening: Mix 2 tablespoons cornstarch with cold water for gravy
Prep Time & Cooking Schedule
Total time: 6 hours 30 minutes to 8 hours 15 minutes
Prep time: 20 minutes (including vegetable chopping and meat searing)
Cook time: 6–8 hours on LOW or 4–5 hours on HIGH
Resting time: 10–15 minutes before serving
Planning your schedule matters because the slow cooker operates on a temperature curve. The first hour builds flavor as the pot reaches optimal heat, while the final two hours allow collagen breakdown for that desired tenderness. For best results, start cooking by 10:00 AM for a 6:00 PM dinner using the LOW setting. If you are short on time, the HIGH setting works adequately but produces slightly less tender meat. The resting period is not optional—it allows juices to redistribute throughout the meat fibers, preventing that dry, crumbly texture when you cut into it.
Step-by-Step Instructions
1. Prepare and sear the meat: Remove the chuck roast from packaging and pat thoroughly dry with paper towels—moisture inhibits browning. Season generously on all sides with kosher salt, black pepper, and smoked paprika. Heat 2 tablespoons of oil in your cast iron skillet over medium-high heat until shimmering. Sear the roast for 3–4 minutes per side without moving it, creating a deep mahogany crust. This Maillard reaction is non-negotiable for developing rich, complex flavors that your slow cooker pot roast will carry throughout the cooking process.
2 Brown the aromatics: After removing the meat, reduce heat to medium and add quartered onions cut-side down for 2 minutes. Stir in minced garlic and tomato paste, cooking for 1 minute until fragrant and slightly darkened.
3. Assemble in the slow cooker: Place seared meat in the center of your slow cooker. Arrange carrots, potatoes, and onions around the roast. Pour in beef broth mixed with Worcestershire sauce, then add herb sprigs and bay leaves. The liquid should reach about halfway up the meat—not submerge it entirely. This pot roast technique ensures the top remains exposed for better texture.
4. Cook low and slow: Cover and cook on LOW for 6–8 hours or HIGH for 4–5 hours. Avoid lifting the lid during the first 4 hours, as each lift releases heat and extends cooking time by 15–20 minutes. The meat is ready when it shreds easily with a fork and reaches an internal temperature of 200–205°F.
5. Rest and serve: Transfer the roast to a cutting board, tent with foil, and let rest for 10–15 minutes. Use a slotted spoon to remove vegetables. For gravy, strain the cooking liquid, skim fat, and simmer with a cornstarch slurry until thickened. Slice against the grain or shred the meat, ladle gravy over everything, and serve warm.
Nutritional Benefits & Advantages
A well-prepared slow cooker pot roast offers surprising nutritional advantages beyond its comforting reputation. Chuck roast provides 25–30 grams of protein per serving, making it excellent for muscle maintenance and satiety. The long, moist cooking method breaks down collagen into gelatin, which supports joint health and digestive function. Carrots contribute beta-carotene (converted to vitamin A), while potatoes offer potassium and vitamin C when eaten with the skin. The slow cooking process preserves more water-soluble nutrients compared to high-heat methods, and using low-sodium broth allows you to control overall salt intake. For those watching their diet, this dish can easily be paired with extra vegetables or served over cauliflower mash to reduce carbohydrate load while maintaining satisfaction.
Tips Variations & Cooking Advice
Flavor variations: Add chipotle peppers in adobo for smoky heat, or incorporate Chinese five-spice powder for an aromatic twist. For an Italian-inspired version, replace thyme with oregano and add a Parmesan rind during cooking.
Dietary adaptations: Use tamari instead of Worcestershire for gluten-free needs. Dairy-free versions require no changes to the core recipe. To reduce sodium, use unsalted broth and add salt gradually near the end of cooking.
Alternative cooking methods: Can you achieve similar results in an Instant Pot? Absolutely—pressure cook on HIGH for 60 minutes with natural release. For oven braising, cook covered at 300°F for 3–4 hours in a Dutch oven.
Portion changes: This recipe serves 6–8 people. For smaller households, halve ingredients but maintain the same liquid-to-meat ratio. Leftovers freeze beautifully for meal prep.
Texture adjustments: If you prefer thicker gravy, mash some cooked potatoes into the cooking liquid before thickening. For firmer vegetables, add them halfway through cooking rather than at the start.
Common Mistakes to Avoid
– Skipping the sear: This is the most frequent error. Without browning, you lose 50% of potential flavor depth. The caramelized crust builds the savory foundation that defines great pot roast.
– Overcrowding the slow cooker: Fill the pot no more than two-thirds full. Overcrowding creates steam rather than braising, resulting in mushy vegetables and meat that never achieves proper texture.
– Lifting the lid repeatedly: Each time you peek, heat escapes and extends cooking time. Trust the process—only check at the minimum recommended cooking time.
– Adding too much liquid: The meat releases its own juices during cooking. Excess liquid dilutes flavor and produces watery gravy. You want the liquid at one-third to halfway up the meat, not covering it.
– Slicing without resting: Cutting immediately causes juices to pool on the cutting board, leaving dry meat. Ten minutes of rest makes a measurable difference in moisture retention.
Storage & Meal Prep Tips
Refrigeration: Store cooled pot roast in an airtight container with some cooking liquid for up to 4 days. Separate meat from vegetables before storing to prevent them from becoming mushy. When reheating, warm slowly on the stovetop over low heat, adding a splash of broth to restore moisture. Microwave reheating works in a pinch but may dry out the meat—cover the dish with a damp paper towel to help.
Freezing: The dish freezes exceptionally well for up to 3 months. Cool completely, portion into freezer-safe containers with gravy included, and leave 1/2-inch headspace for expansion. Thaw overnight in the refrigerator before reheating. For best texture, avoid freezing and thawing multiple times, as each cycle degrades the meat fibers.
Meal prep strategies: Cook a double batch on Sunday for easy weekday lunches. Shred the meat and portion with vegetables into individual containers for grab-and-go options. The gravy can be stored separately and added at reheating to prevent sogginess.
Conclusion
Mastering this classic slow cooker pot roast transforms a simple cut of beef into a deeply satisfying meal that fills your home with comfort and your plate with flavor. By following the techniques outlined here—especially the critical searing step and proper temperature management—you can consistently achieve fork-tender meat with rich, savory gravy that rivals any restaurant version. The beauty of this recipe lies in its flexibility; experiment with different herbs, vegetables, and seasonings to make it your own while relying on the proven method for reliable results. Whether you are preparing it for a Sunday family dinner, meal prepping for busy workdays, or looking to impress guests without spending hours in the kitchen, this pot roast recipe delivers every time. Give it a try, share your results with us, and explore our other slow cooker recipes to expand your repertoire of comforting, home-cooked meals.
FAQs
Can I use frozen meat in the slow cooker?
No, for food safety reasons. Frozen meat takes too long to reach a safe temperature in a slow cooker, allowing harmful bacteria to multiply. Always thaw meat completely in the refrigerator before searing and slow cooking.
Why is my pot roast tough after 8 hours?
Check your slow cooker temperature—some models run cooler than indicated. Ensure you are using the LOW setting and that your meat reaches 200–205°F internally. If the meat is tough after the recommended time, cook another hour and test again. Undercooked collagen is the usual culprit.
Can I skip the searing step and still get good flavor?
You can skip it, but the difference is significant. Searing creates hundreds of flavor compounds through the Maillard reaction that no amount of seasoning can replicate in the slow cooker. If you are pressed for time, at least season the meat well and cook longer, but expect a milder, less complex final dish.
What can I substitute for Worcestershire sauce?
Soy sauce or tamari mixed with a drop of molasses provides similar umami and sweetness. For a completely different but delicious flavor, use coconut aminos for a paleo-friendly alternative that still adds depth.
How do I fix watery gravy at the end?
Remove the meat and vegetables, then simmer the cooking liquid uncovered over medium heat for 10–15 minutes to reduce and concentrate flavors. Alternatively, make a cornstarch slurry (1 tablespoon cornstarch mixed with 2 tablespoons cold water per cup of liquid) and whisk in while simmering until thickened.
Best way to grow 3 Slow Cooker Pot Roast techniques
Ingredients
Equipment
Method
- Season the beef roast liberally with salt and pepper.
- Place the seasoned roast in the slow cooker and add beef broth.
- Add carrots, potatoes, onion, minced garlic, thyme, and bay leaf to the slow cooker.
- Cook on low for 6-8 hours or on high for 3-4 hours, until the beef is fork-tender.
- Season the beef roast with salt and pepper.
- Place the roast in the slow cooker and pour in crushed tomatoes and red wine.
- Add pitted Kalamata olives, chopped sun-dried tomatoes, oregano, rosemary, and minced garlic.
- Cook on low for 6-8 hours or on high for 3-4 hours, until the beef is very tender.
- Season the beef roast with salt and pepper.
- In a bowl, whisk together soy sauce, hoisin sauce, rice vinegar, grated ginger, minced garlic, sesame oil, and red pepper flakes (if using).
- Place the roast in the slow cooker and pour the prepared sauce over it.
- Cook on low for 6-8 hours or on high for 3-4 hours, until the beef shreds easily.
- Garnish with sliced scallions before serving.