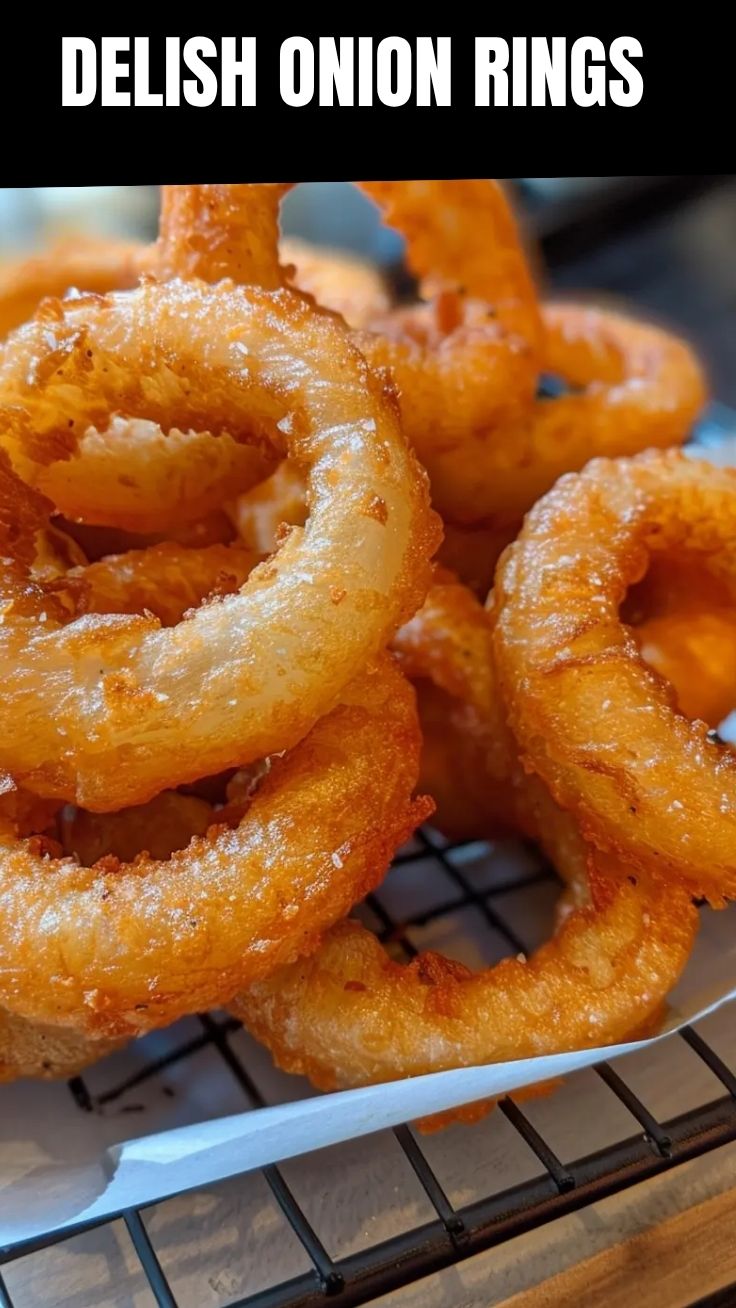
The Ultimate Guide to Perfectly Crispy Onion Rings (Baked, Fried & Air Fryer)
Have you ever bitten into a soggy, greasy onion ring and wondered why restaurant versions taste so much better? The secret isn’t just deep-frying—it’s the perfect balance of coating, temperature control, and technique. Mastering Onion Rings (Crispy) at home transforms a simple snack into a crunchy, golden delight that rivals any appetizer menu. Whether you’re preparing game-day snacks or a side for burgers, the ability to achieve that shatteringly crisp exterior without the mess of a deep fryer is a game-changer. In this guide, you’ll learn how to create restaurant-quality crispy onion rings using an air fryer onion rings method that delivers crunch with less oil, starting right in your own kitchen.
Ingredients & Kitchen Tools
For the Onion Rings:
– 2 large sweet onions (Vidalia or Walla Walla work best—their high sugar content caramelizes beautifully, creating a sweeter, less harsh flavor)
– 1 cup all-purpose flour (for dredging; substitute with rice flour for extra crispiness or gluten-free blend)
– 1 teaspoon garlic powder
– 1 teaspoon smoked paprika
– 1/2 teaspoon cayenne pepper (optional, for heat)
– 1 large egg
– 1 cup buttermilk (or 1 cup milk + 1 tablespoon lemon juice, let sit 5 minutes)
– 1 cup panko breadcrumbs (Japanese-style—they create larger, airier crunch than regular breadcrumbs)
– 1/2 cup finely grated Parmesan cheese (adds umami and helps browning)
– Salt and black pepper to taste
– Cooking spray or oil for misting
Kitchen Tools:
– Sharp knife or mandoline slicer (for uniform rings)
– 3 shallow bowls (breading station setup)
– Baking sheet with wire rack (essential for even air circulation during baking or resting)
– Air fryer or deep fryer (or heavy-bottomed pot with thermometer)
– Paper towels for draining
– Tongs for handling
Optional Substitutions:
– Gluten-free: Use cornstarch instead of flour, and crushed gluten-free crackers for breadcrumbs.
– Dairy-free: Substitute buttermilk with almond milk + vinegar, and skip Parmesan.
– Extra crispy: Add 2 tablespoons cornstarch to the flour mixture.
Prep Time & Cooking Schedule
Prep Time: 15 minutes (slicing, setting up breading station)
Resting Time: 10 minutes (coated rings rest on wire rack before cooking)
Cook Time: 8–12 minutes total (air fryer method) or 3–4 minutes (deep frying in batches)
Total Time: Approximately 35–40 minutes
Planning Tip: The resting period is non-negotiable. Allowing the breaded rings to sit on a wire rack for 10 minutes lets the coating adhere better and prevents the crust from sliding off during cooking. If you’re preparing for a party, bread the rings up to 2 hours ahead and refrigerate on the rack—just add 1–2 minutes to cooking time.
Step-by-Step Instructions
1. Prepare the Onions: Slice onions into 1/2-inch thick rounds. Separate into individual rings (discard the smallest inner rings or save them for another use). Soak rings in ice water for 15 minutes—this reduces sulfur compounds that cause tears and improves crispiness by hydrating the layers.
2. Set Up Breading Station:
– Bowl 1: Mix 1 cup flour, garlic powder, paprika, cayenne, salt, and pepper.
– Bowl 2: Whisk together egg and buttermilk until smooth.
– Bowl 3: Combine panko breadcrumbs and Parmesan cheese.
3. Breading Process: Working one ring at a time, coat in flour mixture (shake off excess), dip into buttermilk-egg mixture (let excess drip), then press into panko-Parmesan mixture until fully covered. Place on wire rack over baking sheet.
Pro Tip: Use one hand for dry ingredients and one hand for wet—this prevents clumpy, gooey fingers and keeps the coating light. To achieve crispy onion rings, double-dip by repeating the flour and buttermilk steps once more for an extra-thick crust.
4. For the Air Fryer Method (Our Recommended Technique):
– Preheat air fryer to 375°F (190°C) for 3 minutes.
– Spray the basket with cooking spray.
– Arrange rings in a single layer—do not overcrowd (work in batches if needed).
– Lightly mist the tops with cooking spray (this helps browning).
– Cook for 8–10 minutes, flipping halfway through, until golden brown and crispy.
Temperature Check: If your air fryer onion rings are browning too quickly but aren’t crisp inside, reduce temperature to 350°F and extend cooking time by 2–3 minutes. Every air fryer runs slightly differently.
Pro Tip on Texture: Tap a cooked ring with a fork—it should make a hollow, crunchy sound. If it sounds dull or feels soft, add 1–2 more minutes.
Nutritional Benefits & Advantages
– Onions are rich in quercetin, a powerful antioxidant that supports heart health and reduces inflammation.
– Panko breadcrumbs absorb less oil than traditional breadcrumbs, making air-fried versions significantly lower in fat (approximately 60% less oil than deep-frying).
– Parmesan cheese adds calcium and protein without excessive sodium when used sparingly.
– Cayenne pepper boosts metabolism temporarily through capsaicin.
Dietary Advantage: A single serving (4–5 rings) air-fried contains roughly 180–220 calories compared to 350–400 calories for deep-fried versions, with 70% less saturated fat. The crispy onion rings retain their crunch without the greasy aftermath.
Tips, Variations & Cooking Advice
– Flavor Twists: Add 1 tablespoon ranch seasoning mix to the flour for a tangy twist, or 1 teaspoon chipotle powder for smoky heat.
– Spice Swap: Replace Parmesan with nutritional yeast for a vegan, cheesy flavor.
– Alternative Cooking Methods:
– Oven-Baked: Place rings on a wire rack over a baking sheet, spray with oil, and bake at 425°F (220°C) for 12–15 minutes, flipping once.
– Deep-Fried: Heat oil to 350°F (175°C). Fry in small batches for 3–4 minutes until deep golden brown.
– Portion Changes: Double the recipe for parties—breaded rings hold well in the fridge for up to 4 hours before cooking.
– Dietary Adaptations: For gluten-free, use crushed pork rinds or gluten-free cornflakes instead of panko. Dairy-free versions work beautifully with oat milk in the batter.
Pro Tip for Air Fryer Onion Rings: Always preheat your air fryer—failure to do so results in uneven browning. Also, avoid stacking rings; they must sit flat to allow hot air circulation.
Common Mistakes to Avoid
| Mistake | Solution |
|———|———-|
| Soggy coating | Didn’t soak onions in ice water first, or skipped resting time on wire rack. Always rest rings 10 minutes before cooking. |
| Coating falls off | Excess flour or wet batter. Shake off excess flour between each step, and let buttermilk drip thoroughly. |
| Uneven cooking | Overcrowding the air fryer or baking sheet. Always cook in a single layer with space between rings. |
| Bland flavor | Forgot to season the flour mixture. Onion rings need aggressive seasoning—add extra salt and paprika. |
| Burnt exterior, raw interior | Temperature too high. Lower heat by 25°F (15°C) and cook slightly longer. |
Pro Tip: If you notice the coating sliding off while cooking, your batter-to-flour ratio is off. Aim for a slightly thick, paste-like consistency in the wet mixture—it should drip slowly, not run like milk.
Storage & Meal Prep Tips
Refrigeration: Store cooled rings in an airtight container lined with paper towels (to absorb condensation). They keep for 2–3 days, but crispiness decreases significantly.
Freezing: Perfect for meal prep!
– Freeze uncooked breaded rings on a baking sheet in a single layer for 1 hour.
– Transfer to a freezer bag (separate layers with parchment paper).
– Freeze for up to 3 months.
– Cook from Frozen: Add 3–4 minutes to air fryer time (no thawing needed).
Reheating (Best Method): Always reheat in an air fryer or oven to restore crunch.
– Air Fryer: 350°F (175°C) for 3–5 minutes.
– Oven: 400°F (200°C) on a wire rack for 5–7 minutes.
– Avoid microwave at all costs—it turns crisp coating into a soggy, sad mess.
Conclusion
The secret to truly memorable crispy onion rings lies not in complicated ingredients but in attention to detail: soaking the onions, allowing resting time, and controlling temperature. Whether you choose the air fryer route for healthier indulgence or opt for deep-frying for instant nostalgia, this recipe delivers that elusive crunch every time. We’ve shown you how even an air fryer onion rings method—often dismissed as lacking crispiness—can achieve shatteringly golden results when done right. Now it’s your turn: try this recipe tonight, experiment with one of the flavor variations, and share your results (or tag us in your crispy creations). For more side dish inspiration, check out our guide to homemade dipping sauces or explore our collection of air fryer appetizers that make weeknight cooking effortless.
FAQs
Q: Can I use frozen onion rings instead of making from scratch?
A: Yes, but follow the air fryer instructions on the package—most frozen varieties need 8–12 minutes at 375°F. Homemade rings have superior texture and less artificial additive content.
Q: Why did my batter become lumpy?
A: Lumps typically form when liquid is added too quickly to flour. Whisk buttermilk and egg thoroughly before combining, and pour slowly while whisking. Alternatively, use a fork to break up lumps.
Q: Can I substitute buttermilk with regular milk?
A: Yes, but add 1 tablespoon of lemon juice or white vinegar per cup of milk and let sit 5 minutes to sour. This acidity helps tenderize the onion and activate baking powder if using.
Q: How do I make gluten-free onion rings?
A: Use a 1:1 gluten-free flour blend for dredging, and replace panko with crushed gluten-free crackers, cornflakes, or almond flour. The texture will be slightly different but still delicious.
Q: Why did my onion rings turn out too dark on the outside but still raw inside?
A: Your oil or air fryer temperature was too high. Lower by 25°F (15°C) and extend cooking time. Also, ensure rings are uniform in thickness (mandoline slicer helps). Thicker rings need longer, gentler heat.
Quick way to grow 7 Onion Rings (Crispy)
Ingredients
Equipment
Method
- Slice the onion into 1/4 inch thick rings and separate them.
- In a bowl, whisk together flour, baking powder, and salt.
- In a separate bowl, whisk the egg and milk.
- Dip each onion ring into the egg mixture, then dredge in the flour mixture, ensuring it's fully coated.
- Heat the vegetable oil in a deep fryer or large pot to 350°F (175°C).
- Carefully place a few coated onion rings into the hot oil, ensuring not to overcrowd the fryer.
- Fry for 2-3 minutes or until golden brown and crispy, then remove and place on a wire rack lined with paper towels to drain excess oil.