How to Make a Perfectly Juicy Brined Turkey at Home
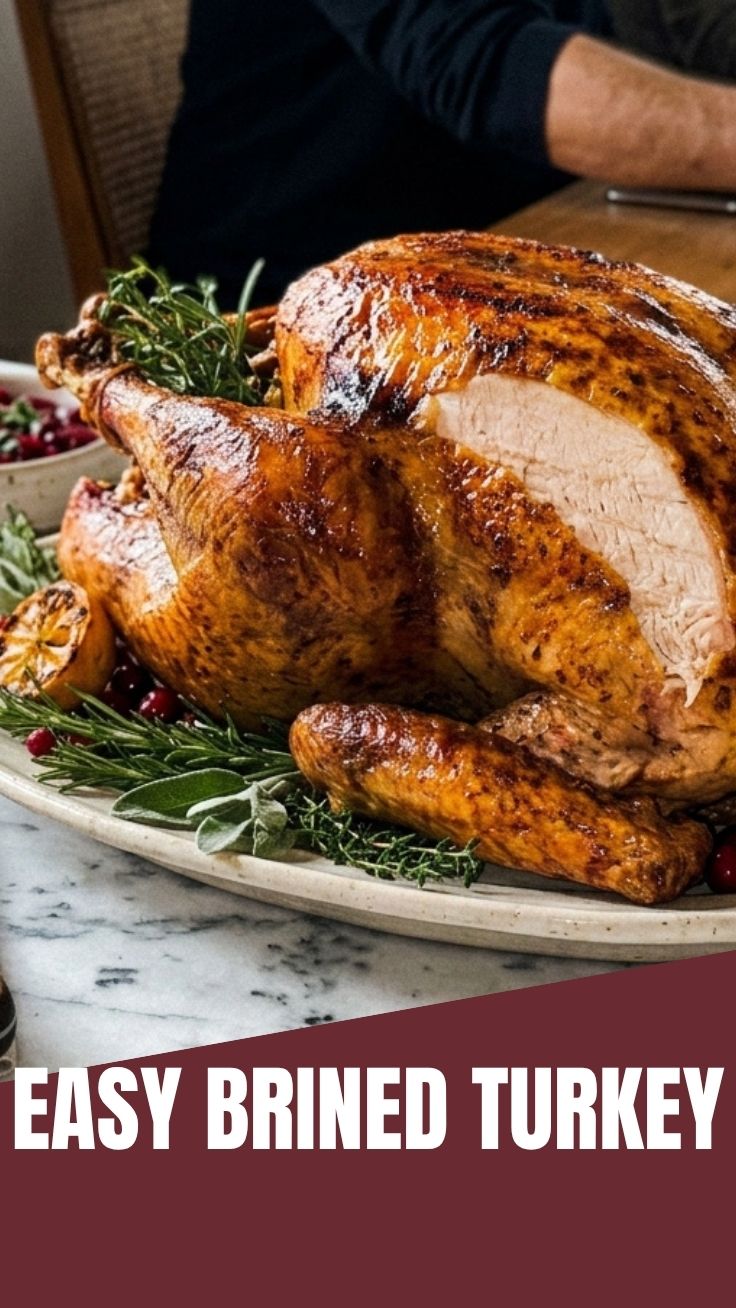
Have you ever carved into a turkey only to find dry, flavorless meat? The secret to a moist, deeply seasoned bird lies in a simple technique: Brined Turkey. By using a saltwater solution known as Wet Brining, you lock in moisture and infuse flavor from the inside out. Preparing this at home not only saves money but gives you complete control over the seasoning and quality of your holiday centerpiece. Trust me, once you try it, you’ll never go back to an unbrined bird.
Ingredients & Kitchen Tools
For the brine:
– 4 quarts cold water
– 1 cup kosher salt (use Diamond Crystal for best flavor absorption)
– ½ cup brown sugar (balances saltiness)
– 2 tbsp black peppercorns
– 4 bay leaves
– 6 garlic cloves, smashed
– Fresh rosemary and thyme sprigs
– 2 quarts ice (to cool brine quickly)
For the turkey:
– 1 whole turkey (12–14 lbs), thawed if frozen
– 4 tbsp unsalted butter, softened
– Fresh herbs (sage, parsley) for under the skin
– 1 onion, quartered
– 1 lemon, halved
Kitchen tools:
– Large stockpot or brining bag (food-grade bucket works too)
– Roasting pan with a V-rack
– Instant-read meat thermometer
– Sharp carving knife
– Paper towels for drying the skin
Optional substitutions: Use coconut sugar instead of brown sugar for a deeper flavor; replace butter with olive oil for a dairy-free version.
Prep Time & Cooking Schedule
– Active prep time: 20 minutes
– Brining time: 12–24 hours (overnight is ideal)
– Roasting time: 3–4 hours (about 15 minutes per pound at 325°F)
– Resting time: 30 minutes
Plan ahead: If you want turkey on the table at 2 PM, start the brine at 2 PM the day before. The long soak allows the brine to penetrate deep into the muscle fibers, transforming a lean bird into a succulent centerpiece.
Step-by-Step Instructions
1. Make the brine: In a large pot, combine 4 quarts water, kosher salt, sugar, peppercorns, bay leaves, garlic, and fresh herbs. Bring to a boil, stirring until salt and sugar dissolve. Remove from heat and add 2 quarts ice to cool the mixture to below 40°F.
2. Submerge the turkey: Place the turkey in your brining container, pour the cooled brine over it, and add more cold water if needed to fully cover the bird. Once your turkey is fully submerged in the wet brining liquid, you’ve set the stage for a perfectly seasoned brined turkey. Cover and refrigerate for 12–24 hours.
3. Rinse and dry: Remove the turkey from the brine, discard the brine, and rinse the bird thoroughly under cold water. Pat it bone-dry with paper towels—any moisture on the skin will prevent browning.
4. Prep for roasting: Preheat oven to 325°F. Loosen the skin over the breast and rub softened butter and fresh herbs directly onto the meat. Stuff the cavity with onion and lemon. Truss the legs with kitchen twine.
5. Roast: Place turkey breast-side up on a rack in a roasting pan. Roast until the thickest part of the thigh reaches 165°F (about 3–4 hours). Tent with foil if the skin browns too quickly.
6. Rest and carve: Let the turkey rest uncovered for 30 minutes. This redistributes juices and ensures each slice is tender. Carve and serve.
Nutritional Benefits & Advantages
A brined turkey offers more than just incredible taste. The brining process helps the meat retain natural juices without added fats, resulting in a leaner final dish if you choose to skip the butter. Rinsing the brine removes excess sodium, so you control the salt level. Turkey is packed with high-quality protein, B vitamins, and selenium, supporting muscle health and immunity. By brining at home, you avoid the preservatives and sodium phosphate often used in commercial injected turkeys.
Tips, Variations & Cooking Advice
– Flavor twist: Add apple cider, orange zest, or star anise to the brine for a festive spin.
– Alternative method: Try a dry brine (rubbing salt and herbs directly on the skin) for an even crispier crust—though moisture retention is slightly lower than wet brining.
– Dietary adaptations: Use vegetable oil instead of butter for a dairy-free version; all other ingredients are naturally gluten-free.
– Cooking method swap: Deep-fry your brined turkey for extra juiciness (just dry the bird extremely well first).
– Portion change: Scale the recipe for a smaller turkey (8–10 lbs) by halving the brine volume.
Common Mistakes to Avoid
– Over-brining: Leaving the turkey in brine longer than 24 hours makes the meat mushy and overly salty. Stick to the timeline.
– Skipping the rinse: Always rinse after brining, or the turkey will be inedibly salty.
– Damp skin: A wet turkey steams instead of roasts, leading to pale, rubbery skin. Pat it bone-dry.
– Not preheating the oven: Starting in a cold oven prolongs cooking and dries out the exterior. Always preheat to 325°F.
– Relying on pop-up timers: Those plastic indicators are inaccurate. Use a meat thermometer for perfect doneness.
Storage & Meal Prep Tips
– Refrigeration: Store leftover carved turkey in an airtight container for up to 4 days.
– Freezing: Wrap portions tightly in plastic wrap and aluminum foil, then freeze for up to 3 months.
– Reheating: To avoid drying, reheat slices in a covered baking dish with a splash of chicken broth at 300°F until warmed through. Alternatively, use leftover meat in soups, casseroles, or sandwiches.
Conclusion
Mastering the art of a perfectly brined turkey ensures your holiday table is memorable for all the right reasons. The technique of wet brining transforms an ordinary bird into a juicy, flavor-packed showstopper. Ready to impress your guests? Try this recipe today, snap a photo of your golden-brown turkey, and share your success in the comments. For more roasting secrets, check out our guide to perfect gravy and stuffing sides!
FAQs
1. How long should I brine a turkey?
For a 12–14 lb turkey, 12–24 hours is optimal. Smaller birds need 10–12 hours; larger ones can go up to 24 hours. Never exceed 24 hours.
2. Can I brine a turkey in a cooler instead of the fridge?
Yes. Fill a clean cooler with the brine and turkey, then add ice packs to keep the temperature below 40°F. Monitor with a thermometer.
3. Do I really need to rinse the turkey after brining?
Absolutely. Rinsing removes excess surface salt. Without it, the skin will be overly salty and the final dish may be unpleasantly briny.
4. Can I reuse the brine solution?
No. Once used, the brine contains raw poultry juices and bacteria. Discard it after one use to avoid food safety risks.
5. What if my turkey is still partially frozen?
Thaw it completely in the refrigerator (allow 24 hours per 5 lbs) before brining. Brining a semi-frozen bird won’t allow even salt penetration and may spoil the meat.
Best way to grow a 12 lb Brined Turkey
Ingredients
Equipment
Method
- In a large stockpot or food-safe container, combine the water, kosher salt, brown sugar, bay leaves, peppercorns, quartered oranges, and fresh rosemary to create the brine solution.
- Submerge the turkey completely in the brine, ensuring it is fully covered; if necessary, weigh it down with a plate.
- Refrigerate the turkey in the brine for at least 12 hours, and preferably up to 24 hours, to allow the flavors to penetrate and tenderize the meat.
- Preheat your oven to 425°F (220°C) and prepare a roasting pan by placing the quartered onion, chopped carrots, chopped celery, and fresh thyme sprigs at the bottom.
- Remove the brined turkey from the solution, pat it thoroughly dry with paper towels, and tuck the wing tips under the body.
- Rub the melted butter all over the turkey's skin, then place it on a roasting rack set inside the prepared roasting pan.
- Roast the turkey for 30 minutes at 425°F (220°C) to achieve a golden-brown skin.
- Reduce the oven temperature to 325°F (160°C) and continue roasting for approximately 2 to 2.5 hours, or until a meat thermometer inserted into the thickest part of the thigh reads 165°F (74°C).
- If the skin starts to get too dark, tent the turkey loosely with aluminum foil.
- Once cooked, remove the turkey from the oven, transfer it to a carving board, and let it rest for at least 20-30 minutes before carving to allow the juices to redistribute, ensuring a moist and flavorful result.