The Ultimate Guide to Perfect Chicken Parmesan at Home
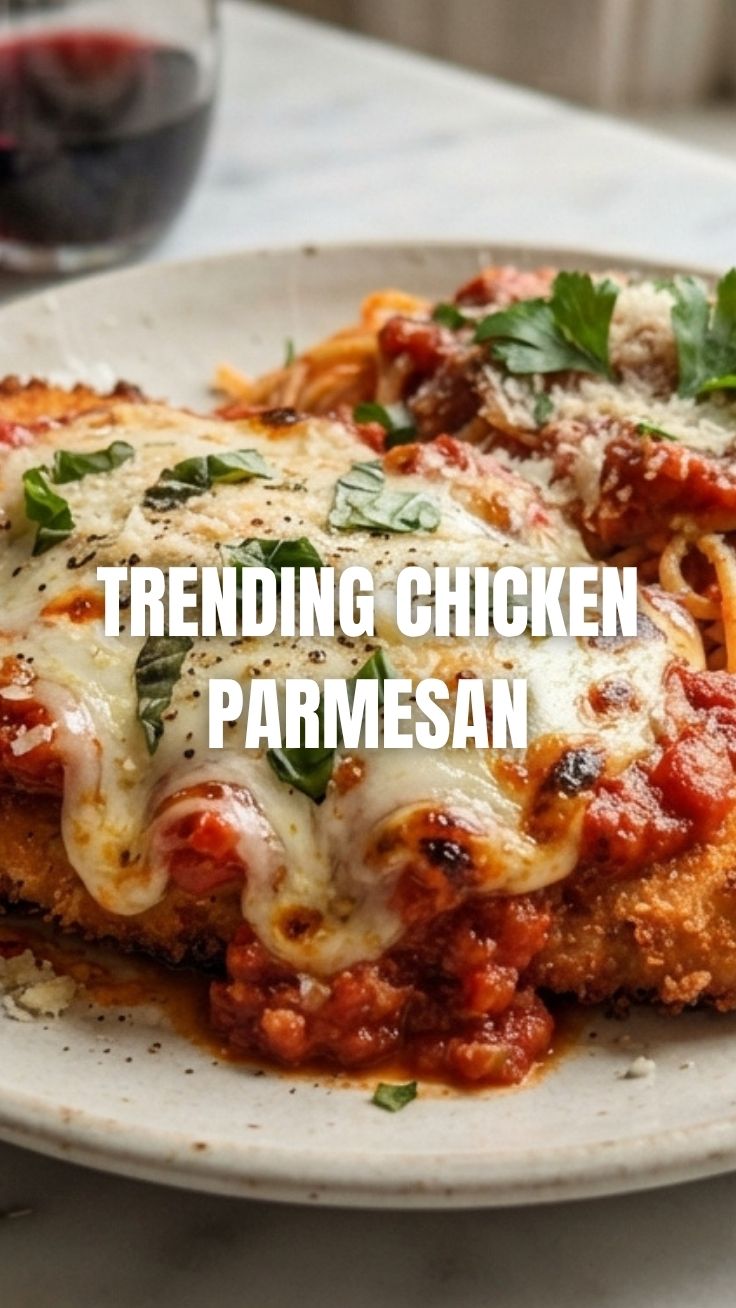
Is there anything more satisfying than biting into a perfectly crispy, golden-brown cutlet topped with melted mozzarella and rich marinara sauce? If you’ve ever wondered how to replicate restaurant-quality Chicken Parmesan in your own kitchen, you’re in the right place. This classic dish, deeply rooted in Italian cuisine, brings together humble ingredients in a way that feels both comforting and indulgent. Preparing it at home not only saves money but also gives you complete control over quality, seasoning, and freshness. Whether you’re cooking for a family dinner or impressing guests, mastering this recipe will elevate your home cooking game. Let’s dive into the secrets behind the perfect Chicken Parmesan.
Ingredients & Kitchen Tools
For the Chicken:
– 4 boneless, skinless chicken breasts – Pound to even thickness (about ½ inch) for uniform cooking
– 1 cup all-purpose flour – For the initial dredge; use gluten-free flour if needed
– 2 large eggs – Beaten with 1 tablespoon water for the egg wash
– 1½ cups seasoned breadcrumbs – Panko offers extra crunch; Italian-style adds more herbs
– ½ cup grated Parmesan cheese – Use fresh, not pre-shredded, for better melting
– 1 teaspoon garlic powder – Adds depth without overpowering
– 1 teaspoon salt – Kosher salt preferred for seasoning
– ½ teaspoon black pepper – Freshly ground for best flavor
For the Sauce and Topping:
– 2 cups marinara sauce – Store-bought or homemade; look for low-sugar options
– 2 cups shredded mozzarella cheese – Whole milk mozzarella melts best
– ½ cup fresh basil leaves – For garnish; adds brightness
– 2 tablespoons olive oil – For frying; avocado oil works too
Kitchen Tools:
– Meat mallet or rolling pin – For pounding chicken evenly
– Three shallow bowls – For the breading station
– Large skillet – Heavy-bottomed for even heat distribution
– Baking sheet – Lined with parchment paper or foil
– Instant-read thermometer – Ensures chicken reaches 165°F safely
– Tongs – For flipping without breaking the breading
Optional Substitutions:
– Chicken thighs – Juicier but require longer cooking time
– Gluten-free breadcrumbs – Almond flour or crushed pork rinds work
– Dairy-free cheese – Look for plant-based mozzarella alternatives
Prep Time & Cooking Schedule
– Prep time: 20 minutes – Includes pounding, setting up breading station, and shredding cheese
– Cook time: 25 minutes – 12 minutes for frying, 13 minutes for baking
– Resting time: 5 minutes – Essential for the cheese to set and juices to redistribute
– Total time: 50 minutes
Pro tip: Start your marinara sauce warming on low heat while you prepare the chicken. This allows flavors to meld and ensures everything is ready simultaneously.
Step-by-Step Instructions
1. Prepare the chicken – Place each breast between two sheets of plastic wrap and pound to ½-inch thickness using a meat mallet. Season both sides with salt and pepper. This step ensures even cooking and tender results.
2. Set up the breading station – In three shallow bowls, place flour in the first, beaten eggs in the second, and a mixture of breadcrumbs, Parmesan, garlic powder, salt, and pepper in the third. The order matters: flour first for adhesion, then egg for binding, then breadcrumbs for crunch.
3. Dredge each piece – Coat chicken in flour, shake off excess, dip into egg wash, then press firmly into breadcrumb mixture. Let coated chicken rest on a wire rack for 5 minutes – this helps the coating adhere better during frying.
4. Fry to golden perfection – Heat olive oil in a large skillet over medium heat. Cook chicken for 3-4 minutes per side until golden brown. The internal temperature should reach 160°F (it will continue cooking in the oven). Don’t crowd the pan – work in batches if needed.
5. Assemble and bake – Preheat oven to 400°F. Place fried chicken on a baking sheet, spoon 2-3 tablespoons of marinara over each piece, and top generously with mozzarella. Bake for 10-13 minutes until cheese is bubbly and chicken reaches 165°F. This marriage of crispy chicken and melted cheese is what makes Chicken Parmesan a star of Italian cuisine – simple yet absolutely satisfying.
6. Rest and garnish – Let rest for 5 minutes before serving. Top with fresh basil and extra Parmesan.
Nutritional Benefits & Advantages
This dish offers more than just incredible flavor. Chicken provides lean protein (about 35g per serving) essential for muscle repair and satiety. The marinara sauce delivers lycopene, a powerful antioxidant linked to heart health. Mozzarella adds calcium for bone strength, while basil contributes vitamin K and anti-inflammatory properties.
To make it lighter, use less cheese or opt for part-skim mozzarella. Serving with a side salad or roasted vegetables balances the meal with fiber and nutrients. For a lower-carb version, swap breadcrumbs for crushed pork rinds or almond flour.
Tips Variations & Cooking Advice
Flavor variations:
– Add red pepper flakes to the breading for heat
– Mix fresh herbs (oregano, thyme) into the breadcrumbs
– Use smoked mozzarella or provolone for a deeper flavor
Cooking methods:
– Air fryer: Cook at 375°F for 10-12 minutes, flipping halfway through
– Baked only: Skip frying; spray breaded chicken with oil and bake at 400°F for 20 minutes
– One-pan: Cook everything in an oven-safe skillet from start to finish
Dietary adaptations:
– Gluten-free: Use gluten-free flour and breadcrumbs
– Dairy-free: Use vegan cheese and nutritional yeast instead of Parmesan
– Keto: Replace breadcrumbs with crushed pork rinds and almond flour
Common Mistakes to Avoid
– Soggy breading: Always pat chicken dry before breading, and let coated pieces rest before frying
– Overcooked chicken: Use a thermometer – remove from heat at 160°F (carryover cooking takes it to 165°F)
– Burning the cheese: Add cheese during the last 5 minutes of baking if using high heat
– Greasy results: Maintain oil temperature at 350°F; too low and the chicken absorbs oil
– Uneven thickness: Pound chicken properly – this is non-negotiable for even cooking
Storage & Meal Prep Tips
Refrigeration: Store leftovers in an airtight container for up to 4 days. Place parchment paper between layers to prevent sticking.
Freezing: Assemble the dish completely but don’t bake. Wrap tightly and freeze for up to 3 months. Bake from frozen at 375°F for 25-30 minutes.
Reheating: For best results, reheat in a 350°F oven for 10-12 minutes. Avoid microwaving, as it makes the breading soggy. An air fryer works great – 3 minutes at 375°F.
Meal prep: Bread and fry chicken in advance, then refrigerate. Assemble and bake when ready to serve. This saves 20 minutes on busy weeknights.
Conclusion
Mastering Chicken Parmesan at home is a rewarding culinary journey that brings the warmth of Italian cuisine to your table. By following these steps, you’ll achieve that perfect balance of crispy exterior, tender meat, and gooey cheese every time. The key takeaways are simple: pound evenly, bread properly, fry at the right temperature, and don’t rush the resting time. Whether you’re cooking for a weeknight dinner or a special occasion, this recipe delivers consistent, restaurant-quality results. I encourage you to try this version, experiment with variations, and share your results in the comments below. Your perfect Chicken Parmesan is just one kitchen session away!
FAQs
Can I use chicken thighs instead of breasts?
Absolutely. Thighs are more forgiving and stay juicier, but they require about 5 extra minutes of cooking time. Adjust thickness to ½ inch as well.
Why did my breading fall off during frying?
This usually happens when the chicken isn’t dry before breading, or you didn’t let the coating rest before frying. Pat chicken dry with paper towels and let breaded pieces sit for 5 minutes on a wire rack.
Can I make this dairy-free?
Yes. Use vegan mozzarella shreds, nutritional yeast mixed with breadcrumbs instead of Parmesan, and ensure your marinara is dairy-free. The texture will be slightly different but still delicious.
How do I prevent the cheese from sticking to the pan?
Line your baking sheet with parchment paper or foil, and lightly spray with non-stick cooking spray. Alternatively, use a silicone baking mat.
Is it possible to make this ahead of time?
Yes. Fry the chicken up to 24 hours in advance and refrigerate. When ready to serve, top with sauce and cheese, then bake as directed. Add 5 minutes to the baking time if starting from cold.