The Ultimate Guide to Perfecting Chicken Pot Pie: A Soul-Warming Classic You Can Master at Home
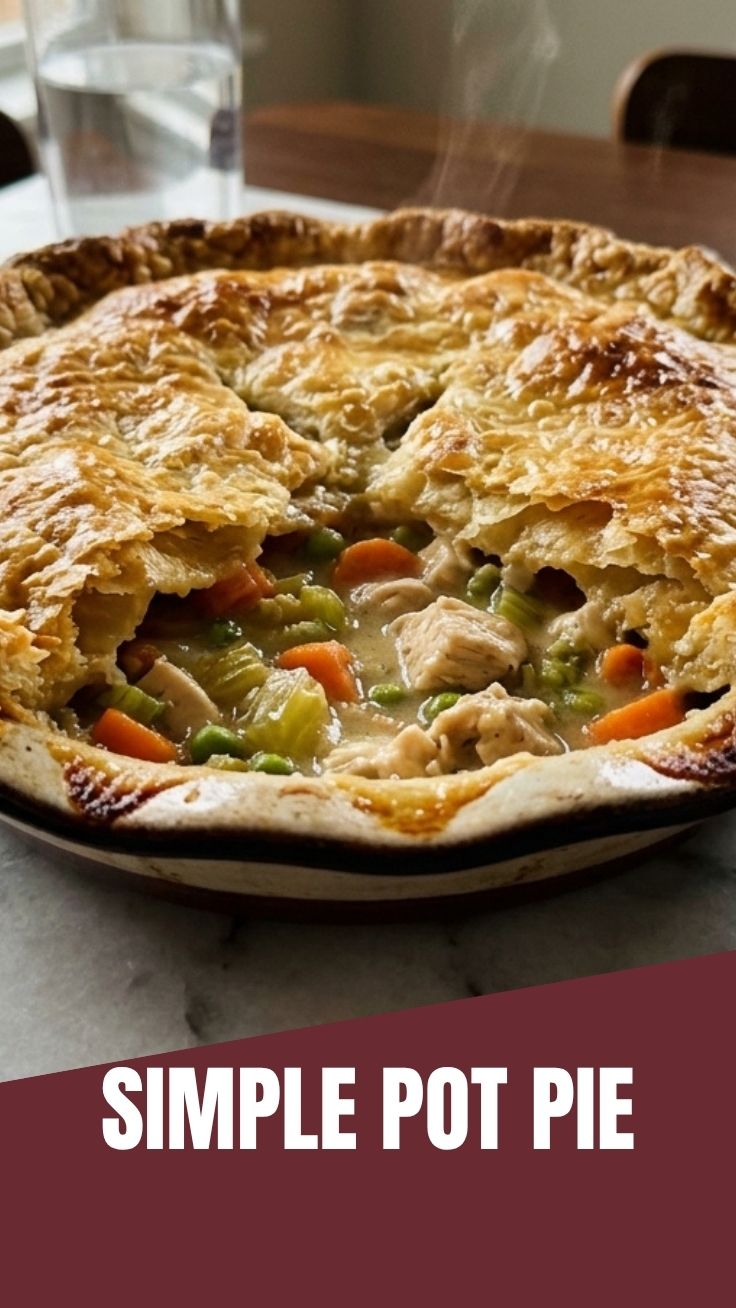
Have you ever craved that golden, bubbling dish that seems to wrap you in a warm hug on a chilly evening? There’s something almost magical about pulling a perfectly baked Chicken Pot Pie from the oven—the flaky crust crackling as steam escapes, revealing a creamy, vegetable-filled interior. While store-bought versions are convenient, preparing this comfort food from scratch not only elevates the flavor but also gives you complete control over ingredients, ensuring a healthier, more satisfying meal. In this guide, we’ll take you through every step to create a restaurant-quality Chicken Pot Pie that rivals any Casserole in richness and depth. Whether you’re a novice or a seasoned cook, this recipe will become your go-to for cozy dinners.
Ingredients & Kitchen Tools (H2)
Before diving in, gather these essentials. Each item plays a specific role in building flavor and texture.
For the Filling:
– 2 cups cooked, shredded chicken (rotisserie chicken works perfectly for convenience)
– 1 cup frozen mixed vegetables (peas, carrots, corn, green beans—no need to thaw)
– 1/3 cup unsalted butter (creates a rich roux base)
– 1/3 cup all-purpose flour (thickens the sauce; substitute with gluten-free flour blend if needed)
– 1 3/4 cups chicken broth (low-sodium preferred for salt control)
– 2/3 cup whole milk (adds creaminess; use half-and-half for extra richness)
– 1/2 teaspoon dried thyme (earthy warmth)
– 1/2 teaspoon garlic powder (subtle savory depth)
– Salt and black pepper to taste
For the Crust (or use 1 refrigerated pie crust):
– 2 1/2 cups all-purpose flour
– 1 cup cold unsalted butter, cubed
– 1/2 teaspoon salt
– 6-8 tablespoons ice water
Kitchen Tools:
– 9-inch pie dish or 8×8 baking dish (glass or ceramic ensures even baking)
– Large skillet or saucepan
– Whisk and wooden spoon
– Rolling pin (if making homemade crust)
– Pastry brush (for egg wash)
Optional substitutions: Swap chicken for turkey or mushrooms (vegetarian version). Use gluten-free flour for the roux and crust.
Prep Time & Cooking Schedule (H2)
– Prep Time: 25 minutes (shred chicken, chop veggies if fresh, make dough)
– Cook Time: 35-40 minutes at 400°F (200°C)
– Resting Time: 10 minutes after baking (allows filling to set)
Plan ahead: If making homemade crust, chill the dough for at least 30 minutes before rolling. This relaxes gluten and prevents shrinkage. For weeknights, assemble the filling and crust separately a day in advance.
Step-by-Step Instructions (H2)
1. Preheat and Prep: Set oven to 400°F (200°C). If using homemade crust, roll out dough to 1/8-inch thickness and fit into your pie dish. Trim edges, leaving a 1/2-inch overhang.
2. Make the Roux: In a large skillet over medium heat, melt butter. Whisk in flour and cook for 1-2 minutes until golden and bubbling—this removes raw flour taste.
3. Build the Sauce: Gradually whisk in chicken broth and milk. Continue stirring until thickened (about 3-4 minutes). Season with thyme, garlic powder, salt, and pepper.
4. Combine Filling: Fold in shredded chicken and frozen vegetables. Simmer for 2 minutes, then remove from heat. Taste and adjust seasoning—this is where you can personalize the Chicken Pot Pie to your preference.
5. Assemble: Pour filling into the prepared crust. Top with second crust, crimp edges, and cut 3-4 steam vents. Brush with beaten egg for a glossy finish.
6. Bake and Rest: Place on a baking sheet to catch drips. Bake for 35-40 minutes until crust is golden and filling bubbles through vents. Let rest 10 minutes before serving.
Pro tip: For a crispy bottom crust, pre-bake the bottom crust for 10 minutes at 400°F before adding filling. This Casserole-style layering ensures no sogginess.
Nutritional Benefits & Advantages (H2)
This homemade Chicken Pot Pie offers more than comfort—it delivers balanced nutrition. Chicken provides lean protein (about 25g per serving), supporting muscle repair and satiety. Carrots and peas contribute vitamin A (for eye health) and fiber (aids digestion). By making it yourself, you control sodium levels (store-bought versions can exceed 800mg per serving) and avoid preservatives like MSG or artificial thickeners. The butter and milk add calcium and healthy fats for energy. For a lighter version, swap whole milk for unsweetened almond milk and use a whole-wheat crust.
Tips Variations & Cooking Advice (H2)
– Flavor Twist: Add 1/2 cup diced potatoes or sweet potatoes for heartiness. Sprinkle smoked paprika or cayenne for heat.
– Dietary Adaptations: For gluten-free, use a blend of rice flour and tapioca starch for the crust. Dairy-free? Use olive oil instead of butter and unsweetened oat milk.
– Portion Changes: Double the recipe and bake in a 9×13 dish for a crowd—increase bake time by 10-15 minutes.
– Alternative Cooking: Make individual ramekins for portion control; bake 20-25 minutes. Or try a Casserole version by skipping the top crust and topping with crushed biscuits for a quicker weeknight meal.
Common Mistakes to Avoid (H2)
1. Soggy Bottom Crust: Blind-bake the bottom crust or brush with egg white before filling. Also, ensure the filling is hot when poured in.
2. Gummy Roux: Whisk constantly while adding liquid. If lumps form, strain through a sieve before proceeding.
3. Burnt Edges, Underfilled Center: Use a pie shield or foil strips if crust browns too quickly. Bake on lowest oven rack for even heat distribution.
4. Watery Filling: Cook the roux until it’s thick enough to coat the back of a spoon. Frozen vegetables release moisture, so don’t thaw them first.
Storage & Meal Prep Tips (H2)
– Refrigeration: Cool completely, cover tightly with foil, and store for up to 4 days. Reheat individual portions in a 350°F oven for 15 minutes (microwave works but softens crust).
– Freezing: Assemble unbaked pie, wrap in plastic wrap and foil, and freeze for up to 3 months. Bake from frozen at 400°F for 50-60 minutes.
– Texture Tips: Reheat in a toaster oven to maintain crust crispness. If freezing leftovers, remove crust and store filling separately—reassemble before reheating.
Conclusion (H2)
Mastering a homemade Chicken Pot Pie is about more than following a recipe—it’s about creating a meal that warms both body and soul. From the golden crust to the creamy, vegetable-packed filling, every bite of this Casserole delivers homemade love. We’ve covered how to avoid common pitfalls, customize flavors, and store leftovers effectively. Now it’s your turn: preheat your oven, gather your ingredients, and experience the joy of pulling your own masterpiece from the heat. Share your results or experiment with variations—comfort cooking is all about personal touch. For more hearty recipes, explore our collection of one-dish wonders and classic soups.
FAQs (H2)
1. Can I use store-bought pie crust for this recipe?
Absolutely! Refrigerated or frozen crusts work well. Blind-bake the bottom crust for 10 minutes to prevent sogginess, and brush the top with egg wash for color.
2. How do I thicken the filling if it’s too thin?
Mix 1 tablespoon cornstarch with 2 tablespoons cold water into a slurry, then stir into the bubbling filling until it reaches desired consistency. Alternatively, cook the roux longer before adding liquid.
3. Can I make this dairy-free?
Yes. Use olive oil or vegan butter for the roux, unsweetened oat milk or coconut milk for creaminess, and a dairy-free crust. Nutritional yeast adds a cheesy depth.
4. Why did my crust shrink during baking?
Dough shrinks when overworked or under-chilled. Rest the dough for 30 minutes before rolling and handle minimally. Also, don’t stretch dough when fitting it into the dish.
5. How do I prevent the filling from spilling over?
Don’t overfill (leave 1/2-inch space at the top). Cut decorative steam vents and place a baking sheet under the pie dish to catch drips. This also ensures even baking.
Proven Way to Grow a Perfect Chicken Pot Pie in 4 Steps
Ingredients
Equipment
Method
- In a large bowl, combine flour and salt, then cut in the cold butter until the mixture resembles coarse crumbs. Gradually add ice water, mixing until a dough forms, then divide in half and chill for 30 minutes.
- Melt butter in a large skillet over medium heat, then whisk in flour and cook for one minute. Gradually add chicken broth and heavy cream, stirring until the mixture thickens.
- Stir in shredded chicken and mixed vegetables into the thickened sauce, seasoning with salt and pepper to taste. Roll out one half of the chilled dough and place it into a 9-inch pie plate.
- Pour the chicken mixture into the pie plate and cover with the remaining rolled-out dough, crimping the edges to seal. Cut several slits in the top crust and bake at 375°F (190°C) for 35-40 minutes, or until the crust is golden brown and the filling is bubbly.