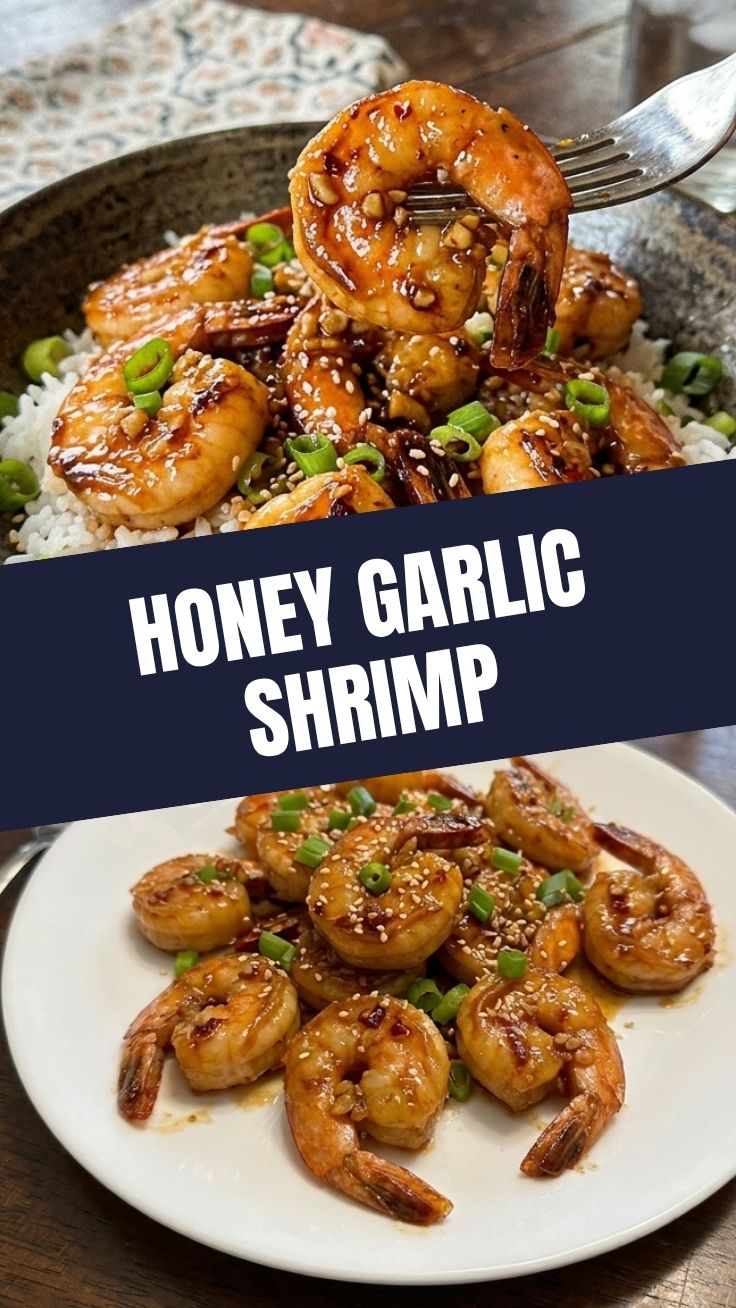
Sweet and Savory Honey Garlic Shrimp: The Ultimate 15-Minute Dinner
What if I told you that the perfect dinner is just 15 minutes away? Imagine succulent, pan-seared shrimp coated in a sticky, rich glaze that balances sweet honey with pungent garlic and a touch of savory soy. This isn’t just any weeknight meal—it’s Honey Garlic Shrimp, a dish that delivers restaurant-quality flavor without the wait or the cost. By preparing this at home, you control the quality of ingredients, adjust the seasoning to your taste, and save money while impressing family or guests. The secret lies in the balance of the honey garlic shrimp recipe, a method that transforms simple pantry staples into a caramelized, crave-worthy sauce that clings perfectly to every bite. Let’s dive into why this recipe is a game-changer.
Ingredients & Kitchen Tools
For the Shrimp:
– 1 lb large raw shrimp (21-25 count), peeled and deveined – tail-on adds visual appeal but feel free to remove for easier eating.
– 1 tbsp olive oil or avocado oil – neutral oils work best for high-heat searing.
– 1/2 tsp salt and 1/4 tsp black pepper – for a clean baseline seasoning.
For the Honey Garlic Sauce:
– 1/3 cup honey – use a mild floral honey for subtle sweetness; avoid raw or strongly flavored honey which can overpower.
– 4 cloves garlic, minced – fresh garlic is non-negotiable; pre-minced lacks the pungent kick needed here.
– 2 tbsp low-sodium soy sauce – tamari works for gluten-free; coconut aminos for a soy-free option.
– 1 tbsp rice vinegar – adds brightness to cut the sweetness.
– 1 tsp sesame oil – optional but recommended for that nutty finish.
– 1/2 tsp red pepper flakes – adjust to taste for heat.
– 1 tbsp cornstarch mixed with 2 tbsp water (slurry) – thickens the sauce without flour.
Kitchen Tools:
– Large non-stick or cast-iron skillet – cast iron retains heat better for a quick sear.
– Mixing bowls – one for the sauce, one for the cornstarch slurry.
– Tongs or spatula – for flipping shrimp without breaking.
– Garlic press or microplane – ensures fine mincing for even flavor distribution.
Optional Substitutions:
– Shrimp: substitute with chicken breast strips or firm tofu (press first) for a different protein.
– Honey: maple syrup or agave nectar works but changes the flavor profile slightly.
– Soy sauce: use coconut aminos for a whole30 or soy-free version.
Prep Time & Cooking Schedule
Total Time: 15 minutes (Prep: 5 min | Cook: 10 min | No rest or marinating needed)
This recipe moves fast—once you start cooking, there’s no stopping. Have all ingredients measured and within arm’s reach before turning on the heat. The shrimp themselves require minimal prep: just pat them dry with paper towels (wet shrimp won’t sear, they’ll steam) and season lightly. The sauce can be whisked together in a bowl while the pan heats. Because there’s no marinating required, this is an ideal recipe for when you need dinner on the table in under 20 minutes. You can even prep the garlic and sauce up to 2 hours ahead and store covered at room temperature.
Cooking Schedule Breakdown:
– Minute 0: Heat skillet over medium-high heat (3 minutes).
– Minute 3: Sear shrimp for 1.5 minutes per side.
– Minute 6: Remove shrimp, reduce heat to medium, add garlic and cook 30 seconds.
– Minute 7: Add honey and soy mixture, simmer 1 minute, then add slurry and cook 1 minute until glossy.
– Minute 9: Return shrimp to pan, toss to coat, garnish.
– Minute 10: Serve immediately.
Step-by-Step Instructions
1. Dry and Season the Shrimp: Pat shrimp completely dry with paper towels. In a bowl, toss with salt and pepper. Key tip: Wet shrimp leads to a gray, rubbery result. Dryness ensures the Maillard reaction creates golden-brown crust.
2. Sear the Shrimp: Heat 1 tbsp oil in a large skillet over medium-high heat until shimmering. Add shrimp in a single layer (work in batches if needed). Cook without moving for 1.5 minutes until deeply golden. Flip and cook 1 more minute. Shrimp should be just opaque with a light pink center—resist the urge to overcook. Remove to a plate.
3. Build the Sauce: Reduce heat to medium. Add minced garlic and stir constantly for 30 seconds until fragrant but not brown (burnt garlic ruins the dish). Pour in honey, soy sauce, rice vinegar, sesame oil, and red pepper flakes. Stir and let bubble gently for 1 minute.
4. Thicken the Glaze: Whisk the cornstarch slurry again (it settles quickly) and drizzle into the sauce while stirring. Within 30–60 seconds, the sauce will transform from watery to a silky, glossy syrup. Taste and adjust seasoning—add a pinch of salt if needed or more honey for sweetness.
5. Coat and Finish: Return the seared shrimp to the skillet. Toss gently with tongs until each piece is coated in the sticky glaze. Cook 30 seconds more to warm through. Serve immediately over steamed rice or noodles, garnished with sliced green onions and sesame seeds.
This Honey Garlic Shrimp delivers a perfect balance of sweet and savory. The honey garlic shrimp recipe technique—searing first, then glazing—ensures the shrimp stays juicy while the sauce caramelizes beautifully.
Nutritional Benefits & Advantages
Shrimp is an exceptional source of lean protein, providing about 20 grams per 3-ounce serving with only 84 calories. It’s rich in selenium (over 50% of the daily value per serving), an antioxidant that supports thyroid function and immune health. The omega-3 fatty acids, specifically EPA and DHA, support heart and brain health. Honey, while a sugar, offers antioxidants and antibacterial properties, and garlic is renowned for its cardiovascular benefits, including reducing blood pressure and cholesterol. This dish is naturally low in carbohydrates if served over cauliflower rice or zucchini noodles, making it suitable for keto or low-carb lifestyles. The protein content and moderate fat from the oil and sesame oil make it a satiating meal that stabilizes blood sugar levels compared to carb-heavy dinners.
Tips Variations & Cooking Advice
Flavor Variations:
– Spicy: Add 1 tbsp sriracha or gochujang with the honey for a Korean-inspired kick.
– Citrus: Replace rice vinegar with fresh lime juice and add 1 tsp lime zest.
– Herbaceous: Stir in 1 tbsp fresh grated ginger with the garlic, and top with fresh cilantro.
– Smoky: Use smoked paprika (1/2 tsp) in the sauce and finish with a pinch of smoked salt.
Alternative Cooking Methods:
– Air Fryer: Toss seasoned shrimp with 1 tsp oil, air fry at 400°F for 6–7 minutes (shaking halfway), then toss with warmed sauce.
– Oven: Broil shrimp on a foil-lined sheet for 4–5 minutes (watch closely), then add sauce and broil 1 more minute.
– Grilled: Thread shrimp on skewers, grill over high heat 2 minutes per side, brush with sauce in the last minute.
Dietary Adaptations:
– Gluten-Free: Use tamari or coconut aminos instead of soy sauce and ensure cornstarch is certified gluten-free.
– Dairy-Free: This recipe is naturally dairy-free; just verify your butter or cream is not used as a substitute (none is needed).
– Lower Sugar: Reduce honey to 1/4 cup and add 1 tbsp more rice vinegar or a splash of water to adjust consistency.
Common Mistakes to Avoid
1. Overcooking Shrimp: Shrimp cooks in 2–3 minutes total. When it curls into a tight ‘C’ or ‘O’ shape, it’s overdone. Remove from heat when just opaque with a hint of pink.
2. Burning the Garlic: Garlic should be added after shrimp is removed, over medium heat, and stirred constantly for 30 seconds. Higher heat or longer cooking turns it bitter and acrid.
3. Sauce Too Thin: If the sauce doesn’t thicken after adding the slurry, simmer 1–2 minutes more while stirring. The cornstarch needs a full boil to activate—don’t rush it.
4. Sauce Too Thick or Sticky: If the glaze becomes candy-like, splash in 1–2 tbsp water or chicken broth and stir over low heat to loosen.
5. Crowding the Pan: Shrimp need space to sear, not steam. If cooking more than 1 lb, use two pans or work in batches. Overcrowding drops the pan temperature and creates gray, rubbery shrimp.
Storage & Meal Prep Tips
Refrigeration: Store leftover Honey Garlic Shrimp in an airtight container for up to 3 days. The sauce will thicken further as it cools; add a splash of water when reheating to restore the glossy texture.
Freezing: Cooked shrimp can be frozen for up to 1 month. Place in a single layer on a baking sheet until solid, then transfer to a freezer bag (this prevents clumping). To thaw, move to the refrigerator overnight or place the sealed bag in cold water for 30 minutes.
Reheating: Avoid the microwave, which can turn shrimp rubbery. Instead, reheat in a non-stick skillet over medium-low heat with 1 tbsp water or chicken broth, stirring gently for 2–3 minutes until warmed through. For a quick option, use an air fryer at 350°F for 4 minutes.
Meal Prep: Cook the sauce base (minus the slurry) up to 3 days ahead and store in the refrigerator. When ready to eat, sear fresh shrimp, reheat the sauce with the slurry, and toss. This saves the 5-minute prep but keeps the shrimp texture perfect.
Conclusion
In just 15 minutes, you can transform simple ingredients into a showstopping dish that rivals any takeout. The beauty of this Honey Garlic Shrimp lies in its simplicity—perfect sear, a glossy sauce, and the confidence that comes from mastering a quick, reliable recipe. Whether you’re feeding a hungry family on a busy Tuesday or impressing dinner guests, this honey garlic shrimp recipe delivers consistent results. Pair it with steamed jasmine rice, sautéed snap peas, or a crisp cucumber salad for a complete meal that feels indulgent yet nourishing. Try it tonight, and share your results—tag your creations online or leave a comment below. For more quick skillet dinners, explore our other seafood recipes or the related citrus-ginger glaze variation.
FAQs
1. Can I use frozen shrimp for this recipe?
Yes, but thaw them completely under cold running water (about 5–10 minutes) and pat extremely dry with paper towels. Frozen shrimp hold more water, which can prevent proper searing and lead to a watery sauce.
2. What can I substitute for honey to make it vegan?
Use pure maple syrup or agave nectar. Maple syrup offers a slightly more robust, woodsy sweetness that pairs well with garlic. Reduce the amount slightly (to 1/4 cup) since maple syrup is thinner—the sauce may need a bit more cornstarch to thicken.
3. How do I know when the shrimp is cooked without cutting into it?
Look for a visual cue: the shrimp will turn from translucent gray to opaque pink with a white, firm texture on the outside. The tail should curl loosely toward the body. When it forms a tight ‘C’ or ‘O’ shape, it’s past done.
4. Why did my sauce turn out overly thick or lumpy?
This happens if the cornstarch slurry wasn’t stirred before adding (starch settles at the bottom) or if you added it when the sauce was not simmering. Always whisk the slurry immediately before pouring, and ensure the sauce is at a gentle boil. If lumps form, whisk vigorously or strain through a fine-mesh sieve.
5. Can I make this dish with chicken or tofu instead?
Absolutely. For chicken, use boneless thighs cut into bite-sized pieces; cook 5–6 minutes per side until golden and cooked through (165°F internal). For tofu, press extra-firm tofu for 30 minutes, cube, and pan-sear until crispy before coating in the sauce. Adjust cooking time accordingly.
Quick Honey Garlic Shrimp 5 Ways
Ingredients
Equipment
Method
- Pat the shrimp dry with paper towels to ensure a better sear, then set aside in a bowl.
- In a small bowl, whisk together the honey, soy sauce, minced garlic, sesame oil, and red pepper flakes until well combined.
- Heat the olive oil in a large skillet over medium-high heat. Add the shrimp to the hot skillet and cook for 1-2 minutes per side until they turn pink and opaque.
- Pour the prepared honey garlic sauce over the cooked shrimp in the skillet. Stir gently and simmer for 2-3 minutes, allowing the sauce to thicken and coat the shrimp.
- Garnish the honey garlic shrimp with sliced green onions and sesame seeds before serving hot.