The Ultimate Guide to Perfect Overnight Oats: Creamy, Nutritious, and Effortless
Have you ever woken up craving a wholesome breakfast but had zero time to prepare it? That’s where Overnight Oats come to the rescue. This no-cook method transforms simple ingredients into a creamy, grab-and-go meal that’s ready when you are. Preparing it at home means you control the sweetness, texture, and add-ins—avoiding the preservatives and high sugar found in store-bought versions. Within the first 100 words of this guide, you’ll discover why mastering Overnight Oats is a game-changer for busy mornings, and I’ll also share the best overnight oats recipes that balance taste and nutrition perfectly.
—
Ingredients & Kitchen Tools
Ingredients
– Rolled oats (old-fashioned) – ½ cup. Use gluten-free certified oats if needed. Quick oats work but yield a mushier texture.
– Milk or dairy-free alternative – ½ cup. Almond, oat, or coconut milk add flavor; cow’s milk provides extra protein.
– Yogurt – ¼ cup. Greek yogurt boosts protein and creaminess. Use plant-based yogurt for vegan option.
– Chia seeds – 1 tablespoon. Adds thickness and omega-3s. Can substitute with flax seeds.
– Sweetener – 1 tablespoon maple syrup or honey. Adjust to taste. Stevia or agave also work.
– Vanilla extract – ½ teaspoon. Optional but enhances flavor.
– Pinch of salt – to balance sweetness.
Optional mix-ins (choose your adventure)
– Fresh or frozen berries, sliced banana, cocoa powder, nut butter, protein powder, shredded coconut, or chopped nuts.
Kitchen Tools
– Mason jar or airtight container – ideally 16oz capacity.
– Measuring cups and spoons – for precision.
– Spoon or small whisk – for stirring.
– Refrigerator – for overnight chilling.
—
Prep Time & Cooking Schedule
– Prep time: 5 minutes
– Resting time: at least 4 hours (preferably overnight or up to 5 days)
– Total time: 5 minutes active + 8 hours passive
Planning tip: Make a batch on Sunday evening for grab-and-eat breakfasts all week. The oats absorb liquid gradually, so they become creamier the longer they sit. Day 1 is slightly chewy; day 3 is silky.
—
Step-by-Step Instructions
1. Combine dry base – In your jar, add ½ cup rolled oats, 1 tablespoon chia seeds, and a pinch of salt. Stir to distribute seeds evenly.
2. Add liquids and flavor – Pour in ½ cup milk, ¼ cup yogurt, 1 tablespoon sweetener, and ½ teaspoon vanilla. Stir vigorously until everything is well incorporated. Tip: If you want a thicker consistency, use less milk; for thinner oats, add an extra tablespoon of liquid.
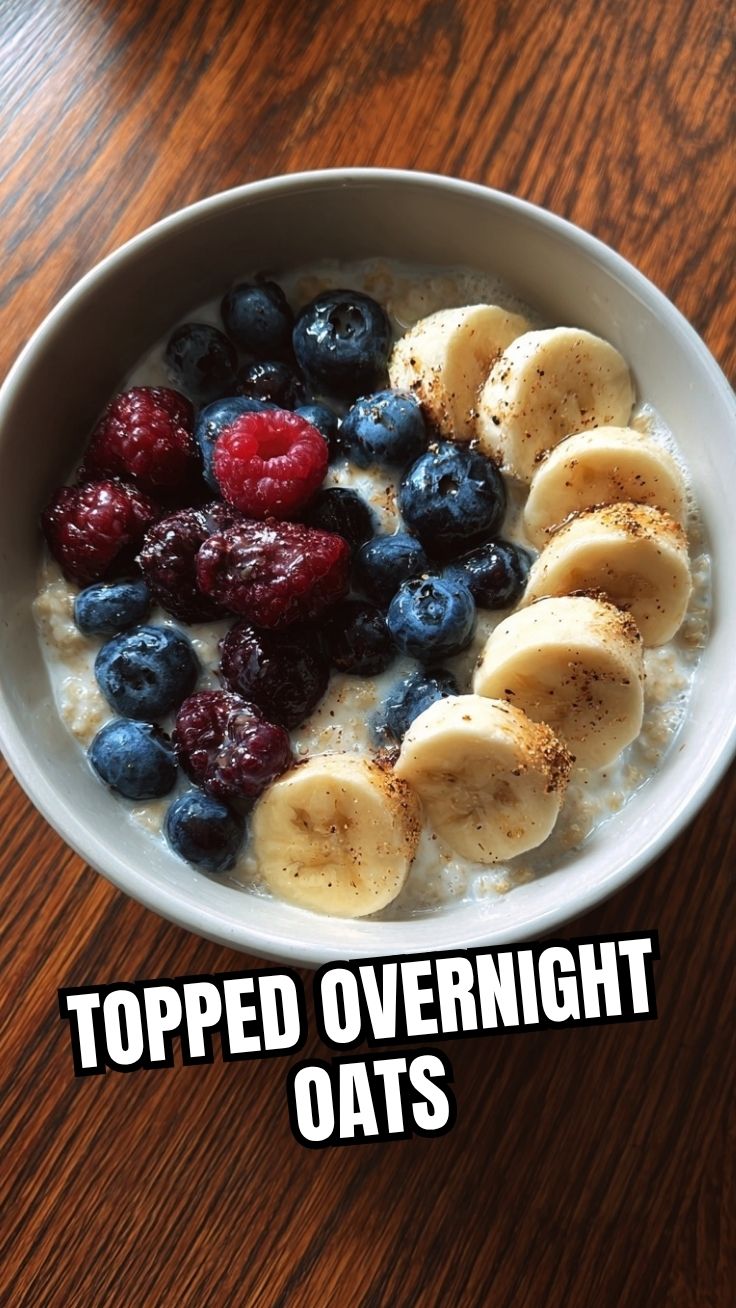
3. Choose your add-ins – Fold in any mix-ins like berries, sliced banana, or a dollop of peanut butter. This is where you personalize your Overnight Oats – experiment with different flavor profiles. For a protein boost, stir in a scoop of vanilla protein powder. Many popular overnight oats recipes also include cocoa powder or cinnamon at this stage.
4. Seal and refrigerate – Close the lid tightly and shake or stir once more. Place in the refrigerator for at least 4 hours, preferably overnight.
5. Serve cold or warm – In the morning, give it a good stir. If too thick, add a splash of milk. Enjoy straight from the jar or microwave for 60 seconds for a warm bowl. Top with fresh fruit, nuts, or a drizzle of nut butter before serving.
Temperature/texture cue: For perfectly creamy oats, the liquid-to-oat ratio is crucial. If your oats are too loose after 8 hours, add extra chia seeds next time. If too dry, increase milk by 2 tablespoons.
—
Nutritional Benefits & Advantages
Overnight oats are a nutritional powerhouse. A standard serving (without extras) provides:
– Complex carbohydrates – sustained energy from oats, low glycemic index.
– Fiber – about 4g per serving from oats and chia, aiding digestion and satiety.
– Protein – 8–10g with Greek yogurt, supporting muscle repair.
– Healthy fats – omega-3s from chia, plus heart-healthy fats from nuts.
– Vitamins & minerals – magnesium, iron, zinc, and B vitamins.
The no-cook method preserves heat-sensitive nutrients (like vitamin C from fruit add-ins) and makes the phytic acid in oats more digestible through soaking. Compared to instant oatmeal, overnight oats have a lower glycemic response because the starch slowly breaks down during refrigeration.
—
Tips Variations & Cooking Advice
Flavor variations:
– Tropical: Use coconut milk, add mango chunks and toasted coconut.
– Chocolate peanut butter: Add 1 tbsp cocoa powder and 2 tbsp peanut butter.
– Apple cinnamon: Mix in diced apple, ½ tsp cinnamon, and a dash of nutmeg.
– Carrot cake style: Add grated carrot, raisins, walnuts, and pumpkin pie spice – similar to the popular high-protein carrot cake version found in some overnight oats recipes.
Dietary adaptations:
– Gluten-free: Use certified gluten-free rolled oats.
– Dairy-free: Substitute almond or oat milk and use coconut or soy yogurt.
– Low sugar: Use unsweetened milk, skip sweetener, and rely on ripe banana or berries.
– High protein: Add a scoop of protein powder or extra Greek yogurt.
Alternative methods: If you’re short on time, you can soak for just 2 hours, though texture will be chewier. Baked oatmeal is a warm alternative, but overnight style requires no oven.
—
Common Mistakes to Avoid
1. Using quick oats or steel-cut oats – Quick oats turn mushy; steel-cut stay hard. Stick with rolled oats for the perfect texture.
2. Not stirring enough – Chia seeds clump if not mixed well. Stir again after 15 minutes in the fridge to redistribute.
3. Over-sweetening – Start with half the sweetener; flavors concentrate overnight. You can always add more in the morning.
4. Skipping the salt – A pinch enhances sweetness and balances flavor.
5. Adding delicate fruit too early – Fresh berries can become mealy after 24 hours. Fold them in just before serving for optimal freshness.
6. Not adjusting liquid ratio – Different yogurts and milk alternatives have varying thickness. After your first batch, tweak the liquid amount based on preference.
—
Storage & Meal Prep Tips
– Refrigeration: Store in airtight jars for up to 5 days. Keep without toppings to prevent sogginess.
– Freezing: Overnight oats freeze well for up to 3 months in freezer-safe jars (leave headspace for expansion). Thaw in fridge overnight and stir in extra milk before serving.
– Reheating: Microwave in 30-second bursts, stirring in between, or warm on the stovetop with a splash of milk. Avoid boiling to prevent curdling.
– Meal prep batch: Prepare 4–5 jars at once with the same base, then add different toppings each morning. Label with dates to track freshness.
—
Conclusion
Mastering Overnight Oats is one of the easiest ways to ensure a nutritious, delicious breakfast every day. By following the step-by-step instructions and avoiding common pitfalls, you’ll create creamy jars that taste far better than anything from a packet. The beauty of overnight oats recipes lies in their endless flexibility—whether you crave fruity, chocolatey, or protein-packed variations, there’s a version for everyone. Now it’s your turn: grab a jar, mix your favorite ingredients, and wake up to breakfast excitement. Share your creations online and tag your best combos—I’d love to see what you come up with!
—
FAQs
1. Can I use quick oats instead of rolled oats?
Yes, but the texture will be softer and more porridge-like. If you prefer a slightly creamy but not mushy result, stick with rolled oats. For a chewier bite, try steel-cut oats soaked for a full 12 hours.
2. How long do overnight oats last in the fridge?
They remain fresh for up to 5 days if stored in an airtight container. After day 3, they become very soft, which many people enjoy. Discard if you notice a sour smell or mold.
3. Can I make overnight oats without yogurt?
Absolutely. Replace yogurt with an equal amount of milk or a mashed banana for creaminess. For a vegan version, use coconut cream or soaked cashew paste.
4. Why are my overnight oats runny?
You may have added too much liquid relative to oats and chia seeds. For thicker oats, reduce milk by 2 tablespoons or add an extra tablespoon of chia seeds. Stir well before refrigerating.
5. Can I warm overnight oats?
Yes. Microwave in a microwave-safe bowl for 60–90 seconds, stirring halfway. You can also heat them on the stovetop over medium-low heat, adding a splash of milk to restore creaminess. Avoid boiling to prevent separation.
Quick way to grow 5 Overnight Oats
Ingredients
Equipment
Method
- For each of the five jars, combine 0.5 cup of rolled oats, 0.75 cup of milk, 1 tablespoon of chia seeds, and 1 teaspoon of honey or maple syrup.
- Stir well to ensure all ingredients are thoroughly mixed.
- Add your desired flavor variation to each specific jar, integrating additional ingredients like berries, peanut butter, cocoa powder, banana and nuts, or cinnamon and apple.
- Securely cover each jar with a lid and place them in the refrigerator.
- Allow the oats to soak overnight or for at least 4 hours to achieve the desired consistency.
- In the morning, before serving, you can add any extra toppings you prefer, such as fresh fruit or additional nuts.