Are you tired of store-bought snacks that are packed with preservatives and lack real flavor? Imagine biting into a moist, spiced treat that not only satisfies your cravings but also provides wholesome nutrition. That’s exactly what you get with homemade Pumpkin Bars. These bars are perfect for school lunches or an afternoon pick-me-up. By preparing this Pumpkin Bars Recipe at home, you control the ingredients, ensuring every bite is both delicious and nutritious. Let’s dive into how to make these crowd-pleasers.
Ingredients & Kitchen Tools
To make your own batch, you’ll need:
– 1 cup pumpkin puree (canned or homemade – ensure it’s 100% pumpkin, not pie filling, to avoid excess sugar)
– 1/2 cup coconut oil (melted; substitute with butter for richer flavor or applesauce for lower fat)
– 1/2 cup maple syrup (or honey; both are natural sweeteners with distinct flavors)
– 2 large eggs (room temperature for better mixing; for vegan, use flax eggs)
– 1 teaspoon vanilla extract (pure vanilla enhances the spice profile)
– 1 cup whole wheat flour (or all-purpose flour; gluten-free blend works with slight liquid adjustment)
– 1 teaspoon baking powder (check freshness for proper rise)
– 1/2 teaspoon baking soda (ensure it’s active)
– 1 teaspoon cinnamon (plus extra for garnish; Ceylon cinnamon is milder)
– 1/2 teaspoon nutmeg (freshly grated if possible)
– 1/4 teaspoon salt (sea salt or table salt)
– Optional: 1/2 cup chocolate chips or chopped walnuts (adds texture and flavor)
Kitchen tools: 9×9 inch baking pan, mixing bowls (one large, one medium), whisk, rubber spatula, parchment paper, measuring cups and spoons, cooling rack.
Prep Time & Cooking Schedule
– Prep time: 15 minutes (including measuring and mixing)
– Cook time: 25-30 minutes
– Cooling time: 20 minutes before slicing (do not skip – this sets the bars)
– Total time: about 1 hour
This recipe yields 12 bars. Plan ahead: It’s great for a Sunday afternoon snack prep. You can double the batch and freeze extras for busy weeks. The bars are ready in under an hour, making them a quick and rewarding project even on a busy weeknight.
Step-by-Step Instructions
1. Preheat your oven to 350°F (175°C) and line the baking pan with parchment paper, leaving some overhang for easy removal.
2. In a large bowl, whisk together the pumpkin puree, melted coconut oil, maple syrup, eggs, and vanilla until smooth. Ensure the coconut oil is not too hot to avoid cooking the eggs.
3. In a separate bowl, mix the flour, baking powder, baking soda, cinnamon, nutmeg, and salt. Sifting these together prevents clumps.
4. Gradually add the dry ingredients to the wet mixture, stirring until just combined. Use a spatula to fold gently. Avoid overmixing to keep the bars tender – lumps are okay.
5. Fold in any optional add-ins like chocolate chips or nuts, distributing evenly.
6. Pour the batter into the prepared pan and spread evenly with the spatula. Tap the pan on the counter to release air bubbles.
7. Bake for 25-30 minutes, until a toothpick inserted in the center comes out clean or with a few moist crumbs. The edges should be golden brown. If the top browns too quickly, tent with foil at the 20-minute mark.
8. Let cool in the pan for 10 minutes, then transfer to a wire rack to cool completely before slicing.
While following this Pumpkin Bars Recipe, remember that these Pumpkin Bars are best enjoyed at room temperature. For a deeper flavor, add a pinch of cloves or ginger to the spice mix.
Nutritional Benefits & Advantages
Pumpkin is rich in vitamin A (over 200% of the daily value per cup), fiber, and antioxidants like beta-carotene, supporting eye health and immunity. Using whole wheat flour adds complex carbs for sustained energy, while coconut oil provides healthy medium-chain triglycerides (MCTs). These bars are lower in sugar than many store-bought alternatives – each bar contains approximately 150 calories, 4g protein, 3g fiber, and 8g sugar. The cinnamon also helps regulate blood sugar, making this a smart snack for kids and adults. Additionally, the fiber from pumpkin aids digestion and promotes satiety, perfect for school lunches.
Tips Variations & Cooking Advice
– For a dairy-free version: Use coconut oil and skip chocolate chips (or use dairy-free chips). Ensure maple syrup is pure.
– Gluten-free: Swap flour with a 1:1 gluten-free baking blend. Add 1 tablespoon of almond flour for extra moisture.
– Spice it up: Add ginger, cardamom, or allspice for a unique twist. A pumpkin pie spice blend works well.
– Texture variations: For a nutty flavor, swap half the flour with almond flour. Or add a streusel topping (butter, flour, sugar, cinnamon) for crunch.
– Portion changes: Slice into 16 mini bars for bite-sized snacks, or use a muffin tin for individual servings (adjust baking time to 15-18 minutes).
– Dietary adaptations: Vegan – use flax eggs (1 tablespoon flaxseed meal + 3 tablespoons water per egg). Lower fat – replace coconut oil with applesauce, but note the texture will be denser.
Common Mistakes to Avoid
– Overmixing the batter: This develops gluten, leading to dense bars. Mix until just combined – a few streaks of flour are fine.
– Using pumpkin pie filling instead of puree: The added sugar and spices disrupt the recipe balance. Always check the label.
– Underbaking: The center should be set; use a toothpick test. If it comes out with wet batter, bake for 2-3 more minutes.
– Skipping the cooling time: Cutting too early causes crumbling. Let the bars cool completely in the pan before slicing.
– Not measuring flour correctly: Spoon and level the flour into the measuring cup to avoid packing, which can make the bars dry.
Storage & Meal Prep Tips
Store leftover bars in an airtight container at room temperature for up to 3 days, or in the refrigerator for up to a week. For longer storage, wrap individually in plastic wrap and place in a freezer-safe bag; freeze for up to 3 months. To reheat, microwave for 15-20 seconds or warm in a 300°F oven for 5 minutes. This maintains moisture and texture. For meal prep, slice the bars and portion them with other snacks like fruit and yogurt for grab-and-go lunches.
Conclusion
In summary, these homemade Pumpkin Bars are a versatile, nutritious snack that fits any schedule. By following this Pumpkin Bars Recipe, you ensure a healthier treat without compromising on taste. I encourage you to try this recipe and share your results – your family will thank you! Experiment with add-ins and share your favorite variations in the comments.
FAQs
1. Can I use fresh pumpkin instead of canned?
Yes, roast and puree fresh pumpkin, but ensure it’s well-drained to avoid excess moisture. Use a paper towel to squeeze out liquid if needed.
2. How do I make these bars vegan?
Substitute eggs with flax eggs (1 tablespoon flaxseed meal + 3 tablespoons water per egg) and use maple syrup. Ensure chocolate chips are dairy-free.
3. Why are my bars dry?
Overbaking is the common cause; check at 25 minutes. Also, measure flour correctly – spoon and level. If using gluten-free flour, add an extra tablespoon of liquid.
4. Can I add a frosting?
Absolutely, a cream cheese frosting or glaze adds sweetness, but note it increases calories. For a lighter option, dust with powdered sugar.
5. How long do they stay fresh?
At room temperature, 3 days; refrigerated, 1 week; frozen, 3 months. Always store in an airtight container to prevent drying out.
6. Can I reduce the sugar?
Yes, substitute maple syrup with a sugar-free syrup like monk fruit, or reduce to 1/3 cup. The bars will be less sweet but still flavorful.
Proven way to grow amazing 3 Pumpkin Bars
Ingredients
Equipment
Method
- Preheat your oven to 350°F (175°C) and grease a 9x13 inch baking pan.
- In a medium bowl, whisk together the flour, baking powder, baking soda, cinnamon, and salt; set aside.
- In a large bowl, combine the granulated sugar, brown sugar, eggs, pumpkin puree, and vegetable oil; beat until well combined.
- Gradually add the dry ingredients to the wet ingredients, mixing until just combined and smooth.
- Pour the batter into the prepared baking pan and spread evenly.
- Bake for 25-30 minutes, or until a wooden skewer inserted into the center comes out clean.
- Let the bars cool completely in the pan on a wire rack before frosting.
- In a medium bowl, beat together the softened cream cheese and butter until light and fluffy.
- Gradually add the confectioners' sugar, beating until smooth; then stir in the vanilla extract and milk until the frosting reaches a spreadable consistency.
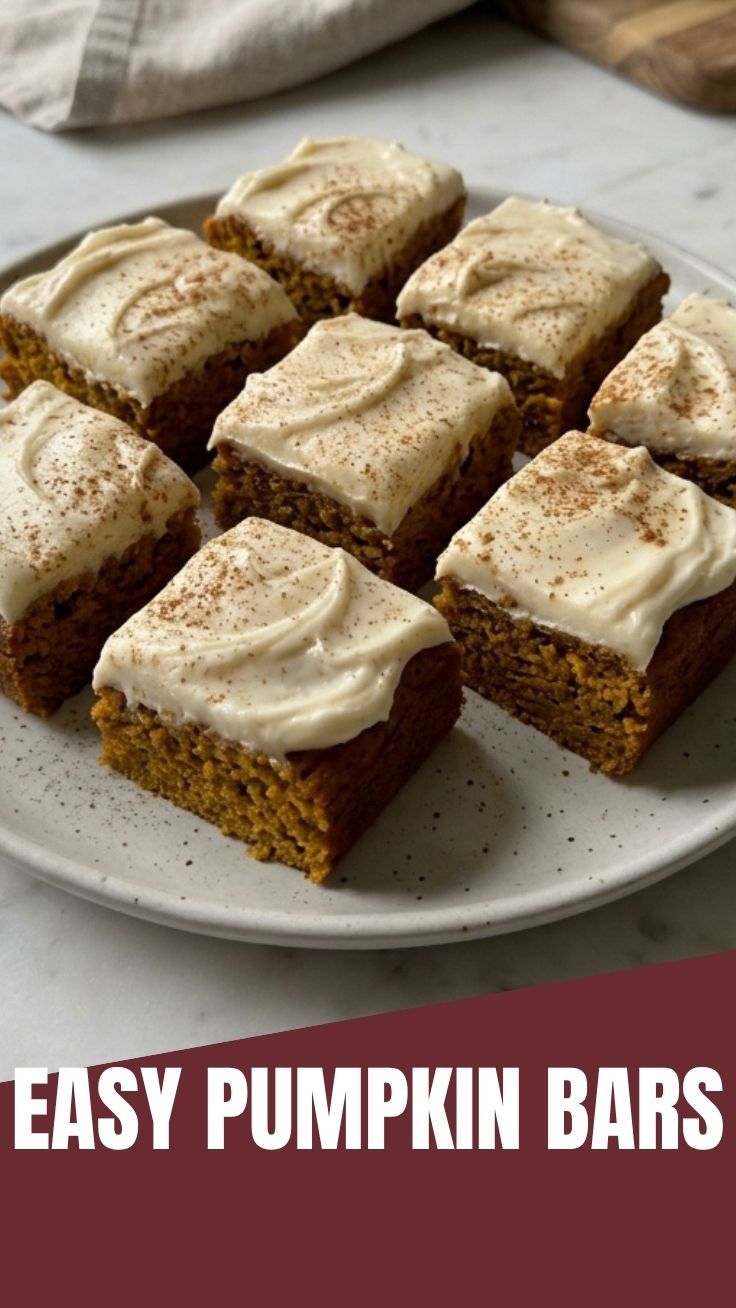
- Once the pumpkin bars are completely cool, spread the cream cheese frosting evenly over them.