The Ultimate Guide to Perfectly Chewy Homemade Rice Krispie Treats
Have you ever bitten into a store-bought Rice Krispie Treats only to find them rock-hard and flavorless? The magic of this nostalgic dessert lies in making it from scratch at home, where you control the texture and sweetness. Whether you’re a busy parent looking for a quick dessert or a home baker seeking foolproof results, preparing Rice Krispie Treats at home ensures a fresher, more customizable, and undeniably more delicious experience. In this comprehensive guide, we’ll unlock the secrets to achieving that perfect gooey-yet-chewy texture using the essential rice krispie cereal.
Ingredients & Kitchen Tools
Required Ingredients
– 3 tablespoons unsalted butter – Adds richness and helps bind the marshmallows.
– 1 package (10 oz) mini marshmallows – Standard marshmallows melt more evenly than large ones.
– 6 cups rice krispie cereal – The base star; ensure it’s fresh and not stale.
– 1/2 teaspoon vanilla extract (optional) – Enhances flavor without overpowering.
– Pinch of sea salt – Balances sweetness and brightens flavors.
Kitchen Tools
– Large non-stick saucepan or pot (at least 5 quarts)
– Rubber spatula or wooden spoon
– 9×13-inch baking dish
– Parchment paper or butter (for greasing)
– Measuring cups and spoons
Optional Substitutions
– Butter alternatives: Vegan butter or coconut oil (for dairy-free).
– Marshmallow swaps: Vegan marshmallows (look for gelatin-free brands).
– Cereal alternatives: Use puffed brown rice or gluten-free crispy rice cereal for dietary needs.
Prep Time & Cooking Schedule
– Prep Time: 5 minutes (measuring ingredients, greasing the dish).
– Cook Time: 10 minutes on the stovetop (melting butter and marshmallows).
– Cooling Time: 15–20 minutes (room temperature) or 10 minutes in the refrigerator for quicker setting.
– Total Time: Approximately 30 minutes.
Plan ahead: These treats are best enjoyed within 24 hours, so prepare them the day you plan to serve for peak freshness.
Step-by-Step Instructions
1. Prep the pan: Line a 9×13-inch baking dish with parchment paper or grease lightly with butter. This ensures easy removal later.
2. Melt the butter: In a large saucepan over low heat, melt the butter completely. Avoid medium-high heat—it can burn the butter and alter the flavor.
3. Add marshmallows: Stir in the mini marshmallows continuously until fully melted and smooth. Remove from heat immediately to prevent overheating, which leads to hard treats.
4. Mix in the cereal: Pour the rice krispie cereal into the marshmallow mixture. Gently fold with a spatula until every piece is coated. Do not overmix; vigorous stirring breaks the cereal kernels and creates a dense texture.
5. Press into the pan: Transfer the mixture to the prepared dish. Use buttered fingers or a buttered spatula to press it evenly. A tip: lightly wet your hands to prevent sticking.
6. Cool completely: Let the treats cool at room temperature for 15–20 minutes. For faster results, refrigerate for 10 minutes—but avoid leaving them too long, or they become overly firm.
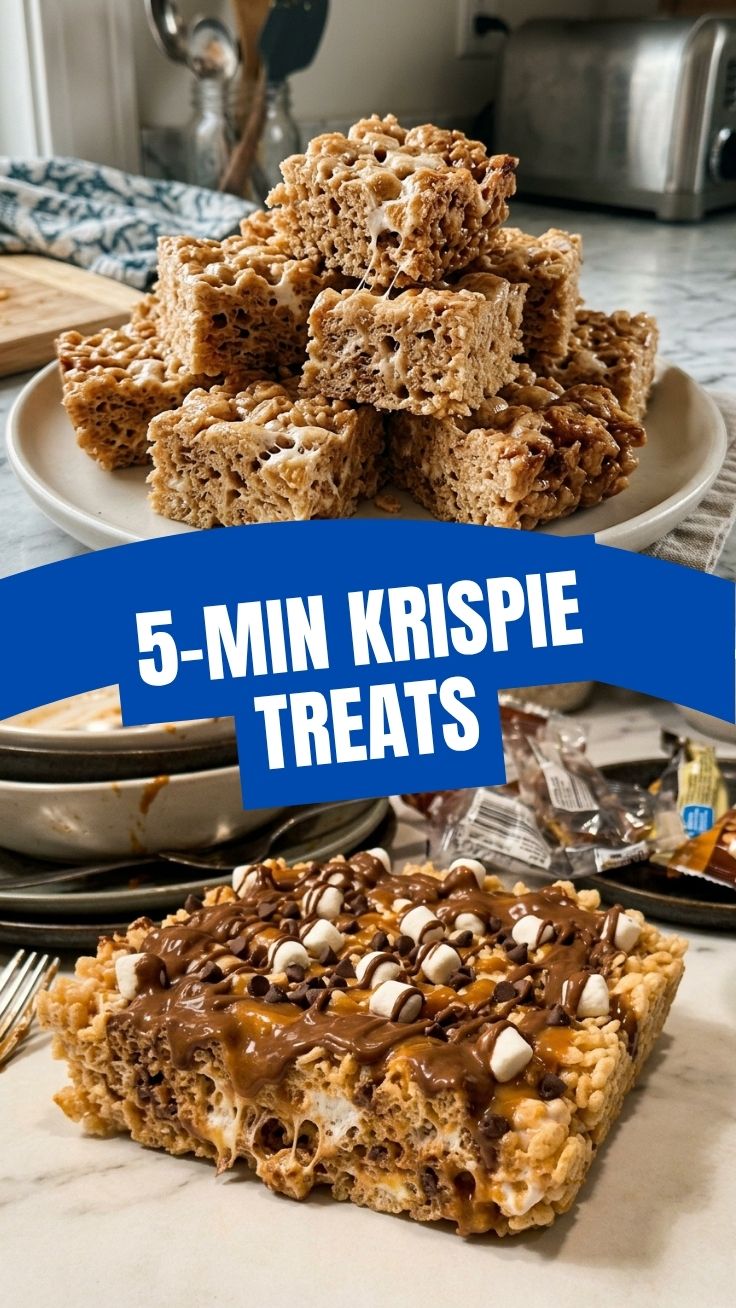
Pro tip: For extra gooey Rice Krispie Treats, add 1/2 cup extra mini marshmallows after removing from heat, folding them in gently. This creates pockets of melted marshmallow for a decadent bite.
Nutritional Benefits & Advantages
While these treats are an indulgence, they offer surprising benefits when made at home:
– Low in cholesterol compared to many butter-heavy desserts (use plant-based butter for zero cholesterol).
– Iron and B-vitamins: Fortified rice krispie cereal provides essential nutrients like iron and folic acid, contributing to daily mineral intake.
– Portion control: Homemade versions allow you to cut smaller squares, reducing calorie load.
– No preservatives: Store-bought versions often include chemical stabilizers; homemade treats contain only whole ingredients.
Tips, Variations & Cooking Advice
Flavor Twists
– Chocolate peanut butter: Add 1/4 cup peanut butter and 1/2 cup mini chocolate chips during the marshmallow melt.
– Salted caramel: Drizzle homemade caramel sauce over the top before cooling and sprinkle with flaky sea salt.
– Cinnamon sugar: Toss the cereal with 1 teaspoon cinnamon before mixing.
Dietary Adaptations
– Gluten-free: Confirm your marshmallows and cereal are certified gluten-free (most brands are).
– Vegan: Use vegan marshmallows (e.g., Dandies) and coconut oil instead of butter.
– Lower sugar: Swap half the marshmallows for sugar-free marshmallows or use a marshmallow-flavored gelatin alternative.
Common Mistakes to Avoid
1. Overheating the marshmallows: This is the #1 cause of rock-hard treats. After melting, remove from heat immediately. If the mixture is too hot, let it cool for 1 minute before adding cereal.
2. Pressing too hard: Applying extreme pressure compacts the treats, making them dense and difficult to bite. Use light, even pressure.
3. Using stale cereal: Cereal that has absorbed moisture or gone stale won’t provide the signature snap. Always use a fresh bag.
4. Skipping the vanilla and salt: These small additions dramatically enhance flavor depth; don’t omit them.
Storage & Meal Prep Tips
– Room temperature storage: Place treats in an airtight container with parchment paper between layers. They stay fresh for 2–3 days on the counter.
– Refrigeration: Wrap tightly in plastic wrap and refrigerate for up to 1 week. Note that cold temperatures can harden the texture.
– Freezing: Cut into squares, freeze on a baking sheet for 1 hour, then transfer to a freezer bag. They last up to 3 months. To thaw, leave at room temperature for 10–15 minutes.
– Reheating: For a softer bite, microwave a single treat for 8–10 seconds. Avoid reheating the entire batch—it can become rubbery.
Conclusion
Mastering homemade Rice Krispie Treats is a game-changer for your dessert repertoire—they’re quick, budget-friendly, and endlessly adaptable. By following the precise instructions here, you’ll avoid common pitfalls and create treats that are perfectly chewy, never hard. Remember, the key lies in using fresh rice krispie cereal and never overheating your marshmallows. Now that you have the blueprint, I encourage you to try this recipe, experiment with one of the suggested variations, and share your results in the comments below. There’s no going back to store-bought after this!
FAQs
1. Can I use jumbo marshmallows instead of mini?
Yes, but mini marshmallows melt more evenly and quickly. If using jumbo, chop them into smaller pieces for faster melting.
2. Why did my Rice Krispie Treats turn out hard?
Overheating the marshmallows or pressing the mixture too firmly are the most common culprits. Always remove from heat as soon as the marshmallows melt and press gently.
3. Can I make these treats without butter?
Absolutely. Replace butter with coconut oil or vegan margarine. For a lower-fat option, use marshmallow crème (7 oz) and skip butter—though the texture will be slightly different.
4. How do I prevent the treats from sticking to my hands?
Wet your hands lightly with water or coat them with a thin layer of butter before pressing. This prevents sticking without adding excess grease.
5. Can I add peanut butter or chocolate chips?
Yes! Fold in 1/4 cup of peanut butter with the marshmallows for a creamy twist, or stir in 1/2 cup of chocolate chips after the cereal is coated.
Quick way to grow Rice Krispie Treats
Ingredients
Equipment
Method
- Melt butter in a large saucepan over low heat, then add marshmallows and stir until completely melted and smooth.
- Remove the saucepan from heat and quickly add the Rice Krispies cereal, stirring until it's fully coated with the marshmallow mixture.
- Press the mixture evenly into a buttered 9x13-inch pan using a buttered spatula or wax paper, and let it cool completely before cutting into squares.