Title: The Ultimate Guide to Perfect Shrimp Fried Rice at Home
Introduction:
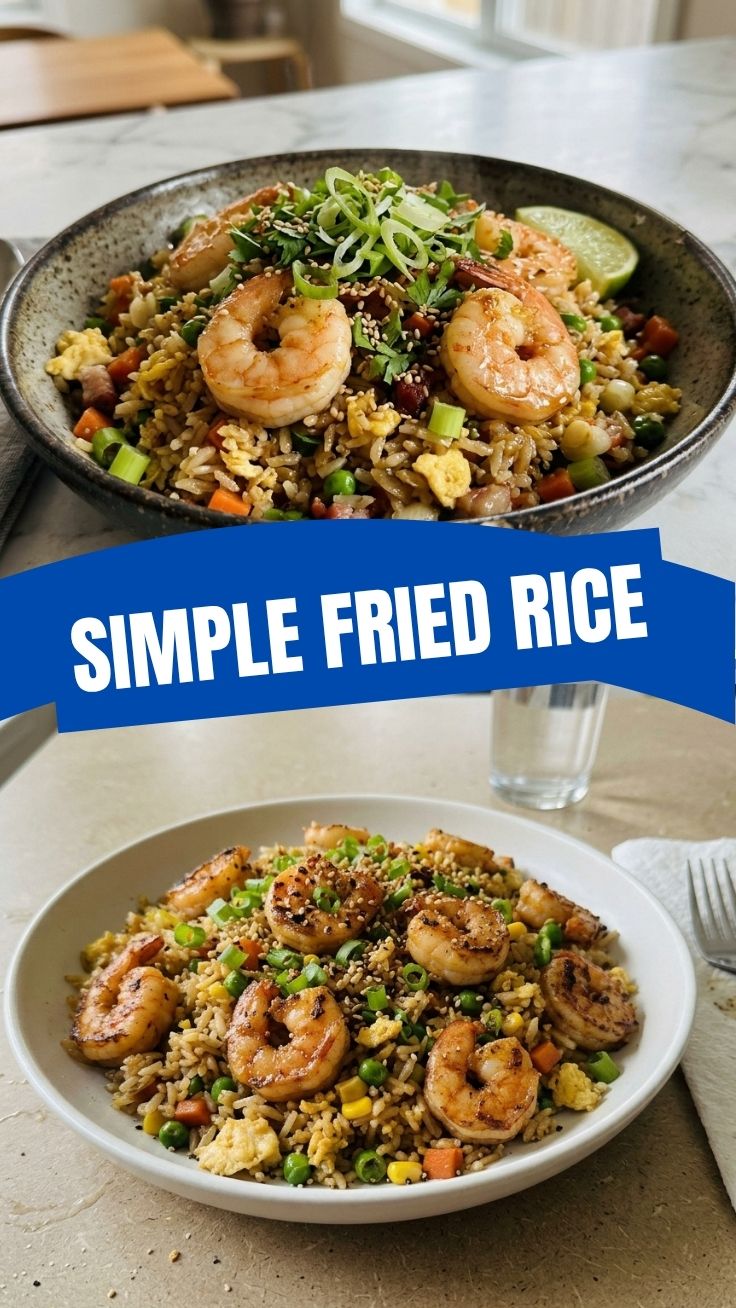
Have you ever craved a restaurant-quality Shrimp Fried Rice but wanted to make it healthier, cheaper, and faster at home? This Easy Shrimp Fried Rice recipe is designed to be your new weeknight hero. Preparing this iconic takeout dish from scratch allows you to control the sodium, customize the vegetables, and ensure perfectly cooked, juicy shrimp every single time. Mastering this recipe unlocks the coveted flavors of your favorite takeout menu right in your own kitchen.
Ingredients & Kitchen Tools (H2)
– Shrimp: 1 lb large shrimp, peeled and deveined (pat dry for best sear).
– Rice: 3 cups cold, day-old jasmine rice (crucial for that non-clumpy texture).
– Eggs: 2 large eggs, lightly beaten.
– Vegetables: 1 cup frozen peas and carrots, 4–5 sliced green onions.
– Aromatics: 4 garlic cloves (minced), 1 tbsp fresh ginger (minced).
– Sauces: 3 tbsp low-sodium soy sauce, 1 tbsp oyster sauce (optional, for umami).
– Oils: 2 tbsp vegetable oil (for high heat) + 1 tsp toasted sesame oil (for finishing).
– Seasonings: White pepper and salt.
– Tools: Wok or large cast-iron skillet, metal spatula, small prep bowls.
Prep Time & Cooking Schedule (H2)
– Prep Time: 15 minutes (devein shrimp, chop veggies, whisk sauce).
– Marinate Time: 10 minutes for the shrimp.
– Cook Time: 10 minutes (the actual wok-fry is lightning fast).
– Total Time: ~35 minutes.
Planning is key: have every ingredient prepped and ready in small bowls (mise en place) before you turn on the heat. If you don’t have day-old rice, spread freshly cooked rice on a baking sheet and refrigerate for 15 minutes to dry it out.
Step-by-Step Instructions (H2)
1. Marinate Shrimp: Toss shrimp with a pinch of salt, white pepper, and 1 tsp soy sauce.
2. Scramble Eggs: Heat wok on high until smoking. Add 1 tbsp oil, scramble eggs until fluffy, then remove.
3. Cook Aromatics: Reduce heat slightly, add 1 tbsp oil, and sauté garlic and ginger for 15 seconds.
4. Sear Shrimp: Add shrimp in a single layer. Sear 1 minute per side until pink. Remove.
5. Fry the Rice: Crank heat to high. Add remaining oil and cold rice. Press the rice flat against the wok for 45 seconds before breaking it up. This searing step creates the signature smoky flavor of restaurant Shrimp Fried Rice.
6. Add Veggies & Sauce: Push rice aside, add peas, carrots, and white scallions. Let them blister for a minute, then mix with rice and pour in the sauce.
7. Finish: Drizzle sesame oil around the edges. Return eggs and shrimp. Toss in green onion tops. For a truly Easy Shrimp Fried Rice experience, watch the shrimp carefully in this final toss—they just need to be reheated, not cooked further. Serve immediately.
Nutritional Benefits & Advantages (H2)
Shrimp delivers lean protein and selenium, an antioxidant that supports immunity. Peas and carrots provide fiber and vitamins A and C. Using day-old rice increases resistant starch, lowering the glycemic impact slightly. Most importantly, making this dish at home dramatically cuts calories and sodium compared to takeout versions, giving you a balanced, satisfying meal without the post-dinner bloat.
Tips Variations & Cooking Advice (H2)
– Protein Swaps: Replace shrimp with chicken, pork, or cubed firm tofu.
– Extra Veggies: Add bell peppers, corn, or bean sprouts for more crunch.
– Spice it Up: Stir in sambal oelek or Sriracha during the sauce step.
– Flavor Boosters: A teaspoon of fish sauce or MSG (like Accent) can elevate the umami significantly.
– Dietary Adaptations: Use tamari or coconut aminos for a gluten-free version. This recipe is naturally dairy-free.
Common Mistakes to Avoid (H2)
– Using Fresh Rice: Fresh rice is too moist and will turn into a gluey paste. Always start with cold, day-old rice.
– Skipping the Rice Sear: Don’t just stir immediately. Letting the rice form a crust against the hot wok is the foundation of the perfect texture.
– Overcrowding: If making a large batch, cook in smaller portions to avoid steaming instead of frying.
– Low Heat: A screaming hot wok or skillet is non-negotiable for achieving that authentic fried rice texture.
– Overcooking Shrimp: Shrimp turn rubbery in seconds. Cook just until pink and opaque.
Storage & Meal Prep Tips (H2)
Cool the rice completely (spread on a baking sheet to speed it up) before storing in an airtight container. It lasts up to four days in the refrigerator or three months in the freezer. To reheat, toss it back into a hot skillet with a splash of water or extra soy sauce—this steam-revival method brings back the moisture and prevents the rice from drying out.
Conclusion (H2)
Mastering Shrimp Fried Rice at home is a rewarding skill that saves you money and impresses dinner guests. This Easy Shrimp Fried Rice recipe proves you don’t need a takeout menu for a vibrant, flavorful dinner any weeknight. By following these high-heat steps and avoiding common pitfalls, you’ll consistently create a dish that is crispy, savory, and perfectly balanced. Give this recipe a try and share your results!
FAQs (H2)
– Can I use frozen shrimp? Absolutely. Thaw completely in the fridge or under cold water, then pat very dry before marinating.
– Why is my fried rice mushy? You likely used fresh, warm rice. Day-old, cold rice is essential for preventing a sticky result.
– Can I skip the oyster sauce? Yes. Replace it with extra soy sauce and a pinch of sugar for sweetness, or just leave it out.
– How do I make this spicy? Add chili garlic sauce or a drizzle of chili oil during the final toss.
– Is this recipe gluten-free? Substitute soy sauce with tamari or coconut aminos, and ensure your oyster sauce is gluten-free (or skip it).
Shrimp Fried Rice
Ingredients
Equipment
Method
- Heat 1 tablespoon of vegetable oil in a large skillet or wok over medium-high heat. Add the beaten eggs and scramble until fully cooked, then remove them from the skillet and set aside.
- Add the remaining 1 tablespoon of vegetable oil to the skillet. Add the shrimp and cook until pink and opaque, about 2-3 minutes per side, then remove and set aside.
- Add the diced carrots, minced garlic, and grated ginger to the skillet, stirring constantly for 2-3 minutes until fragrant and slightly tender.
- Stir in the cooked rice and frozen peas, breaking up any clumps of rice and mixing well with the vegetables.
- Pour in the soy sauce and sesame oil, tossing everything to ensure the rice is evenly coated.
- Return the cooked shrimp and scrambled eggs to the skillet, folding them into the fried rice.
- Stir in the chopped green onions, cooking for another minute until everything is heated through.
- Serve the shrimp fried rice immediately, garnished with additional green onions or sesame seeds if desired.