Here is a comprehensive, SEO-optimized, and reader-friendly blog post tailored to your exact specifications.
—
The Ultimate Guide to Fluffy Buttermilk Biscuits: Easy Homemade Recipe
What is the one thing that can instantly transform a simple breakfast into a Southern-style feast? It is the sight of a golden, steam-emitting split biscuit ready to be drenched in rich gravy. Making them from scratch is a rewarding culinary skill that guarantees superior flavor, texture, and freshness compared to store-bought alternatives. Today, we are diving deep into the science and soul of making fluffy buttermilk biscuits. This easy biscuit recipe is designed to be foolproof, ensuring you achieve that perfect, towering rise every single time. Whether you are pairing them with a creamy sausage gravy or a simple pat of butter, mastering the art of Biscuits is a game changer for your home cooking repertoire.
Ingredients & Kitchen Tools
To ensure success, it is vital to have the right components and tools ready before you start. The key to a tender crumb lies in the temperature of your ingredients.
Ingredients:
– 2 cups All-Purpose Flour: Provides the perfect structure. Spoon and level it for accuracy.
– 1 tbsp Baking Powder: The primary leavening agent for lift.
– 1 tsp Salt: Balances the flavor.
– ¼ tsp Baking Soda: Helps neutralize the buttermilk acid for a better rise.
– 6 tbsp Cold Unsalted Butter: The fat creates steam pockets, leading to flaky layers. Keep it freezer-cold.
– ¾ cup Cold Buttermilk: The acidity tenderizes the gluten and adds a signature tang.
Kitchen Tools:
– Pastry Cutter (or a food processor) to cut the butter into the flour.
– Large Mixing Bowls
– Baking Sheet (light-colored preferred for even browning)
– Parchment Paper
– Sharp Biscuit Cutter (2.5-inch diameter) – Do not use a glass with a dull edge, as it seals the dough.
– Pastry Brush for the butter finish.
Prep Time & Cooking Schedule
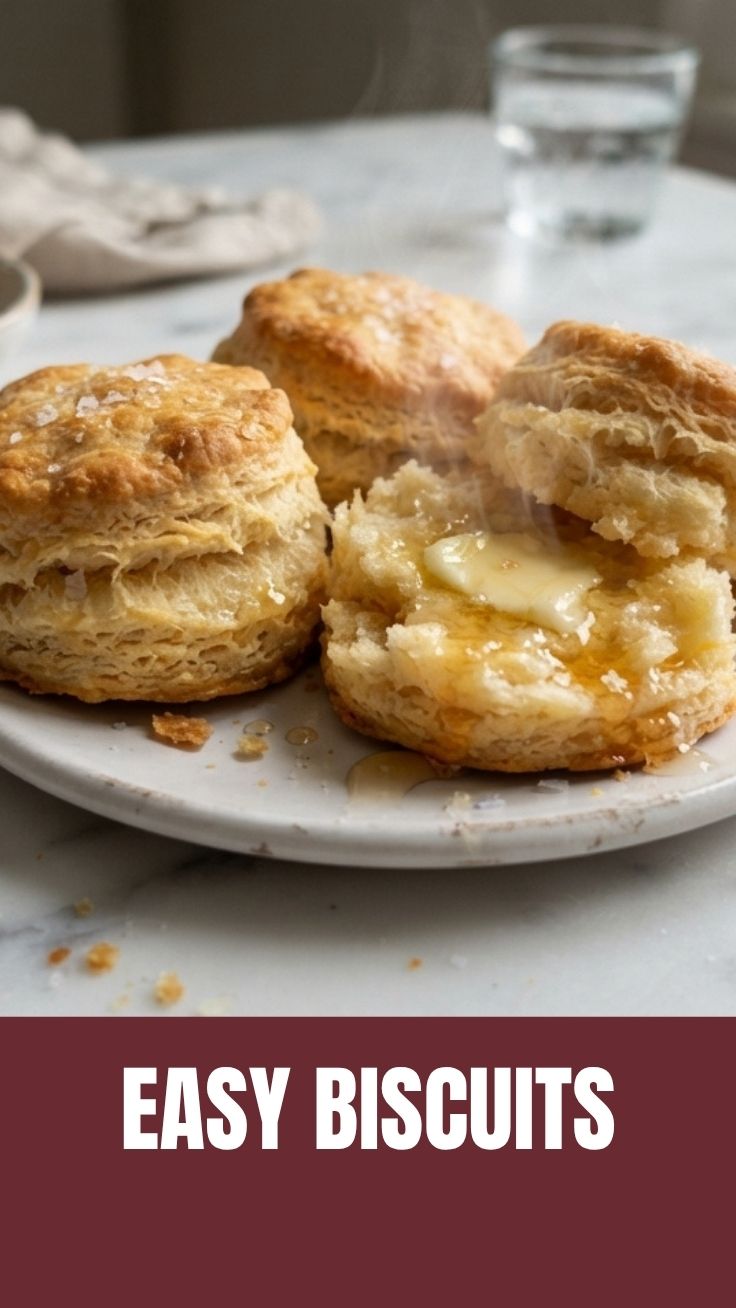
Planning your time is crucial for freshly baked biscuits. This timeline is perfect for a weekend brunch or a quick weekday morning treat.
– Prep Time: 15 minutes
– Chill Time: 10 minutes (for the shaped biscuits)
– Cook Time: 12–14 minutes
– Total Time: Approximately 40 minutes
Context: Start your coffee, preheat the oven, and prepare the dough. By the time the oven is ready, your biscuits will be too. The brief chill time between cutting and baking ensures the butter stays solid, creating the best steam effect.
Step-by-Step Instructions
Follow these steps closely to achieve bakery-quality results. Remember, the secret to fluffy buttermilk biscuits is minimal handling and maximum cold.
1. Preheat & Prep: Preheat your oven to 450°F (232°C). Line your baking sheet with parchment paper. This high heat is critical for immediate steam generation.
2. Dry Mix: In a large bowl, whisk together the flour, baking powder, salt, and baking soda.
3. Cut the Butter: Add the cold, cubed butter. Using your pastry cutter, work the butter into the flour until it resembles coarse meal with pea-sized pieces remaining. Tip: If the butter warms up, pop the bowl in the fridge for 5 minutes.
4. Add Buttermilk: Pour the cold buttermilk into the mixture. Stir with a spatula just until a shaggy dough forms. Do not overmix.
5. Laminate the Dough: Turn the dough out onto a lightly floured surface. Gently bring it together. Pat it into a ½-inch thick rectangle. Fold it over itself (like a letter), then pat down again. Repeat this 3 times to create those iconic flaky layers.
6. Cut: Pat the dough to 1-inch thickness. Use your sharp cutter to press straight down without twisting.
7. Bake: Place the biscuits on the prepared sheet. For soft sides, place them touching. For crispy edges, space them 2 inches apart. Bake for 12–14 minutes until tall and golden brown.
8. Finish: The moment they come out, brush the tops with melted butter. This easy biscuit recipe relies on that final touch for a soft, flavorful crust.
Nutritional Benefits & Advantages
While biscuits are a comforting treat, having them homemade offers significant advantages over processed alternatives. By controlling the ingredients, you eliminate preservatives and trans fats commonly found in canned or frozen varieties. Buttermilk is a fantastic source of probiotics, calcium, and vitamin B12, which aids in digestion and bone health. Furthermore, the butter provides fat-soluble vitamins A, D, and E. While moderation is key, the nutritional profile of a scratch-made biscuit is far superior to its mass-produced counterpart, offering clean energy and higher satiety.
Tips Variations & Cooking Advice
This recipe is a fantastic base for creativity. Here are some ways to customize it.
– Flavor Variations: Add 1 cup of shredded sharp cheddar cheese and ½ teaspoon of garlic powder for a savory twist. For a sweet breakfast, fold in ¼ cup of sugar and ½ cup of dried blueberries.
– Dietary Adaptations: For a gluten-free version, use a 1:1 gluten-free flour blend containing xanthan gum. For a dairy-free version, use cold coconut oil or vegan butter and substitute the buttermilk with almond milk mixed with 1 tablespoon of lemon juice.
– Sweet Treats: If you are in the mood for something sweet, these biscuits are surprisingly versatile. They can be crumbled over a fruit cobbler or used as a base for a dessert, much like you would with classic cookies.
Common Mistakes to Avoid
Even experienced bakers can run into trouble. Here are the most common pitfalls and how to sidestep them.
– Overworking the Dough: This is the number one reason for tough biscuits. Gluten develops quickly. Mix until just combined, and handle the dough as little as possible.
– Warm Ingredients: If your butter or buttermilk is warm, the fat will melt into the flour before baking, resulting in dense, greasy biscuits. Keep everything ice-cold.
– Twisting the Cutter: When you twist the cutter, you “seal” the edges of the dough. This prevents the biscuit from rising to its full potential. Press straight down and lift up.
– Using a Dull Cutter: A clean, sharp cut is essential for maximum rise. If you don’t have a biscuit cutter, use a sharp knife to cut the dough into squares.
Storage & Meal Prep Tips
Biscuits are best enjoyed fresh, but they store surprisingly well if done correctly.
– Room Temperature: Store leftover biscuits in an airtight container at room temperature for up to 2 days. To revive crispness, reheat in a 350°F oven for 5 minutes. Avoid microwaving, as it makes them rubbery.
– Freezing (Unbaked): This is the best meal prep strategy. Cut the biscuits and place them on a tray in the freezer. Once frozen solid, transfer them to a freezer bag. You can bake them directly from frozen, adding 2–3 minutes to the baking time.
– Freezing (Baked): Cool the biscuits completely, wrap them tightly in foil, and place them in a freezer bag. They will keep for up to 3 months. Thaw at room temperature and reheat in the oven.
Conclusion
Mastering this recipe unlocks a world of comfort food possibilities. From a classic Biscuits and Gravy breakfast to a quick side for a hearty dinner, the perfect biscuit is a true kitchen triumph. Remember, the secret to fluffy buttermilk biscuits is cold ingredients, a light hand, and a hot oven. This easy biscuit recipe is your first step to becoming a biscuit pro. Try it this weekend, share your results with us, and explore more comfort food classics on our site!
FAQs
Q: Can I use self-rising flour instead of all-purpose flour?
A: Absolutely. If using self-rising flour, omit the baking powder, salt, and baking soda. Simply combine the flour with the cold butter and buttermilk.
Q: Why didn’t my biscuits rise?
A: Several factors could be at play. The most common are that your oven wasn’t hot enough (it needs to be fully preheated), your butter was too warm, or you twisted the biscuit cutter, which sealed the edges.
Q: How do I make these biscuits extra flaky?
A: The “laminating” technique in Step 5 is critical. The more you fold the dough, the more layers you create. Also, using large, visible pieces of butter in the dough contributes to steam pockets that separate the layers.
Q: Can I make this recipe without a food processor or pastry cutter?
A: Yes. You can freeze the butter and grate it directly into the flour using a box grater. Then, toss the grated butter in the flour with your fingers before adding the buttermilk.
Q: How do I adjust the recipe for high altitude?
A: At high altitude (above 3,500 feet), reduce the baking powder by ¼ teaspoon and increase the oven temperature by 25°F to set the structure before the leavening agents expand too much.
Proven way to grow 7 perfect Biscuits
Ingredients
Equipment
Method
- Preheat your oven to 425°F (220°C) and line a baking sheet with parchment paper.
- In a large bowl, whisk together the flour, baking powder, sugar, and salt until well combined.
- Cut in the cold butter using a pastry blender or your fingertips until the mixture resembles coarse crumbs.
- Gradually add the cold buttermilk, mixing gently until a shaggy dough forms.
- Turn the dough onto a lightly floured surface and gently pat it to about 1-inch thickness.
- Use a 2-inch biscuit cutter to cut out seven biscuits, re-rolling scraps as needed.
- Place the biscuits on the prepared baking sheet, then brush the tops with melted butter.
- Bake for 12-15 minutes, or until golden brown and risen.
- Serve the biscuits warm with your favorite toppings.