The Ultimate Guide to Baking the Perfect Banana Bread at Home
Have you ever stared at a bunch of overripe bananas sitting on your counter and wondered what delicious creation you could whip up in under an hour? You’re not alone. This is the exact scenario that leads millions of home cooks to discover the magic of homemade quick bread. Preparing this classic treat at home is not only deeply satisfying but also allows you to control every ingredient, ensuring a moist, flavorful loaf that far surpasses anything from a box mix. When you master the art of turning those spotty bananas into a golden-brown masterpiece, you unlock a world of baking confidence. Let’s dive into the precise techniques that guarantee a perfect Banana Bread every single time.
Ingredients & Kitchen Tools
To begin, gather the following ingredients and tools. Precision is key, but flexibility exists for substitutions.
Ingredients:
– 3 medium overripe bananas (the darker the spots, the sweeter the flavor)
– 1/3 cup melted unsalted butter (or coconut oil for dairy-free)
– 3/4 cup granulated sugar (reduce to 1/2 cup for a less sweet version)
– 1 large egg (room temperature for better emulsification)
– 1 teaspoon pure vanilla extract
– 1 teaspoon baking soda (not baking powder; this creates the perfect rise)
– 1/4 teaspoon salt (enhances the sweetness without adding sugar)
– 1 1/2 cups all-purpose flour (can substitute whole wheat pastry flour)
– Optional: 1/2 cup chopped walnuts, pecans, or dark chocolate chips
Kitchen Tools:
– 9×5 inch loaf pan
– Large mixing bowl
– Fork or potato masher
– Wooden spoon or spatula
– Measuring cups and spoons
– Parchment paper or non-stick spray
Prep Time & Cooking Schedule
Understanding the timeline helps you plan effectively:
– Prep Time: 10 minutes (mashing bananas and mixing dry/wet ingredients)
– Bake Time: 55-65 minutes at 350°F (175°C)
– Cool Time: 10 minutes in the pan, followed by 30 minutes on a wire rack. Resist slicing immediately—cooling ensures the crumb sets properly, preventing a gummy texture.
Context for Planning: Start your prep as soon as you preheat the oven. While the oven ramps up, you can mash and mix. This recipe requires zero chilling or resting time, making it ideal for spontaneous baking.
Step-by-Step Instructions
1. Preheat and Prep: Set your oven to 350°F (175°C). Grease the loaf pan with butter or line it with parchment paper, leaving a slight overhang for easy removal. This ensures your Banana Bread slides out cleanly every time.
2. Mash the Bananas: In the large mixing bowl, peel and add the three overripe bananas. Use a fork to mash them to your desired consistency. For a chunkier texture, leave small lumps; for a uniform crumb, mash until nearly smooth. Aim for about 1 cup of mashed banana.
3. Combine Wet Ingredients: Add the melted butter to the mashed banana and mix well. Then, whisk in the granulated sugar, egg, and vanilla extract. Stir until the sugar is partially dissolved and the mixture is glossy. This step is crucial for incorporating air, which keeps the bread light.
4. Mix Dry Ingredients: Sprinkle the baking soda and salt over the wet mixture and stir. Immediately add the flour, folding gently with a spatula. Stop mixing as soon as the flour streaks disappear—overworking the gluten leads to a dense, tough loaf. If adding walnuts or chocolate chips, fold them in at the very end.
5. Bake to Perfection: Pour the batter into the prepared pan and smooth the top. Bake for 55-65 minutes. Use a toothpick test: it should come out clean or with a few moist crumbs. The top should be deep golden brown and cracked. If the top browns too quickly at 50 minutes, tent loosely with aluminum foil for the remaining time.
6. Cool Completely: Remove the pan from the oven and let it cool on a wire rack for 10 minutes. Then, lift the bread out using the parchment overhang and cool fully. Slicing into warm bread is tempting, but patience yields a cleaner slice and better texture.
Nutritional Benefits & Advantages
This simple loaf offers surprising nutritional value, especially when made with whole ingredients. A single banana provides potassium, vitamin B6, and vitamin C. By baking at home, you eliminate preservatives common in commercial mixes. For a healthier twist, you can substitute whole wheat flour (which adds fiber) or replace half the butter with unsweetened applesauce (reducing fat without sacrificing moisture). This particular version strikes a balance between indulgence and nourishment—satisfying your sweet tooth while contributing to your daily fruit intake.
Tips Variations & Cooking Advice
Flavor Variations:
– Chocolate Lover’s: Add 1/2 cup cocoa powder with the flour and double the chocolate chips.
– Spiced: Mix in 1 teaspoon cinnamon and 1/4 teaspoon nutmeg for warmth.
– Tropical: Fold in 1/3 cup shredded coconut and 1/3 cup chopped macadamia nuts.
Dietary Adaptations:
– Gluten-Free: Use a 1:1 gluten-free baking flour blend. Add 1 tablespoon of milk or water if the batter seems too thick.
– Dairy-Free: Replace butter with coconut oil or vegan butter. Ensure the chocolate chips are dairy-free.
– Egg-Free: Substitute the egg with a flax egg (1 tablespoon ground flaxseed + 3 tablespoons water, let sit 5 minutes).
Cooking Method Swap: For muffins, spoon batter into a lined muffin tin and bake at 350°F for 18-22 minutes. For a mini loaf (4×3 inch pan), bake for 30-35 minutes.
Common Mistakes to Avoid
1. Skipping the Toothpick Test: Ovens vary. Start checking at 50 minutes, but don’t assume the time is exact. Overbaked banana bread turns dry and crumbly.
2. Using Frozen Bananas Without Draining: Thaw frozen bananas in a bowl, then pour off the excess liquid. That watery discharge dilutes flavor and texture.
3. Overmixing the Batter: Stir only until the flour is absorbed. Twenty extra stirs can transform a tender crumb into a hockey puck.
4. Cutting Too Early: Slicing while steaming hot causes the bread to compress and become gummy. Wait at least one hour after baking for best results.
Storage & Meal Prep Tips
Proper storage ensures your creation stays moist for days.
Storing at Room Temperature: Wrap the cooled loaf tightly in plastic wrap or place in an airtight container. It will stay fresh for up to 4 days. Avoid the refrigerator—it accelerates staling.
Freezing for Longevity: Freeze whole or sliced. Wrap first in plastic wrap, then a layer of aluminum foil. Frozen banana bread remains perfect for up to 3 months. Thaw at room temperature or pop a frozen slice in the microwave for 20 seconds.
Reheating: To revive day-old slices, toast them lightly or warm in a 300°F oven for 5-10 minutes. This restores the crisp crust and soft interior.
Conclusion
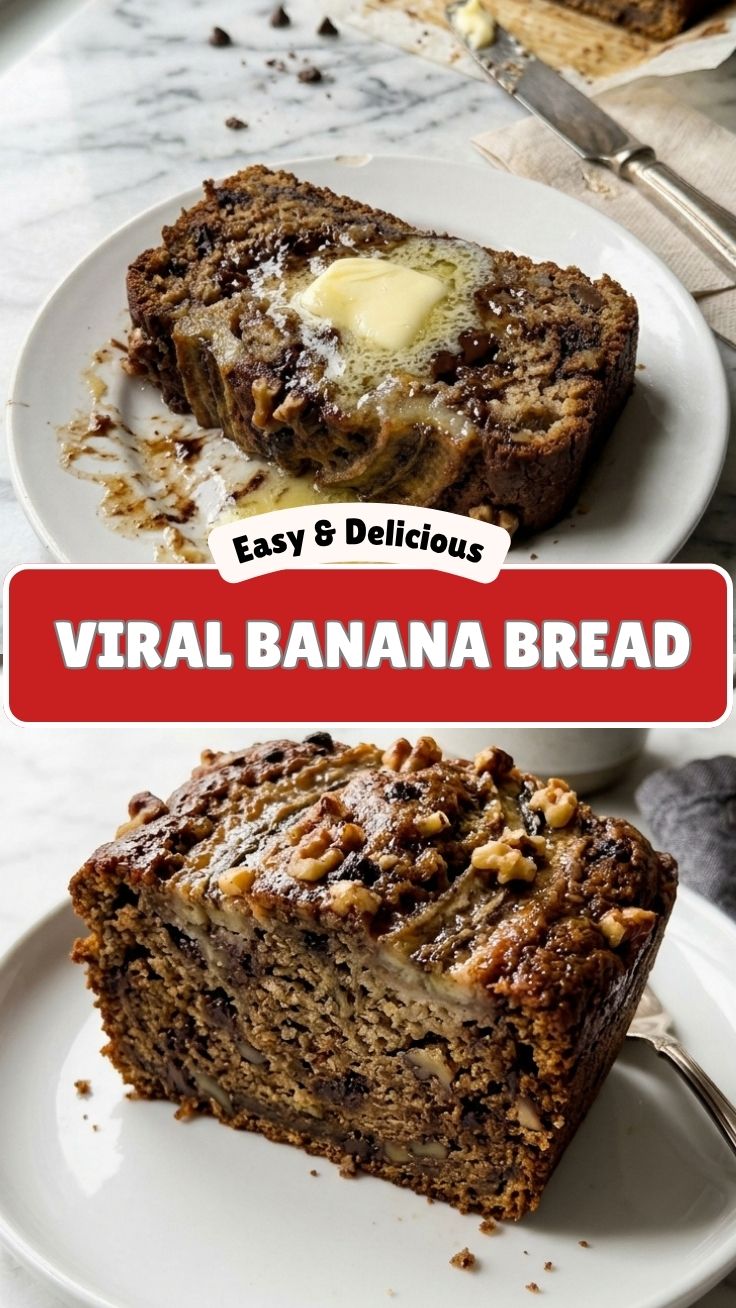
Mastering this Banana Bread recipe will reward you with a versatile, deeply satisfying baked good that shines at breakfast, snack time, or dessert. The key takeaways are simple: use very ripe fruit, mix with a light hand, and respect the cooling process. This particular version yields a perfectly moist crumb with a caramelized crust. Now it’s your turn—grab those spotty bananas and create something extraordinary. Share your results in the comments and let us know which variation you tried. Your kitchen is about to smell incredible.
FAQs
1. Can I use frozen bananas?
Absolutely. Thaw them completely, then drain the excess liquid before mashing. Frozen bananas actually intensify the natural sweetness.
2. How do I know when the bread is done?
Insert a toothpick into the center. It should emerge clean or with just a few moist crumbs attached. The top will be deeply golden and spring back when touched.
3. Can I reduce the sugar?
Yes. Use 1/2 cup instead of 3/4. The riper your bananas, the less sugar you need. For an alternative sweetener, try maple syrup (reduce liquid slightly).
4. Why is my bread dense?
Likely causes are overmixing the batter or using too much flour. Spoon-and-level your flour (don’t scoop directly from the bag) to avoid compaction.
5. How do I make this recipe vegan?
Replace the egg with a flax egg, use coconut oil instead of butter, and swap regular chocolate chips for dairy-free ones. The texture remains remarkably similar.
Quick way to grow Banana Bread
Ingredients
Equipment
Method
- Preheat your oven to 350°F (175°C) and grease a 9x5 inch loaf pan.
- In a large bowl, combine the flour, baking soda, and salt and set aside.
- In a separate bowl, mash the ripe bananas, then stir in the granulated sugar, beaten egg, and melted butter.
- Add the wet ingredients to the dry ingredients, mixing until just combined; be careful not to overmix the batter.
- Pour the batter into the prepared loaf pan and bake for 50-60 minutes, or until a toothpick inserted into the center comes out clean.
- Let the banana bread cool in the pan for 10 minutes before transferring it to a wire rack to cool completely.