Why This Korean Beef Bowl Will Become Your Go-To Weeknight Dinner
Have you ever craved the deeply savory, sweet, and umami-packed flavors of your favorite Korean restaurant but wished you could recreate them in under 30 minutes? Whether you are a seasoned home cook or a complete beginner, mastering a Korean Beef Bowl at home is not only incredibly satisfying but also a game-changer for your weekly meal prep routine. By preparing it yourself, you gain complete control over the quality of ingredients, sodium levels, and spice intensity, transforming a takeout indulgence into a wholesome, budget-friendly staple that the whole family will love.
—
Ingredients & Kitchen Tools
To build the perfect bowl, you will need a specific set of fresh ingredients and reliable tools. Below is a detailed list with practical clarifications for each item.
For the Beef & Marinade
– 1 lb ground beef (80/20 blend): The fat content ensures juiciness without being greasy. For a leaner option, use 93/7 and add 1 tsp of sesame oil.
– ½ cup low-sodium soy sauce: Controls saltiness. Tamari or coconut aminos work perfectly for gluten-free or paleo diets.
– ¼ cup brown sugar (packed): Provides caramelization. Substitute with honey, maple syrup, or monk fruit sweetener for a lower-glycemic version.
– 3 cloves garlic (minced): Fresh is non-negotiable for depth; jarred minced garlic loses pungency.
– 1 tbsp fresh ginger (grated): Adds warmth and zing. Skip dried ginger—it lacks the necessary moisture.
– 1 tbsp sesame oil: Toasted sesame oil offers a nutty finish. Use untoasted for a milder flavor.
– 2 tbsp gochujang (Korean chili paste): The heart of Korean cuisine. Substitute with sriracha + ½ tsp miso paste if unavailable.
– Optional: 1 tbsp rice vinegar: Balances sweetness with acidity.
– 2 green onions (sliced): For garnish. Reserve white parts for cooking, greens for topping.
For the Bowl & Vegetables
– 2 cups cooked white rice (short-grain): Sticky sushi rice is ideal. Brown rice or cauliflower rice works for low-carb diets.
– 1 cup fresh spinach (or baby spinach): Adds nutrients and color. Kale or bok choy are excellent substitutes.
– 1 large carrot (julienned): Provides crunch. Zucchini or cucumber ribbons work well.
– ½ cup kimchi (optional): Fermented cabbage adds probiotics and heat.
– Toasted sesame seeds and nori strips: For final garnish and texture.
Kitchen Tools & Utensils
– Large non-stick skillet or wok: Essential for even browning and easy cleanup.
– Microplane or fine grater: Ideal for fresh ginger and garlic.
– Rice cooker or medium pot: For perfectly steamed rice.
– Sharp chef’s knife and cutting board.
– Small mixing bowl for the sauce.
– Spatula or wooden spoon.
—
Prep Time & Cooking Schedule
Understanding the timing is crucial to avoid overcooked beef or mushy vegetables. Here is your breakdown:
– Prep Time: 15 minutes (includes chopping, grating, and making the sauce)
– Cook Time: 10–12 minutes (total stove time)
– Resting Time: 2–3 minutes (allows the beef to reabsorb juices)
– Total Time: Approximately 30 minutes
Pro Tip: Start your rice cooker first—long-grain jasmine takes roughly 20 minutes. While the rice cooks, prepare all your vegetables and mix the sauce. This parallel approach keeps the entire process streamlined.
—
Step-by-Step Instructions
Follow these detailed steps for a perfectly balanced Korean Beef Bowl that rivals any restaurant version. Pay attention to temperature cues and seasoning adjustments for consistent results.
1. Prepare the sauce: In a small bowl, whisk together the soy sauce, brown sugar, minced garlic, grated ginger, sesame oil, gochujang, and rice vinegar (if using). Set aside. Taste the sauce—it should be sweet, salty, and slightly spicy. Adjust sweetness by adding more sugar if needed.
2. Cook the beef: Heat your large non-stick skillet over medium-high heat. Add the ground beef and break it apart with a spatula. Cook for 3–4 minutes, stirring occasionally, until no longer pink. Do not drain the fat unless you have a very fatty cut—the fat carries flavor.
3. Add the sauce: Pour the prepared sauce over the browned beef. Reduce heat to medium-low and stir to combine. Simmer for 2–3 minutes until the sauce thickens and coats the meat. Look for the sauce to become glossy and sticky—this signals proper caramelization.
4. Add the bulgogi-inspired finish: For a deeper, smoky dimension reminiscent of traditional bulgogi, toss in the white parts of the sliced green onions and stir for 30 seconds. This technique builds layered flavor without additional ingredients.
5. Wilt the spinach: In the same skillet, push the beef to one side. Add the fresh spinach to the empty space and cook for 1–2 minutes until just wilted. If your skillet is too crowded, remove the beef temporarily, wilt the spinach separately, and combine.
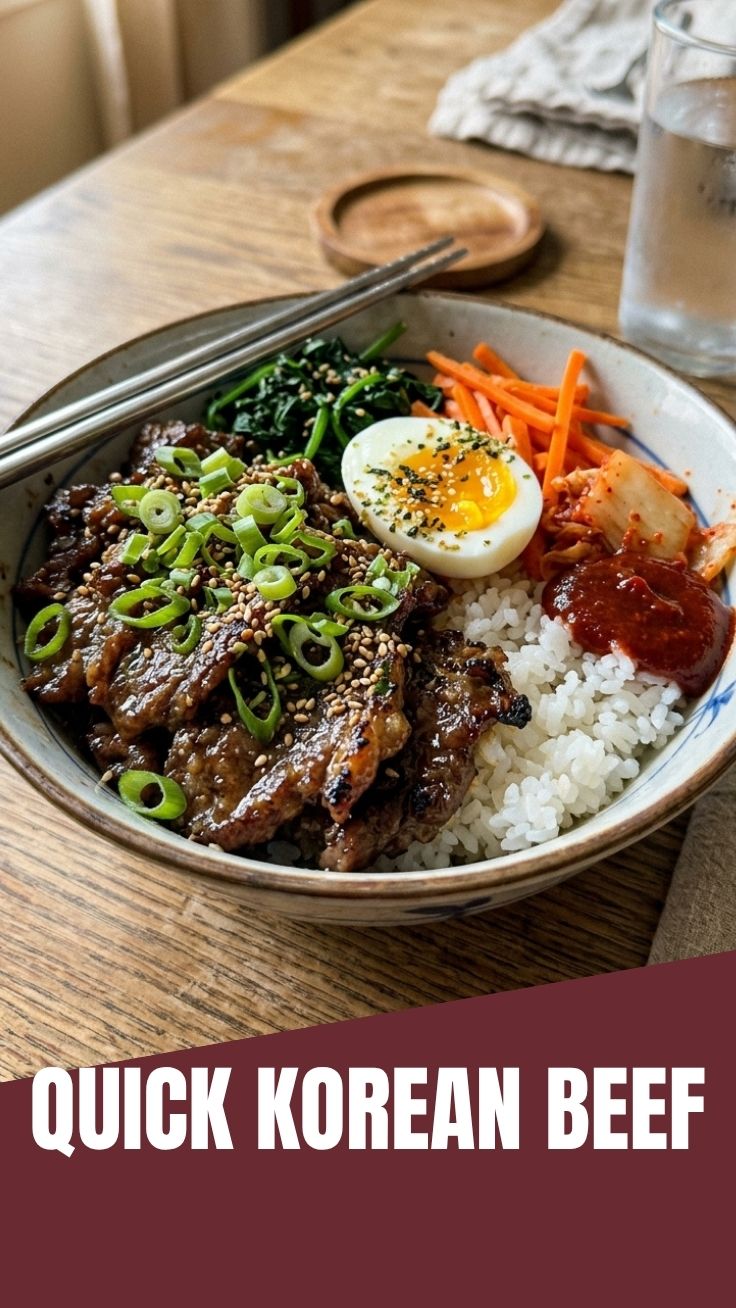
6. Assemble the bowls: Divide the cooked rice among serving bowls. Top with the beef mixture, wilted spinach, julienned carrots, and kimchi (if using). Garnish with toasted sesame seeds, nori strips, and the reserved green onion tops.
Crucial Temperature Control: Do not increase heat above medium-high. High heat will burn the sugar in the sauce, creating a bitter taste. If the sauce seems too thin, let it simmer for an extra minute instead of raising the flame.
—
Nutritional Benefits & Advantages
This Korean Beef Bowl offers a remarkable balance of macronutrients and micronutrients that support energy levels and satiety. A single serving (using lean beef and brown rice) provides approximately 450–500 calories, 25g of protein, 40g of carbohydrates, and 15g of fat.
– High-quality protein: The grass-fed beef supports muscle repair and provides bioavailable iron, which is essential for oxygen transport and preventing fatigue.
– Fermented probiotics: Adding kimchi introduces beneficial lactobacillus bacteria, which improve gut health and digestion.
– Antioxidant-rich vegetables: Spinach and carrots deliver vitamins A, C, and K along with lutein and beta-carotene, which support eye health and immune function.
– Healthy fats: Sesame oil contains sesamin and sesamolin, compounds with documented anti-inflammatory properties.
– Controlled sodium: By using low-sodium soy sauce and adjusting the gochujang, you reduce the typical restaurant sodium by up to 40%.
Dietary Advantage: Compared to takeout, this homemade version saves approximately 200–300 calories per bowl and eliminates unhealthy trans fats often found in commercial sauces.
—
Tips, Variations & Cooking Advice
Unlock the versatility of this recipe with these creative twists and dietary adaptations.
Flavor Variations
– Sweet and Tangy: Add 2 tbsp of pineapple juice or apple purée to the sauce for a fruity undertone.
– Smoky Spice: Incorporate 1 tsp of smoked paprika or chipotle powder with the gochujang for a Mexican-Korean fusion twist.
– Garlic Lovers: Double the minced garlic and add a pinch of garlic powder to the rice.
Dietary Adaptations
– Gluten-Free: Replace soy sauce with tamari or coconut aminos. Ensure your gochujang is labeled GF (many brands are).
– Dairy-Free: This recipe is naturally dairy-free. No substitutions needed.
– Low-Carb/Keto: Use cauliflower rice and increase the beef to 1.5 lbs. Replace brown sugar with allulose or stevia.
– Vegetarian: Substitute the beef with crumbled extra-firm tofu or plant-based ground meat. Increase umami by adding 1 tsp of mushroom powder.
Alternative Cooking Methods
– Instant Pot: Brown beef using the sauté function, then pressure cook on high for 5 minutes with the sauce. Quick release.
– Slow Cooker: Brown beef on the stovetop first, then transfer to the slow cooker with sauce. Cook on low for 4 hours. Texture will be softer but deeply flavorful.
Portion Changes
– For a family of 4: Double all ingredients and use a 12-inch skillet.
– For meal prep: Divide the beef and rice into individual containers, but store vegetables separately to prevent sogginess.
—
Common Mistakes to Avoid
Even skilled cooks can fall into these traps. Here are the most frequent errors and how to fix them.
1. Overcooking the Beef
Cooking ground beef past the point of browning results in dry, tough crumbles.
Solution: Cook just until pink disappears (internal temp 160°F). If using a thermometer, remove from heat at 155°F as carryover cooking will finish the job.
2. Using Too Much Sauce
Pouring the entire sauce without letting it reduce creates a soupy, unappetizing bowl.
Solution: Simmer the beef with sauce for at least 2 minutes until the sauce thickens into a glaze. If it remains thin, add a slurry of 1 tsp cornstarch + 2 tsp water.
3. Skipping the Resting Time
Serving immediately after cooking causes the juices to run out, leaving you with a dry bowl.
Solution: Let the beef rest for 2–3 minutes off heat before serving. This allows the fibers to reabsorb moisture.
4. Crowding the Skillet
Adding too much ground beef at once lowers the pan temperature, leading to steaming instead of browning.
Solution: Cook in batches of 1 lb or less. If doubling, use a second skillet or work in two batches.
5. Forgetting to Season the Rice
Plain white rice dilutes the bold flavors of the beef.
Solution: While the rice cooks, season it with 1 tsp sesame oil, a pinch of salt, and a dash of rice vinegar before assembling.
—
Storage & Meal Prep Tips
Proper storage ensures your Korean Beef Bowl stays fresh and flavorful for days.
Refrigeration
– Store the beef and vegetables in separate airtight containers.
– Beef: Keeps fresh for up to 4 days in the refrigerator (40°F or below).
– Rice: Store in a separate container to avoid sogginess. It lasts 3–4 days.
– Vegetables: Spinach and carrots should be stored separately and consumed within 2 days for optimal crunch.
Freezing
– Beef only: Portion into freezer-safe bags or containers. It freezes well for up to 3 months.
– Do not freeze assembled bowls—the rice and vegetables will become mushy upon thawing.
– Thawing: Transfer frozen beef to the refrigerator overnight. Reheat gently on the stovetop.
Reheating Instructions
– Stovetop (best method): Heat a skillet over medium heat, add the beef with 1 tbsp of water, and stir for 2–3 minutes until steaming.
– Microwave: Place beef in a microwave-safe bowl, cover with a damp paper towel, and heat on high for 60–90 seconds. Add 1 tsp water to maintain moisture.
– Avoid overheating: High heat will dry out the beef and break the sauce.
Meal Prep Strategy
For grab-and-go lunches, divide the beef, rice, and vegetables into individual containers. Add kimchi and green onions right before eating to preserve texture. This approach keeps the bowl fresh for up to 4 days when stored correctly.
—
Conclusion
Mastering a Korean Beef Bowl at home unlocks a world of bold, comforting flavors that are both quick to prepare and deeply satisfying. By following this guide, you gain not just a recipe but a foundational technique that can be adapted to countless variations—from spicy bulgogi-inspired bites to vegetarian alternatives. The key is balancing the sweet-savory sauce, controlling cooking temperature, and layering fresh vegetables for contrast. Now it is your turn: head to the kitchen, try this recipe, and share your results with friends or in the comments below. Your weeknight dinner rotation will never be the same.
—
FAQs
1. Can I use ground turkey or chicken instead of beef?
Absolutely. Use ground turkey (93% lean) or chicken. Add 1 tablespoon of sesame oil to the pan before cooking to compensate for the lower fat content. Cook until the internal temperature reaches 165°F. The flavor will be milder, so consider increasing the gochujang for a bolder kick.
2. How do I make this recipe spicier or milder?
– Milder: Omit the gochujang entirely or replace it with an equal amount of tomato paste + ½ tsp miso. Use only 1 tsp of red pepper flakes.
– Spicier: Double the gochujang, add ½ tsp of cayenne pepper, or mix in 1 tbsp of sambal oelek (chili garlic sauce) at the end. Serve with extra kimchi on the side.
3. Why did my beef sauce turn out too salty?
This typically happens if you use regular soy sauce instead of reduced-sodium. To fix it, add 2–3 tablespoons of water, 1 tsp of brown sugar, or a squeeze of lime juice to balance the saltiness. For future batches, start with ⅓ cup of low-sodium soy sauce and adjust after tasting.
4. Can I make this dish without gochujang?
Yes, but the flavor profile will shift. Use a combination of 1 tbsp sriracha + 1 tsp white miso paste for a similar sweet-spicy-umami punch. Alternatively, use 1 tbsp chili oil + ½ tsp sugar + ½ tsp soy sauce. The result will still be delicious but less authentically Korean.
5. How do I prevent the rice from becoming sticky and clumpy?
– Rinse your rice thoroughly under cold water until the water runs clear (3–4 times) before cooking. This removes excess starch.
– Use a 1:1.1 ratio of rice to water for fluffy grains.
– After cooking, fluff the rice with a fork and let it steam for 5 minutes before serving. Do not stir while it rests.