The Ultimate Pickled Red Onions Recipe – Tangy, Crunchy, and Easy to Make at Home
Have you ever taken a bite of an otherwise perfect burger or taco and felt that something was missing—that bright, tangy pop that cuts through richness? That’s the magic of pickled red onions. These vibrant strips transform any dish with their quick pickling magic, adding acidity, crunch, and a beautiful magenta hue. Making them at home is not only cost-effective but also lets you control the flavor intensity, salt level, and sweetness. In just 20 minutes, you can create a jar that elevates salads, sandwiches, grain bowls, and tacos for weeks. The secret lies in mastering the pickling brine—a balanced mixture of vinegar, sugar, salt, and spices that preserves and flavors the onions. Let’s dive into this foolproof recipe and learn how to achieve restaurant-quality results every time.
—
Ingredients & Kitchen Tools
Ingredients
– 2 medium red onions – Look for firm, heavy onions with tight skin; they yield the best crunch.
– 1 cup apple cider vinegar – Adds fruity acidity; white vinegar works too but gives a sharper bite.
– 1 cup water – Helps dilute the acidity so the onions don’t become overpowering.
– 2 tablespoons granulated sugar – Balances sourness; adjust to taste (honey or maple syrup are good substitutes).
– 1 tablespoon kosher salt – Use non-iodized salt to avoid metallic notes.
– Optional aromatics – 2 cloves garlic (smashed), 1 teaspoon black peppercorns, ½ teaspoon red pepper flakes, or a sprig of fresh dill.
Kitchen Tools
– Sharp knife and cutting board – For even, thin slices (use a mandoline for uniformity).
– Medium saucepan – To heat the brine.
– Glass jar or heatproof container – Mason jars work perfectly; avoid plastic for long-term storage.
– Measuring cups and spoons – Precision matters for brine balance.
– Tongs or spoon – For packing onions into the jar.
Optional Substitutions
– Vinegar swap – Rice vinegar for milder acidity, red wine vinegar for deeper color.
– Sweetener swap – Coconut sugar for lower glycemic index, stevia for zero sugar.
– Salt swap – Himalayan pink salt or sea salt.
—
Prep Time & Cooking Schedule
– Prep time: 10 minutes (slicing onions, measuring ingredients)
– Cook time: 5 minutes (heating brine)
– Rest/Cool time: 20–30 minutes (onions soften as brine cools)
– Total time: ~35 minutes before serving. For best flavor, refrigerate at least 1 hour.
– Plan ahead: Make a double batch on Sunday; they last up to 3 weeks in the fridge.
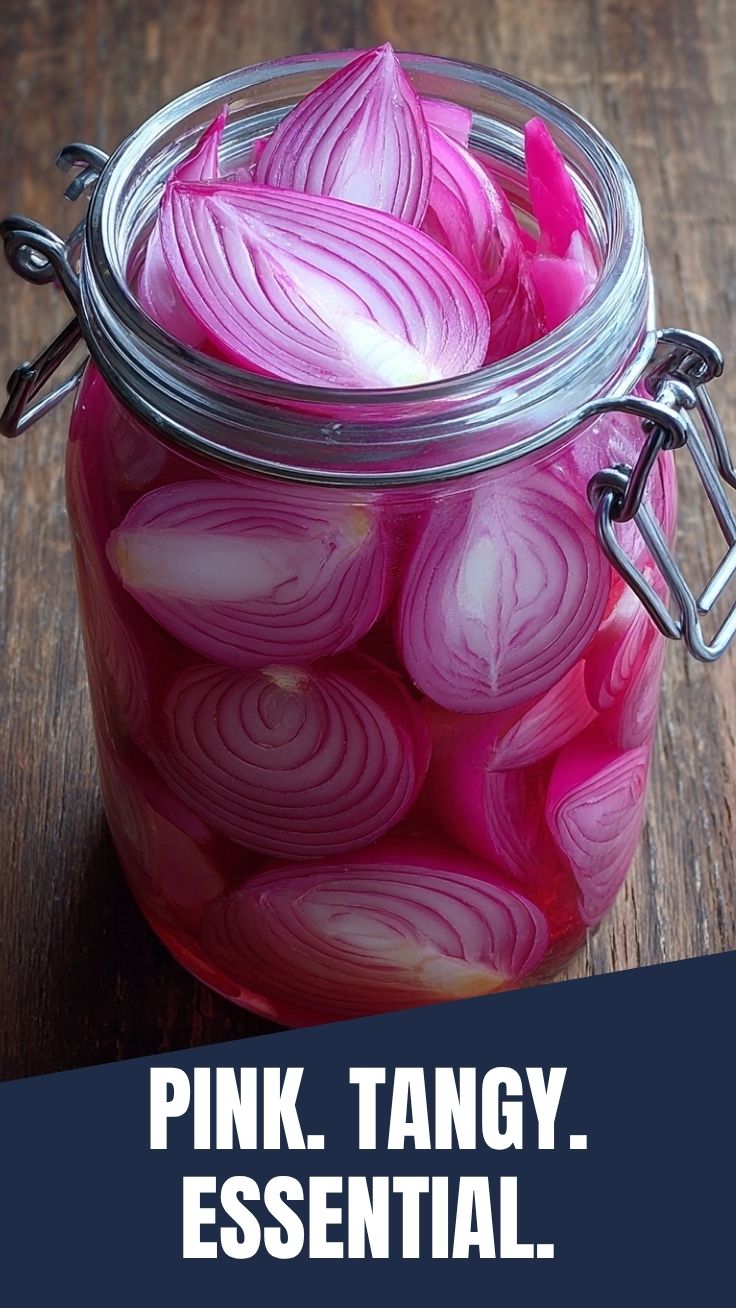
The image above shows the vibrant result: thinly sliced red onions submerged in a golden brine, ready to brighten your meals.
—
Step-by-Step Instructions
1. Slice the onions – Cut off both ends, peel, and slice into thin rings or half-moons (about ⅛ inch thick). Thinner slices pickle faster and stay crunchy.
2. Prepare the brine – In a saucepan, combine water, apple cider vinegar, sugar, salt, and any aromatics. Bring to a simmer over medium-high heat, stirring until sugar and salt dissolve completely. Do not boil vigorously—just a gentle simmer for 1 minute.
3. Pack the jar – Place the sliced onions into your jar or heatproof container. Pour the hot Pickled Red Onions brine directly over the onions, ensuring they are fully submerged. If needed, press them down with a spoon.
4. Cool and seal – Let the jar sit uncovered at room temperature for 20–30 minutes. The onions will turn bright pink and soften slightly. Then screw on the lid and refrigerate.
5. Serve or store – Enjoy immediately for a mild flavor, or wait 1–2 hours for deeper tanginess. The pickling brine will continue to infuse the onions overnight.
Pro tips:
– Use a mandoline for uniform slices that pickle evenly.
– For extra crunch, add a pinch of calcium chloride (Pickle Crisp) to the brine.
– If you prefer less vinegar punch, reduce vinegar to ¾ cup and increase water to 1¼ cups.
—
Nutritional Benefits & Advantages
Red onions are packed with quercetin, a potent antioxidant that fights inflammation and supports heart health. The pickling process preserves most of these nutrients. A 1-ounce serving of pickled red onions contains roughly 10 calories, 0g fat, and 2g carbs—making them a low-calorie flavor bomb for weight management. The pickling brine itself is rich in electrolytes (sodium and potassium) and probiotics if you use raw vinegar (like unpasteurized apple cider vinegar). Plus, the acidity helps balance blood sugar spikes when paired with high-carb meals like rice bowls or bread.
—
Tips, Variations & Cooking Advice
– Flavor variations:
– Mexican-style: Add cumin seeds, oregano, and a slice of jalapeño to the brine.
– Asian-inspired: Use rice vinegar, a splash of soy sauce, and star anise.
– Herby: Add fresh thyme, rosemary, or dill sprigs.
– Dietary adaptations: Naturally gluten-free, dairy-free, and vegan. For low-sodium, reduce salt to 1 teaspoon.
– Portion changes: Halve the recipe for a single jar or scale up to 4x for parties.
– Alternative methods:
– No-cook method: Mix room-temperature vinegar + water + sugar + salt in a jar, shake well, add onions, and refrigerate for 24 hours (softer texture).
– Quick microwave method: Heat brine in a microwave-safe bowl for 90 seconds, then pour over onions.
—
Common Mistakes to Avoid
1. Slicing too thick – Thick strips take longer to pickle and can remain harsh. Stick to ⅛ inch or thinner.
2. Overheating the brine – Boiling the vinegar for too long evaporates acidity and dulls flavor. Simmer only until dissolved.
3. Skipping the cooling step – Adding hot brine to a jar and immediately refrigerating can cause glass to crack. Let it cool slightly.
4. Using iodized salt – Iodine can cause a bitter aftertaste and cloudiness. Use pure kosher or sea salt.
5. Not submerging completely – Exposed onions can spoil. Weigh them down with a clean utensil or top with a small bag of extra brine.
—
Storage & Meal Prep Tips
– Refrigeration: Store in an airtight glass jar – the onions will stay fresh for up to 3 weeks.
– Freezing: Not recommended – thawed onions become mushy.
– Reheating: Use cold directly from the jar. For warm pickled onions, microwave in short 10-second bursts (they lose crunch).
– Meal prep: Make a large batch on Sunday. Use them in lunch salads, grain bowls, sandwiches, or as a garnish for soups and stews.
—
Conclusion
Mastering homemade pickled red onions is one of the simplest yet most rewarding kitchen skills you can learn. With just a handful of ingredients and a hot pickling brine, you can create a tangy, beautiful condiment that elevates nearly any meal. The balance of sweet, sour, and savory is entirely in your hands—adjust sugar, salt, and spices to match your palate. I encourage you to prepare a batch today and witness how a simple jar of onions can transform your everyday cooking. Share your results in the comments below or explore our related recipes for rice bowls, tacos, and sandwiches that pair perfectly with these pickled gems.
—
FAQs
Q1: Can I use white onions instead of red?
Yes, but the color will be pale yellow. Add a slice of beetroot to the brine for a pink tint.
Q2: How long do pickled red onions need to sit before eating?
They are edible immediately after cooling, but the flavor deepens after 1–2 hours in the fridge. Best after 24 hours.
Q3: My brined onions turned out too salty – how to fix?
Rinse the onions under cold water before serving, or add a splash of fresh vinegar to the jar and let sit for 10 minutes.
Q4: Can I reuse the brine for a second batch?
Technically yes, but the vinegar’s acidity and flavor will be diluted. For best results, make fresh brine.
Q5: Why are my pickled red onions soft instead of crunchy?
You likely sliced them too thin or used a no-cook method with very hot water. Try slicing slightly thicker and using a brine with calcium chloride (Pickle Crisp).
Best way to grow your own Pickled Red Onions in just 5 days
Ingredients
Equipment
Method
- Thinly slice the red onions and pack them into a clean jar.
- In a saucepan, combine vinegar, water, sugar, salt, and optional peppercorns and garlic; bring to a simmer until sugar and salt dissolve.
- Pour the hot brine over the onions in the jar, ensuring they are fully submerged.
- Seal the jar and let it cool to room temperature before refrigerating.
- The pickled red onions will be ready to enjoy after 24 hours, but their flavor will deepen over 5 days.