The Ultimate Guide to Baking a Classic Red Velvet Cake at Home
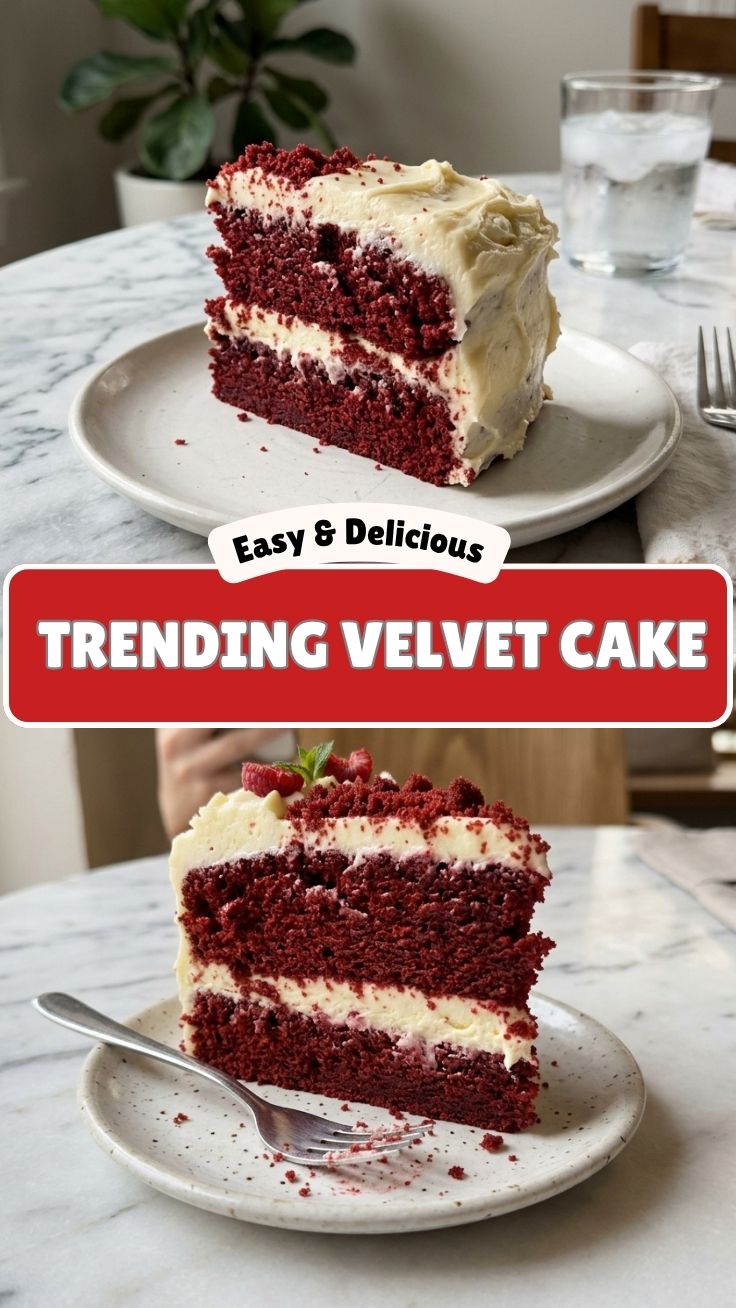
Have you ever wondered what makes a Red Velvet Cake so irresistible? Is it the deep crimson hue, the subtle cocoa flavor, or the velvety crumb that melts in your mouth? Whatever the reason, baking this iconic dessert from scratch is more than just following a recipe—it’s a rewarding experience that fills your kitchen with warmth and nostalgia. Preparing a Red Velvet Cake at home allows you to control the ingredients, adjust sweetness, and create a showstopper for any celebration. Pair it with a luscious cream cheese frosting, and you have a dessert that’s as beautiful as it is delicious. In this guide, I’ll walk you through every step, from gathering tools to storing leftovers, so you can bake with confidence.
—
Ingredients & Kitchen Tools
Here’s everything you need for a flawless Red Velvet Cake and that tangy cream cheese frosting.
For the cake:
– 2½ cups all-purpose flour – sifted for a light texture
– 1½ cups granulated sugar – standard sweetness; reduce to 1¼ cups if you prefer less sweet
– 1 tbsp unsweetened cocoa powder – Dutch-processed gives deeper color
– 1 tsp baking soda – ensures rise
– 1 tsp salt – balances flavor
– 1 cup buttermilk – at room temperature; substitute with 1 cup milk + 1 tbsp vinegar
– ½ cup unsalted butter, softened – adds richness
– 2 large eggs – room temperature for even mixing
– 1 tbsp red food coloring – gel works best for vibrant color
– 1 tsp vanilla extract – enhances flavor
– 1 tsp white vinegar – activates baking soda
For the cream cheese frosting:
– 8 oz cream cheese, softened – full-fat for best texture
– ½ cup unsalted butter, softened
– 4 cups powdered sugar – sifted to avoid lumps
– 1 tsp vanilla extract
– Pinch of salt
Utensils: Two 9-inch round cake pans, electric mixer, mixing bowls, rubber spatula, cooling rack, offset spatula, parchment paper.
—
Prep Time & Cooking Schedule
– Prep time: 20 minutes
– Bake time: 25–30 minutes
– Cooling time: 1 hour (cakes must be completely cool before frosting)
– Total time: ~2 hours
Plan accordingly: bake the cake layers a day ahead if you’re short on time. Store wrapped layers at room temperature or in the fridge.
—
Step-by-Step Instructions
1. Preheat & prep pans. Set oven to 350°F (175°C). Grease two 9-inch round pans and line bottoms with parchment paper.
2. Mix dry ingredients. In a bowl, whisk flour, cocoa powder, baking soda, and salt. Set aside.
3. Cream butter & sugar. In a large bowl, beat butter and sugar until light and fluffy (about 3 minutes). Add eggs one at a time, then vanilla.
4. Combine wet & dry. Alternate adding dry mixture and buttermilk, starting and ending with dry. Mix until just combined.
5. Add color & acid. Stir in food coloring and vinegar. The color should be deep red; adjust gel amount if needed.
6. Bake. Divide batter evenly between pans. Bake 25–30 minutes or until a toothpick inserted comes clean. Cool in pans 10 minutes, then transfer to a rack.
7. Make cream cheese frosting. Beat cream cheese and butter until smooth. Gradually add powdered sugar, then vanilla and salt. Beat until fluffy.
8. Assemble. Place one cake layer on a plate, spread about 1 cup of frosting. Top with second layer, then frost the top and sides. For a naked cake, use less frosting.
Pro tips: Use room-temperature ingredients for a uniform crumb. Don’t overmix once flour is added—gluten development leads to a dense cake. For an extra tangy finish, let the cream cheese frosting sit at room temperature for 15 minutes before spreading.
Remember, the perfect Red Velvet Cake is defined by its tender crumb and the silky cream cheese frosting that complements it—getting both right transforms a simple dessert into a celebration.
—
Nutritional Benefits & Advantages
While this is an indulgent treat, Red Velvet Cake offers some surprising nutritional perks when enjoyed in moderation. Cocoa powder provides antioxidants called flavonoids, which support heart health. Buttermilk adds calcium and probiotics that aid digestion. If you use reduced-fat cream cheese, you lower saturated fat without sacrificing creaminess. For a lighter version, swap half the butter with unsweetened applesauce—this reduces calories while keeping moisture. The cake also adapts well to portion control: cut smaller slices to enjoy the flavor without overindulging.
—
Tips, Variations & Cooking Advice
– Flavor twist: Add ½ tsp espresso powder to deepen the cocoa notes.
– Gluten-free option: Use a 1:1 gluten-free flour blend; increase baking time by 5 minutes.
– Dairy-free: Replace butter with vegan butter, buttermilk with almond milk + vinegar, and cream cheese with a vegan block alternative.
– Cupcake version: Divide batter into 24 cupcake liners; bake 18–20 minutes.
– Extra moisture: Brush cooled cake layers with simple syrup (equal parts sugar and water) before frosting.
– Natural red alternative: Use beetroot powder (2 tbsp) instead of food coloring—result is a more muted red but entirely natural.
—
Common Mistakes to Avoid
1. Overbaking – leads to dry cake. Check at 25 minutes; if edges pull away, it’s done.
2. Skipping buttermilk – its acidity is crucial for the velvet texture. Use the milk+vinegar substitute if needed.
3. Using cold cream cheese – lumps in frosting. Always soften to room temperature.
4. Frosting a warm cake – melting disaster. Wait until cakes are completely cool.
5. Overmixing after adding flour – tough crumb. Fold gently.
—
Storage & Meal Prep Tips
Store leftover cake in an airtight container in the refrigerator for up to 5 days. Let slices come to room temperature for 15 minutes before serving to soften the frosting. To freeze: wrap unfrosted cake layers tightly in plastic wrap and foil; freeze up to 3 months. Thaw in the fridge overnight, then frost. Frosted cake can also be frozen for up to 1 month—place in the freezer uncovered for 1 hour until the frosting hardens, then wrap. Reheat individual slices in the microwave for 10 seconds to restore softness.
—
Conclusion
Baking this classic Red Velvet Cake at home is a labor of love that pays off in every bite. From the moist, cocoa-laced layers to the tangy cream cheese frosting that tops it all, this recipe delivers a dessert worthy of any occasion. The beauty of making it yourself is that you can customize the sweetness, color, and even dietary needs without losing the soul of the cake. I encourage you to try this method, share your results with family, or experiment with one of the variations above. Whether it’s a birthday, holiday, or just a Tuesday, a homemade Red Velvet Cake with cream cheese frosting is always a good idea.
—
FAQs
1. Can I use natural cocoa powder instead of Dutch-processed?
Yes, but the color may be less vibrant. Dutch-processed gives a richer red hue.
2. How do I make a vegan Red Velvet Cake?
Replace eggs with flax eggs (1 tbsp ground flax + 3 tbsp water per egg), use plant-based milk + vinegar, and vegan butter. For the frosting, use a store-bought vegan cream cheese.
3. My cake turned out too dense—what went wrong?
Possible overmixing, too much flour (measure by spooning into cup), or expired baking soda. Check your technique and ingredient freshness.
4. Can I skip the food coloring?
Absolutely. The cake will be a darker brown with a hint of red from the cocoa; it’s still delicious but not the iconic red color.
5. Why did my cream cheese frosting turn out runny?
Likely because the cream cheese or butter was too warm. Use cold cream cheese (but not fridge-cold) and beat just until combined. If already runny, chill the frosting for 20 minutes then re-whip.
Quick way to grow your Red Velvet Cake
Ingredients
Equipment
Method
- Preheat your oven to 350°F (175°C) and prepare two 9-inch round cake pans by greasing and flouring them.
- In a large bowl, whisk together the dry ingredients: flour, sugar, cocoa powder, baking soda, and salt.
- In a separate medium bowl, combine the wet ingredients: buttermilk, vegetable oil, eggs, red food coloring, vanilla extract, and white vinegar.
- Pour the wet mixture into the dry ingredients and mix with an electric mixer on low speed until just combined, being careful not to overmix.
- Divide the batter evenly between the two prepared cake pans and bake for 25-30 minutes, or until a toothpick inserted into the center comes out clean.
- Allow the cakes to cool in the pans for 10 minutes before inverting them onto a wire rack to cool completely.