The Ultimate Guide to Perfectly Cooked Turkey Breast: Juicy, Flavorful, and Foolproof
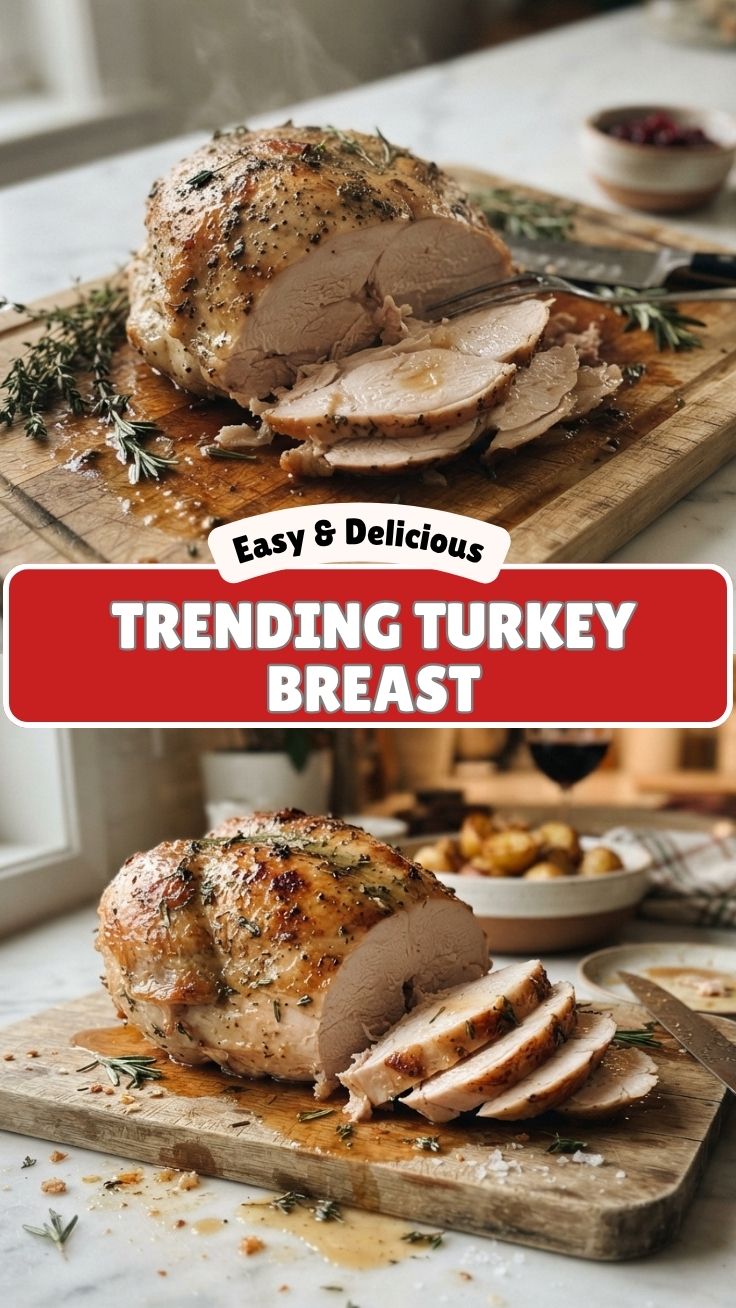
Have you ever wondered why your roast turkey breast turns out dry and bland despite your best efforts? The secret lies not just in the recipe, but in understanding the science of moisture retention and seasoning. Preparing a show-stopping Turkey Breast at home is not only more economical than buying a whole bird, but it also gives you complete control over flavor, texture, and dietary preferences. Whether you’re planning a holiday dinner, a Sunday roast, or a quick weeknight meal, this guide will help you achieve a tender, golden-brown masterpiece every time. And the best part? The leftovers make an incredible Turkey Sandwich that rivals any deli counter.
Ingredients & Kitchen Tools
Essential Ingredients
– Boneless, skin-on turkey breast (2–3 lbs) – Skin-on retains moisture; bone-in adds flavor but requires longer cooking.
– Olive oil or melted butter (3 tbsp) – For basting and crisping the skin.
– Fresh rosemary and thyme (2 tbsp each, chopped) – Aromatic herbs that complement poultry.
– Garlic (4 cloves, minced) – Adds depth; use garlic powder as a substitute.
– Salt (1 tsp) and black pepper (½ tsp) – Season generously; kosher salt is preferred for even distribution.
– Lemon juice (2 tbsp) – Brightens flavors and helps tenderize.
– Chicken or turkey broth (½ cup) – Keeps the meat moist during roasting.
Kitchen Tools
– Roasting pan with a rack – Elevates the meat for even heat circulation.
– Meat thermometer – Essential for perfect doneness (165°F internal temp).
– Basting brush – For applying butter or oil.
– Chef’s knife and cutting board – For trimming and carving.
– Aluminum foil – To tent the breast if browning too quickly.
Optional Substitutions
– Replace butter with ghee (dairy-free) or avocado oil (for high heat).
– Use dried herbs (1 tsp each) instead of fresh if needed.
– Add a splash of white wine or apple cider vinegar to the broth for extra acidity.
Prep Time & Cooking Schedule
– Prep time: 15 minutes (including seasoning and tying the breast if needed)
– Cooking time: 45–60 minutes at 375°F (depending on thickness)
– Resting time: 10–15 minutes (critical for juice redistribution)
– Total time: About 1 hour 15 minutes
Planning tip: For the best texture, let the turkey breast sit at room temperature for 20 minutes before roasting. This ensures even cooking. If you brine the breast overnight (in a simple salt-and-sugar solution), the meat will be even more succulent. Adjust your cooking schedule accordingly – brined turkey roasts faster, so reduce time by 5–10 minutes.
Step-by-Step Instructions
1. Preheat oven to 375°F (190°C). Position the rack in the center.
2. Pat the turkey breast dry with paper towels – this is crucial for crispy skin.
3. Season generously: Rub the olive oil (or butter) all over the breast, then sprinkle with salt, pepper, garlic, rosemary, and thyme. Massage the seasoning under the skin for maximum flavor.
4. Place the breast on the roasting rack, skin side up. Pour the broth into the bottom of the pan (not over the skin).
5. Roast uncovered for 40–50 minutes, basting every 15 minutes with pan juices. If the skin browns too quickly, tent loosely with foil.
6. Check internal temperature – insert the thermometer into the thickest part of the breast, avoiding the bone. Remove at 160°F (the temperature will rise to 165°F during resting).
7. Rest the turkey – transfer to a cutting board, tent with foil, and let rest for 10–15 minutes. This is a prime moment to prepare your Turkey Breast for slicing, or start assembling a Turkey Sandwich if using leftovers.
8. Carve against the grain into even slices for the juiciest texture.
Pro tip: If you prefer a smoky flavor, sear the breast in a cast-iron skillet for 2 minutes per side before roasting.
Nutritional Benefits & Advantages
Turkey breast is a lean protein powerhouse. A 3-ounce serving (about the size of a deck of cards) contains roughly 26 grams of protein, less than 2 grams of fat, and only 125 calories. It’s rich in B vitamins (especially B6 and B12), selenium, and zinc, which support immune function and metabolism. Compared to dark meat, the breast has significantly less saturated fat, making it ideal for heart-healthy diets. Plus, the herbs and garlic add antioxidants without extra calories. When you use this recipe to make a Turkey Breast, you’re prioritizing whole-food ingredients over processed alternatives. The leftover meat also forms the base of a nutritious Turkey Sandwich, which can be packed with vegetables and whole-grain bread for a balanced meal.
Tips, Variations & Cooking Advice
– Flavor variations: Swap rosemary for sage or tarragon. Add a tablespoon of Dijon mustard to the butter. For a sweet-savory twist, brush with honey or maple syrup during the last 10 minutes of roasting.
– Cooking method: Try spatchcocking (butterflying) the breast for faster, even cooking. Or use an air fryer at 375°F for 30–35 minutes (check internal temp).
– Dietary adaptations: Gluten-free? Skip the broth (use water) and ensure no cross-contamination. Dairy-free? Use olive oil or plant-based butter. Keto? The recipe is naturally low-carb – just add a sugar-free glaze.
– Portion changes: For a 1-pound breast, reduce cooking time to 30–35 minutes. For a 4-pound breast, increase to 65–75 minutes.
Common Mistakes to Avoid
– Skipping the dry step: Patting the skin dry is non-negotiable – moisture on the surface prevents browning.
– Overcooking without a thermometer: Guessing leads to dry meat. Always use an instant-read thermometer.
– Not resting the meat: Cutting immediately lets juices escape, leaving the meat tough.
– Overcrowding the pan: If the breast touches the pan sides, air circulation is blocked, causing uneven cooking.
– Using too much salt if brining: If you brine, reduce recipe salt by half to avoid a salty result.
Storage & Meal Prep Tips
– Refrigeration: Store leftover turkey sliced or whole in an airtight container for up to 4 days. Keep the meat moist with a splash of broth before sealing.
– Freezing: Wrap tightly in plastic wrap, then foil, or use a vacuum-sealed bag. Frozen turkey breast remains good for 3 months. Thaw overnight in the refrigerator.
– Reheating: To maintain moisture, reheat in a 300°F oven covered with foil for 10–15 minutes, or in a skillet with a tablespoon of broth. Avoid microwaving unless you use a low power setting and cover the dish.
– Meal prep: Cook a large breast on Sunday and use it for salads, wraps, or the famous Turkey Breast sandwiches throughout the week. The best Turkey Sandwich starts with perfectly cooked, moist leftover meat.
Conclusion
Mastering a juicy, flavorful turkey breast at home is simpler than you think. By focusing on proper seasoning, temperature control, and resting, you’ll achieve restaurant-quality results every time. The versatility of this dish means you can enjoy it as a centerpiece today and repurpose the leftovers into a satisfying Turkey Sandwich tomorrow. I encourage you to try this recipe, share your results with friends, and explore other ways to incorporate this lean protein into your weekly menu. Whether you’re a beginner or a seasoned cook, this Turkey Breast recipe will become a reliable staple in your kitchen.
FAQs
Q: Can I use a frozen turkey breast without thawing?
A: It’s not recommended. Thaw in the refrigerator for 24 hours per 5 pounds. Cooking from frozen drastically increases cooking time and can lead to uneven doneness.
Q: How do I prevent the skin from sticking to the pan?
A: Use a roasting rack or line the pan with parchment paper. Grease the pan well if you don’t have a rack.
Q: What if my turkey breast is too dry after cooking?
A: Shred the meat and mix with a little gravy or broth, then use it in soups, casseroles, or a Turkey Sandwich with extra sauce.
Q: Can I marinate the turkey breast overnight?
A: Yes! A simple marinade of olive oil, lemon juice, garlic, and herbs works well. Avoid acidic marinades for more than 8 hours, as they can break down the meat fibers.
Q: How do I know when the turkey is done without a thermometer?
A: The juices should run clear when pierced, and the thickest part should feel firm to the touch. However, a thermometer is far more reliable.