Why You Should Master This Crunchy Chicken Sandwich at Home
Have you ever craved that perfect bite—crispy, juicy, and packed with flavor—only to be let down by a soggy, overpriced takeout version? The secret to achieving restaurant-quality crunch lies in your own kitchen. Preparing a Chicken Sandwich from scratch gives you total control over ingredients, seasoning, and cooking technique. Whether you’re after a classic tender or a fire-kissed Nashville Hot Chicken Sandwich, making it at home means fresher results, fewer additives, and the ability to customize every layer. Let’s dive into a method that guarantees golden, shatteringly crisp chicken every time.
—
Ingredients & Kitchen Tools
For the Chicken & Marinade:
– 2 boneless, skinless chicken breasts (pounded to even thickness)
– 1 cup buttermilk (helps tenderize and locks in moisture)
– 1 tablespoon hot sauce (optional, adds subtle heat)
– 1 teaspoon salt and ½ teaspoon black pepper
For the Breading:
– 1½ cups all-purpose flour
– 2 tablespoons cornstarch (lightens the crust)
– 1 teaspoon paprika, garlic powder, and onion powder
– ½ teaspoon cayenne (adjust for heat level)
– 1 egg + 2 tablespoons water (for binding)
For the Nashville Hot Glaze:
– ¼ cup neutral oil (canola or avocado)
– 2 tablespoons cayenne pepper
– 1 tablespoon brown sugar
– 1 teaspoon smoked paprika
Kitchen Tools:
– Cast-iron skillet or heavy-bottomed pan (retains heat best)
– Meat mallet or rolling pin (for even thickness)
– Wire rack fitted over a baking sheet (keeps breading crispy)
– Tongs, whisk, and shallow bowls for dredging
Optional Substitutions:
– Buttermilk substitute: 1 cup milk + 1 tablespoon vinegar (let sit 5 minutes)
– Gluten-free: Use almond flour + 1 tablespoon arrowroot for breading
– Dairy-free: Swap buttermilk for unsweetened almond milk + lemon juice
—
Prep Time & Cooking Schedule
– Marinating time: 30 minutes (minimum) to 4 hours (ideal)
– Prep time: 15 minutes (pounding, mixing, setting up station)
– Cooking time: 6–8 minutes total (3–4 minutes per side)
– Resting time: 5 minutes on the wire rack (crucial for crispiness)
Plan ahead: Pound and marinate the chicken in the morning or the night before. The buttermilk soak not only tenderizes but also helps the breading cling. Once marinated, the actual cooking process moves fast—have your buns prepped and toppings ready before you drop the chicken in oil.
—
Step-by-Step Instructions
1. Prepare the chicken – Butterfly or pound breasts to ½-inch even thickness. Season both sides with salt and pepper, then submerge in buttermilk and hot sauce. Cover and refrigerate for at least 30 minutes (up to 4 hours).
2. Build the breading station – In one bowl, whisk flour, cornstarch, paprika, garlic powder, onion powder, and cayenne. In another, beat the egg with water. Remove chicken from buttermilk, letting excess drip off. Dredge in flour mixture, dip in egg, then dredge in flour again, pressing firmly.
3. Fry for perfection – Heat ½ inch of oil in a cast-iron skillet to 350°F (175°C). Gently place the breaded chicken in the hot oil, cooking 3–4 minutes per side until golden brown and internal temperature reaches 165°F. Transfer to a wire rack; resist the urge to place directly on paper towels (they trap steam and soften the crust).
4. Create the Nashville Hot glaze – While the chicken rests, whisk together hot oil, cayenne, brown sugar, and smoked paprika until smooth. Brush or drizzle the glaze generously over each piece of chicken.
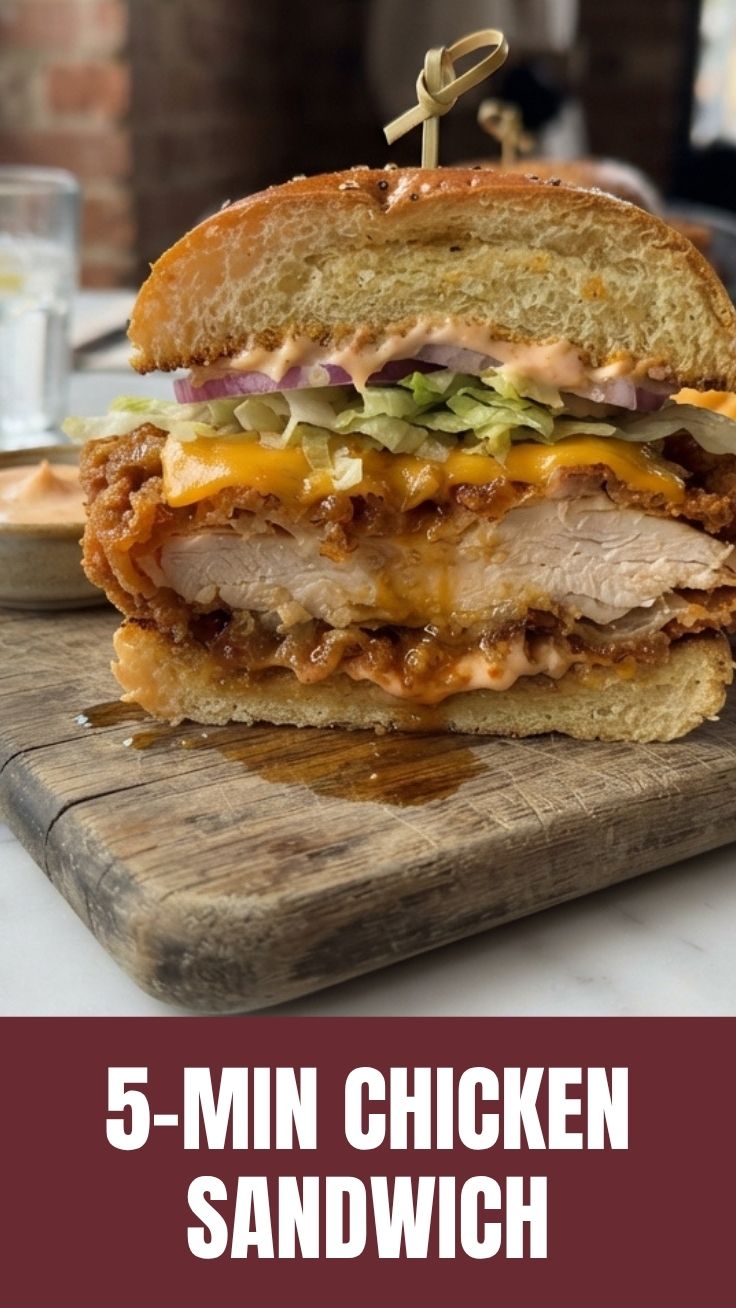
5. Assemble your perfect Chicken Sandwich – Toast brioche or potato buns on the skillet. Spread mayo or comeback sauce on both halves. Add pickles, shredded lettuce, and the glazed chicken. For an authentic Nashville Hot Chicken Sandwich, pile on extra pickles to cut the heat.
—
Nutritional Benefits & Advantages
This homemade version skips the preservatives and excess sodium found in fast-food counterparts. Chicken breast is a lean protein source rich in B vitamins (especially niacin and B6) and selenium, which supports immune function. The buttermilk marinade adds calcium and probiotics without drastically increasing calories. By controlling the oil temperature (rather than deep-frying), you reduce absorption—keeping the crust crunchy without greasiness. Serve on a whole-grain bun for added fiber, and pile on crunchy slaw for vitamin C and gut-friendly crunch.
—
Tips Variations & Cooking Advice
Flavor Twists:
– Buffalo Style: Add 2 tablespoons buffalo sauce to the buttermilk marinade.
– Italian-inspired: Mix 1 tablespoon dried oregano and Parmesan into the breading.
– Smoky version: Replace cayenne with chipotle powder in the glaze.
Dietary Adaptations:
– Gluten-free: Use a blend of rice flour, tapioca starch, and fine cornmeal.
– Dairy-free: The buttermilk substitution works beautifully; use vegan butter in the glaze.
– Air fryer method: Bread the chicken as directed, spray with oil, and cook at 400°F for 10–12 minutes, flipping halfway (texture will be lighter but still crisp).
Pro Tip: For an extra-crunchy crust, double-dredge and let the breaded chicken rest on a wire rack for 10 minutes before frying. This allows the coating to set and adhere better during cooking.
—
Common Mistakes to Avoid
– Skipping the pound: Uneven thickness means burnt edges and raw centers. Always pound to uniform ½ inch.
– Oil too cold or too hot: If the oil is below 325°F, the breading absorbs grease. Above 375°F, it burns before the chicken cooks. Use a thermometer.
– Overcrowding the pan: Each piece needs space—fry in batches to keep oil temperature stable and prevent the crust from steaming.
– Not resting after frying: Placing hot chicken directly on a plate creates condensation that ruins the crunch. Always rest on a wire rack.
—
Storage & Meal Prep Tips
– Refrigeration: Store cooked, unglazed chicken in an airtight container for up to 3 days. Keep the glaze and buns separate to avoid sogginess.
– Freezing: Freeze fried chicken pieces on a baking sheet, then transfer to a freezer bag for up to 2 months. Reheat directly from frozen.
– Reheating: For best texture, reheat in a 375°F oven or air fryer for 6–8 minutes. Avoid the microwave, which turns the crust rubbery.
– Meal prep hack: Bread the chicken up to 24 hours in advance and refrigerate uncovered on a wire rack. Fry fresh when ready to serve.
—
Conclusion
This recipe proves that a spectacular Chicken Sandwich is well within your reach—no special equipment or deep fryer required. The buttermilk brine, double-dredge technique, and careful temperature control deliver a crust that shatters with every bite. Whether you keep it classic or dial up the heat for a Nashville Hot Chicken Sandwich, the results are far superior to any drive-thru version. Try it this weekend, share your creation with friends, and don’t forget to check out our other crispy chicken variations for more inspiration.
—
FAQs
1. Can I use chicken thighs instead of breasts?
Absolutely—thighs are more forgiving and stay juicier. Just adjust cooking time slightly (4–5 minutes per side) and ensure the internal temperature reaches 175°F for optimal texture.
2. What if my breading falls off during frying?
This usually happens when the chicken is still wet from the marinade. Shake off excess buttermilk before dredging, and press the breading firmly into the meat. Letting the coated chicken rest for 10 minutes before frying also helps it adhere.
3. How do I make it less spicy?
Reduce or omit the cayenne in the breading and glaze. Add a tablespoon of honey to the glaze for a sweet heat alternative. For a true mild version, use only paprika and a pinch of black pepper.
4. Can I bake instead of fry?
Yes—place breaded chicken on a greased wire rack over a baking sheet, spray with oil, and bake at 425°F for 15–18 minutes, flipping halfway. The texture will be crunchy but slightly less rich than fried.
5. How do I keep leftovers crispy?
Store unglazed chicken in a single layer with the lid slightly ajar (or use a paper towel to absorb moisture). Reheat in an air fryer at 375°F for 4 minutes—never microwave. For the Nashville Hot version, add fresh glaze after reheating.
Proven way to grow Chicken Sandwich 5
Ingredients
Equipment
Method
- Season chicken breasts on both sides with salt, pepper, and paprika.
- Heat a skillet over medium-high heat with a tablespoon of olive oil.
- Cook chicken for 6-8 minutes per side, or until internal temperature reaches 165°F (74°C).
- Remove chicken from skillet and let it rest for a few minutes before slicing.
- Toast buns lightly in the same skillet or a toaster.
- Place lettuce and tomato on the bottom bun, then add the cooked chicken.
- Top with the other half of the bun and serve immediately.